Good day. FLProg had no news for a very long time. This is justified by the fact that I was busy with a big task of creating an integrated into the program system Scada. And here came the first
beta version of this system .
In the development process, I occasionally told the program about the status of work on the website.
System development historyThe first report on the status of the project from 29 Jun. 2017
The second report on the status of the project from 6 September. 2017
First talk about the ideology of the system.
Currently, I have not found a single Scud system that would suit me in terms of the level of entry, and the convenience of creating projects. Practically all of them are monsters designed for industrial use, and in order to start using them you need to undergo serious training. Yes, and after training (for example, I am a certified developer on WinCC), the start of work on them takes considerable time. In addition, prices start at ten thousand rubles. There are, of course, free versions, but more often they are limited either by a very small number of tags, or by the running time. There is FreeScada. But I never figured out how to work with her. And if I could not do this, then people who are not familiar with programming (which is the majority of program users) will not cope.
In addition, in all the scripts that I considered to create the logic of behavior of the scada itself, certain textual programming languages are used. That is, there is a need to learn their syntax, rules of writing, a set of commands. This also runs counter to the FLProg project’s motto, “Programming for non-programmers.”
In general, I wanted something light, with a low threshold of entry, and the possibility of programming internal logic using visual programming. And of course free. Nothing suitable was found, which means we will reinvent our bicycle.

For the basic concept, I took the idea of not realizing it, but presenting the computer with a kind of microprocessor with a built-in display, keyboard and mouse. Accordingly, the main parts of the program immediately appeared.
Graphic Editor
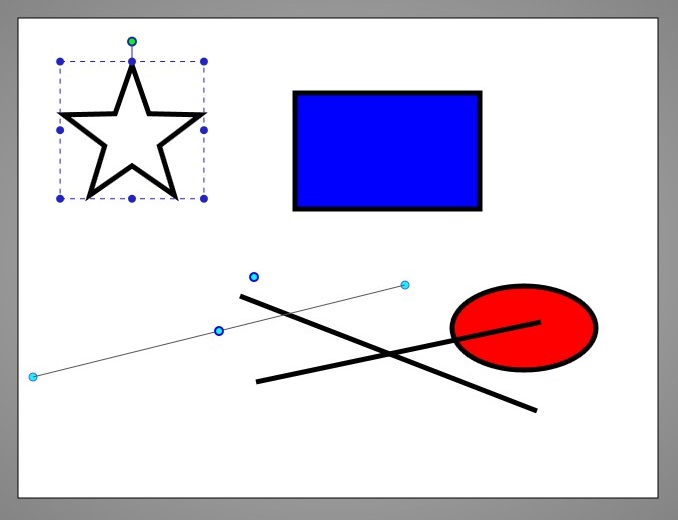
As a sample, I took the very favorite WinCC program from Siemens, which was built into the TiaPortal package. I removed what I don't like about it, added what I think it lacks, took a bit from a Windows point, a bit from CorelDraw, a bit from myself. In all the other scuds that I saw, I was strained most of all by the hard task of screen sizes. When these screens were displayed on monitors with a different resolution, either black frames were obtained, or some of the elements went off the screen, and were simply invisible. This fully applies, for example, the same WinCC. I see it at work every day. In my scud, the screen size is the same, but when playing a project in the player, you can resize the program window, while the elements will automatically adjust to the new size. Something like scaling, but smart, without loss of quality (all the widgets are scuds are vector).
There are not so many widgets in the first beta of the program. This is a rectangle, circle, broken line, text. In addition, there are controls. This is an input - output field, a simple button, a round indicator.
All widgets have animation. With the help of attached variables, they can dynamically change their position, visibility, contour color (who has a contour), fill color (who can fill it). The text widget can change its text, and the rectangle and the input box widgets can have a dynamic fill mode (the fill level changes depending on the value of the bound variable).
It is also possible to attach events to any widget. This is hovering the cursor on the widget, leaving the cursor on the widget, pressing the mouse button, releasing the mouse button, clicking, double-clicking. Possible reactions to events are changing the value of a variable, inverting the value of a Boolean variable, switching to another screen, opening a service dialog.
This is certainly not a lot, but for the first version is enough for now. Further, the number of widgets and their capabilities will grow.
Schematic editor
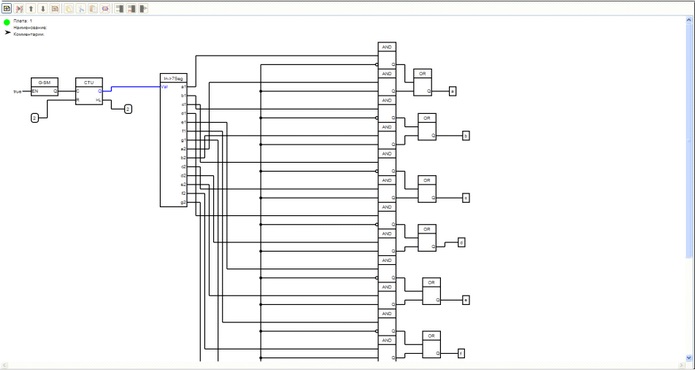
Here, of course, I took the FBD editor as the basis, which is used when programming the controller in the FLProg program. The editor interface is almost unchanged, which will allow users of the program to work easily in the Scada schema editor. But the filling has changed dramatically. During the work on the program FLProg (already gone fifth year) I had a lot of ideas to optimize the work of the editor and compiler of the program. I applied all these ideas in the schema editor, and after running in it, I will transfer them to the main program as well. As for the support of the LAD language in Scuda, I have not yet made a decision; if there are enough interested users in this, then I will.
CommunicationsAnd of course communication, what a scud without them.
- Internal Protocol FLProg. This is the exchange of variables of any type through the ComPort (for the computer) with the UART port of the microcontroller. It works quickly, but it is possible only for firmware controllers created in the FLProg program.
- Modbus RTU, Modbus TCP, Modbus RTU over TCP. You can create an unlimited number of connections using these protocols. Functions 1, 2, 3, 5, 6, 15, 16 are supported. The protocol driver is self-written; external libraries are not used. I tried as much as possible to conform to the Modbas standard. Testing will show how I did it. Works in the environment of Windows and Linux. However, for Linux there are some limitations beyond my control. The fact is that Modbus TCP Slave raises a TCP server on a specific port. For Modbus, the standard port is -502. But in Linux ports less than 1024-th ordinary user does not have the right to open. Therefore, you must either create a slave on the port with a higher number, or run the player from the root (which is not good). With the master, since he is a client, there are no such problems.
For all communications, it is possible in the execution process to turn on, turn off the connection, make a full connection setup, turn off the polling of slaves, monitor the connection status, as well as the status of the slave connection to the master. Of course, for each master and slave there are utility variables that store the last error code when polling.
At any time during project development, you can open this project for execution, and see how it will work. To play the player creates a Runtime file.
Small demonstrationReception - transfer of variables through UART
Modbus RTU
Modbus RTU
PlayerPlayer runtime file is a separate application. The player package has three executable files for Windows and two for Linux.
Start.exe file (Windows version only). At startup, it looks for a runtime file (extension of the .fsp) in its side. If it finds it, it launches it for execution. If it does not find it, it searches for records in the project manager. In these records, the default project is searched, which is launched for execution. If no project manager records are found, or the default project is not marked in them, the dispatcher itself is launched directly. With the help of the dispatcher, you can find the runtime files on your computer, make a list of them, and assign one of them as the default one. The Start.exe file cannot be renamed, just as it can not be tied to it for execution runtime files (extension .fsp). This file cannot be removed from the package.
File
pleer.exe. The behavior is similar to the Start.exe file, but there are no restrictions on renaming, and binding runtime files. If these functions are not needed, then this file can be removed from the package (this applies only to Windows, in Linux it is the main launch file).
File
Manager.exe. Used to launch the Project Manager unambiguously. If this function is not needed, then this file can be removed from the package.
The remaining files in the package are directly a player.
Training!

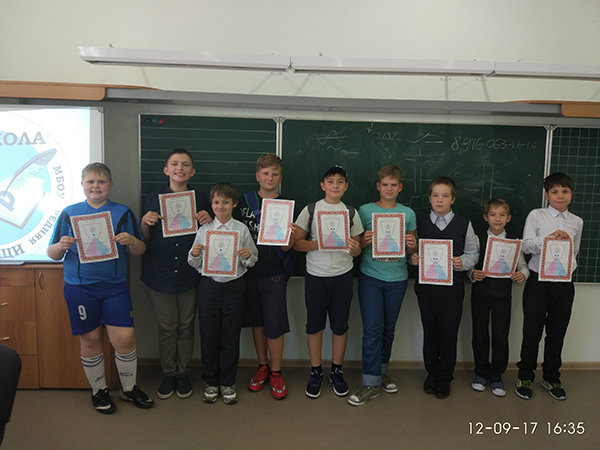
The main goal of the FLprog project is to attract young people to the profession of an industrial programmer, an electronics engineer, and simply in a technical profession. There are already too many programmers and sales managers in our country. Wherever you spit, or a programmer of toys for android, or a web programmer of sales pages, or an "advanced" manager. And you will not find a good setup man or developer of an automated control system during the day with fire. In this regard, I am pleased with the appearance of two circles of robotics, which have chosen FLProg as the main working program. One in the city of
Shatura , the other in
Mytishchi (Photo from this circle). With this in mind, the scud was also developed. I tried so that any teacher could easily create an interactive application, for example, to demonstrate the work of the basic logic, without difficulty, learning programming languages, principles of building programs. Also with the help of this scud, it is possible to carry out any laboratory work on the construction of logic circuits, learning how to create industrial automation systems.
I have no teaching gift, but I think that a real teacher will be able to come up with the right material. Well, I tried to provide a tool.

I must immediately warn you that the existing, currently version of the program is STRONGLY test. Since the FLProg project staff consists of one person (me), I use the program users shamelessly as a QA department. And they are happy to do this work. To date, caught a lot of mistakes. Therefore, in the near future a test version will be updated on the server. The estimated testing time is a month, after which a stable release will be released.
If the given subject will interest readers of Geektimes, then I will continue release of articles with more detailed description of functions of the program.