Hi geektimes.
Recently, I needed a low-power radio transmitter for home experiments. There was nothing suitable at hand, and here I remembered the method described a few years ago on amateur radio sites - to use Raspberry Pi as a transmitter directly. The method is not new and has been known for several years, but it seems like geektimes it has not been described once (or I was looking badly), and the survey of my friends showed that nobody knows about this method of transmission.
Correct this moment.

Testing how it works, under a cat.
Principle
Modern computers operate at very high clock speeds, and any generator is in fact a low-power transmitter. By programmatically changing the PLLD clock multiplier frequency to the Raspberry Pi, you can send a radio signal directly from the microprocessor's feet. The method was first tested
in 2013 , after which the concept was developed, and now you can find several projects on Github: you can transmit different types of signals, AM, FM, CW, SSB, WSPR, DCF77, and even images in the “slow scan” mode (SSTV). You can even transfer Stereo FM with RDS, some programs also support USB Audio, which allows you to use the Raspberry Pi and the radio microphone as a
bug .
Of course, the output power is small, and is about 10mW. But nevertheless, it works. And note to paranoiacs: yes, a modern computer hypothetically can transmit a radio signal directly from the board. True, the range is low, and the next room such a signal will not leave. But nevertheless, as a hypothetical method of information leakage, this method takes place.
How it works, let's start testing.
Testing
As a test subject, the Raspberry Pi3 was taken and the
rpitx program was
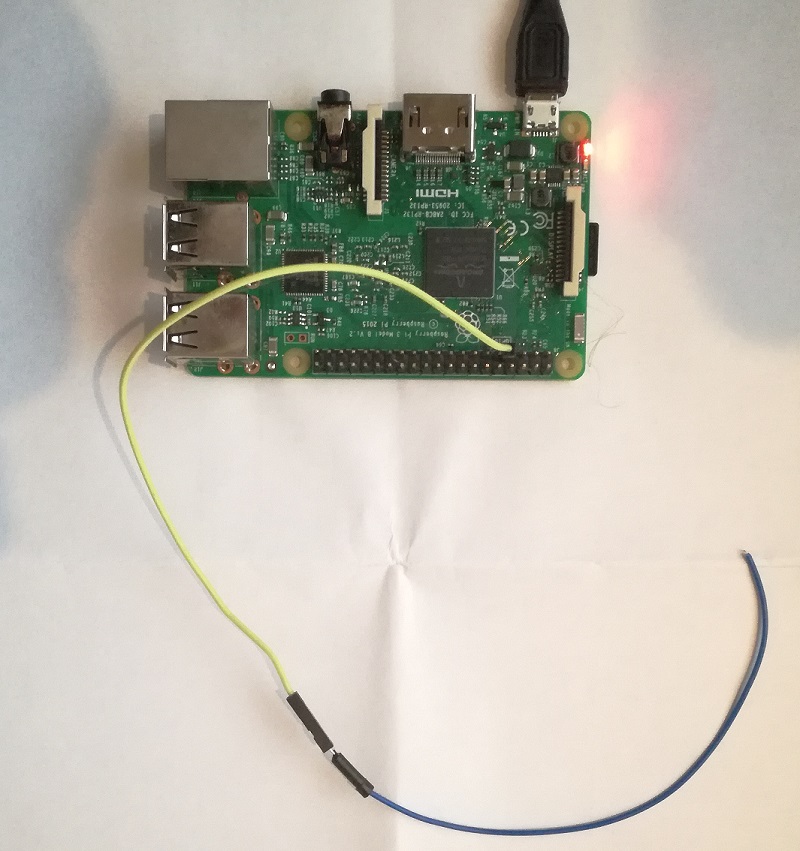
installed . Instead of an antenna on GPIO18, a piece of wire was worn from the breadboard.
A photoAs you can see, nothing superfluous :)

The SDR receiver SDRPlay v2 was used as a spectrum analyzer. He also checked whether the tested frequency was free, whether there were any signals or negotiations.
1. VFO mode
In this mode, a simple signal is transmitted at the specified frequency:
sudo ./rpitx -m VFO -f 235000000
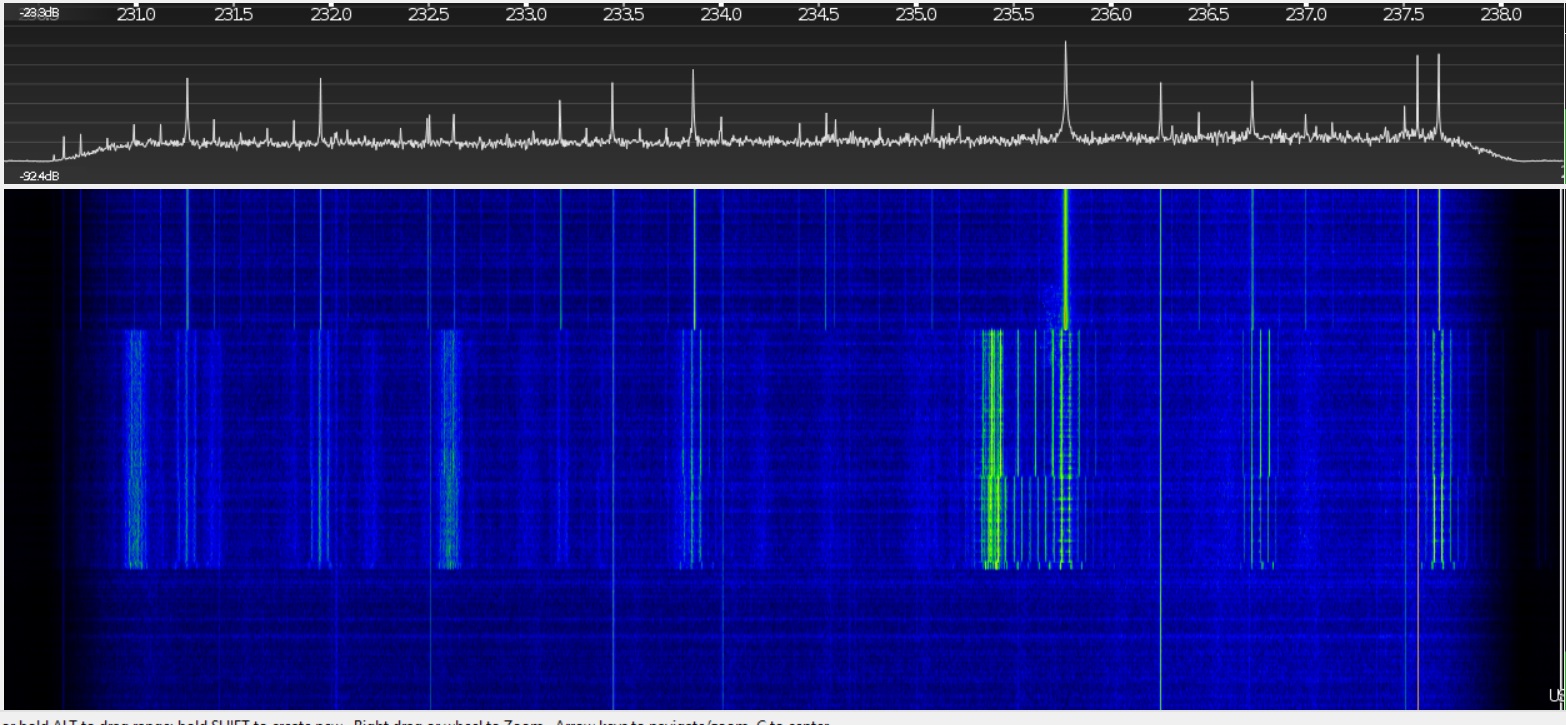
Switching on the “transmitter” takes a few seconds, after which a peak is seen on the SDR screen at
about the specified frequency.

As you can see, in addition to the central peak, there is alas, a lot of side. The bottom line is that, like any microprocessor, the Raspberry Pi in real gives a
square wave signal . Which has a bunch of harmonics, and instead of a single frequency, a whole bunch of garbage is actually being broadcast on all multiple frequencies. On the SDR, it can be seen that the interference from the transmission "flies" across the entire spectrum, down to the gigahertz.
With a power of 10mW, this is not a problem, but
an important note follows: a desire to connect a power amplifier to the Raspberry Pi would be a bad idea. Or it is necessary to use a low-pass filter, which will cut off the higher frequencies, but in this case the whole essence of the simplicity of the idea is lost.
2. Narrow FM mode
The same program can transmit a wav file in Narrow FM mode, which can be used, for example, for listening to portable radio stations.
First we create a file with data - we convert the file into IQ data:
./pifm sampleaudio.wav out.fm
Start the transfer:
sudo ./rpitx -m RF -i out.fm -f 235000000
But as I did not try, the sound did not work out, only “sticks” on the spectrum. Either the program does not support Raspberry Pi 3, or there is some other error in it.
3. WFM mode
To transmit a full-fledged FM radio, there is a PiFmRds program, which can be downloaded
from guthub . Unlike the previous version, the program uses a different pin, GPIO4, so that the “antenna” had to be rearranged.
Run the program from the command line:
sudo ./pi_fm_rds -audio sound.wav -freq 87.0
It works ... but the sound is very high and squeaking, the frequency is higher than 2 times, like the characters in the Disney cartoon. Using the method of scientific typing, I select the ppm parameter (correction), the command line is as follows:
sudo ./pi_fm_rds -audio sound.wav -freq 87.0 -ppm -320000
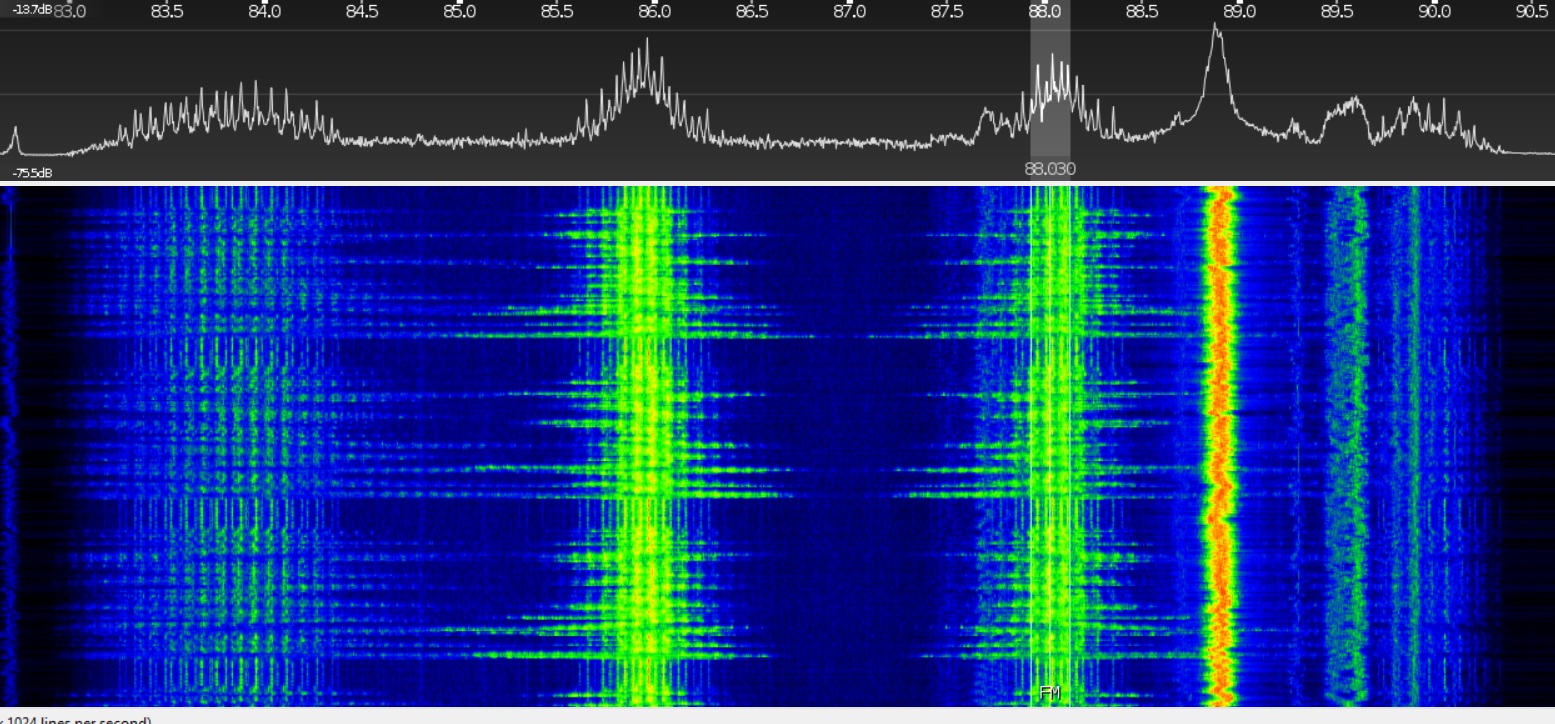
The frequency of transmission, as it turned out, also moved down almost to megahertz, and the spectrum is twice as wide as at a normal normal station:

The sound quality is about the same as from the handset, but in principle it is quite legible. The range, surprisingly, turned out to be quite good; within the limits of the entire apartment, the signal was quite confidently caught by an ordinary FM receiver. And this being so, on a completely inconsistent antenna, the efficiency of which is extremely small. By the way, using a special narrowband WSPR transmission method and tuned antennas, with 10mW of power, amateurs managed to transmit a signal
over a distance of up to 2000km .
findings
The transfer method is rather interesting, as proof of concept. It was not possible to achieve good sound quality, and there is something incomprehensible with the frequencies, the discrepancy is very strong. But the fact that only by software, without any external “hardware” in general, it is possible to transmit signals in any type of modulation, with a frequency of up to 500 MHz, is quite interesting. Well, practically, if you need a simple and low-power generator, this method may well be useful.
For those who want to repeat the experiment, a couple of tips:
- Do not use short-circuited antennas - a short circuit pin will ruin the Raspberry Pi. Enough simple piece of wire, at best, a dipole antenna, the length of the "whiskers" can be counted in any online calculator.
- Do not use the power amplifier - the signal contains too much noise, and will interfere with other services.
If you wish, you can also find a lot of video tutorials in the youtube with a demonstration, for example
, this one .
All successful experiments.