Retro games with simple mechanics and pixel graphics can evoke warm memories from experienced players, and at the same time are quite accessible to a younger audience. Today, many games are called “retro,” but effort and planning are required to create a nostalgic style. That is why we invited the guys from Mega Cat Studios to help us discuss this topic. In this post, we’ll cover everything you need to create authentic NES-style game graphics, including important Unity options, graphic structures, and color palettes.
Create authentic NES-style art
To get started, we’ll cover the basics of creating graphics for games that meet the limitations of the classic Nintendo Entertainment System. This generation of consoles imposes serious restrictions on artists seeking to reproduce its authentic graphics. These are restrictions on the palettes used and on the size and number of objects on the screen. In addition, it is important to consider that the resolution of this console is 256 × 240 pixels.
Palettes
When creating NES-compatible graphics, the artist must consider many limitations. First, the most important of these limitations is how color palettes are used in the image. NES is unique in that all possible colors of the palette are “wired” to the console. NES chooses which colors to use in the image by sending sets of values to the NES GPU, after which the GPU returns the colors corresponding to these values. The following is an image of the NES color palette:
These colors cannot be changed because they are part of the console itself. All NES games use combinations of these colors that make up the images.
Sub palettes
To create the combinations used in games, sub-palettes are created that are attached to in-game sprites or background images. NES splits the palette into sub-palettes that can be assigned to sprites and backgrounds. Each sub-palette contains one common color, which is used in all sub-palettes, and three unique colors. It can load four sub-palettes for backgrounds and four sub-palettes for sprites. In the case of sprites, the overall color at the beginning of each sub-palette is considered transparent.
Here is an example of a set of sub-palettes used in the game. The upper part shows the background sub-palettes, the bottom shows the sprite sub-palettes. In this example, black is the common color used in all sub-palettes. Since the overall color is considered transparent in sprites, a second black color is needed in the sub-palettes for sprites, which is used as the visible color.
Assigning Sub-Palettes
Limitations on the use of palettes become even more stringent when an artist moves on to how palettes are used in a game. To explain this, you need to talk more about how retro consoles store and display graphics. The graphics of any retro console are stored inside the game as 8 × 8 pixel tiles. Thanks to this, artists can save space by reusing tiles for different objects. (For example, parts of the road can be reused by creating a cliff or building from them). It is also important that the color information is not stored with the graphics. All tiles are saved in a monochrome palette. Due to this, when a tile is displayed in the game, you can assign a sub-palette to it and simultaneously display it on the screen with different sub-palettes. This is important when recreating retro console graphics on modern platforms, because it affects how we assign palettes to graphics.
NES assigns palettes to sprites and backgrounds differently. She assigns sprites palettes taylovo. This means that with each 8 × 8 tile in the sprite, one of four sprite sub-palettes can be associated.
This ninja character uses two sub-palettes to increase color depth. On the right you can see that it is divided into separate 8 × 8 tiles. In such a divided form, it is noticeable that the light turquoise and dark red used in the sword and headband are unique to these tiles, and the dark purple and black contours are used in the remaining three tiles.
Backgrounds are subject to much more stringent restrictions. Background palettes are assigned to 16 × 16 fragments. The background sub-palette bindings of the entire screen are called Attribute Tables (attribute tables). It is because of these tables that most retro images are actively using repeating tile segments. Such segments usually consist of 16 × 16 tiles, which is why they are placed in attribute tables. Despite the fact that this was caused by hardware limitations, such 16 × 16 background tiles became the defining characteristic of retro graphics and are now absolutely necessary for its reconstruction in modern games.
Here is an example of the background of a beautiful city in the style of RPG, made taking into account these restrictions. The image on the right shows that it is well divided into blocks of 16 × 16 pixels, and palettes are set for each block. To save space, elements such as roof tiles, grass, and bricks on the bridge are made up of repeating segments of these blocks. The roof tiles of small buildings use the same tiles, but they are assigned different sub-palettes, giving it a unique appearance.Sprite overlay
Even though artists can use different sub-palettes for each 8 × 8 sprite tile, they may have a situation where it is necessary to give the sprite a greater color depth. In this case, you can use sprite overlay. Overlaying sprites is the division of a sprite into two separate sprites and placing them on top of each other. This allows artists to circumvent the condition of using one sub-palette per 8 × 8 tile. Thanks to this, artists can in fact double the number of colors that can be used in one 8 × 8 area. The only serious drawback of this approach is the limitations of sprite rendering. NES is capable of displaying only 64 8 × 8 sprite tiles at a time, and only eight sprite tiles in one horizontal line. If this limit is reached, all other tiles will not be rendered on the screen. That is why in many games for NES with a large number of sprites on the screen, they begin to flicker. In this case, the only way to display all the sprites is to show them in alternating frames. Such restrictions must be taken into account when superimposing sprite layers, because this doubles not only the number of colors, but also the number of sprite tiles in one horizontal line.
To get around the limitations of the attribute table, you can implement sprite layers using the background. This trick is usually used for static images, such as plot screens and character portraits, which gives them much greater color depth. To realize this, the artist must draw part of the image as a background, and then apply sprites on top of it to fill in the remaining parts.
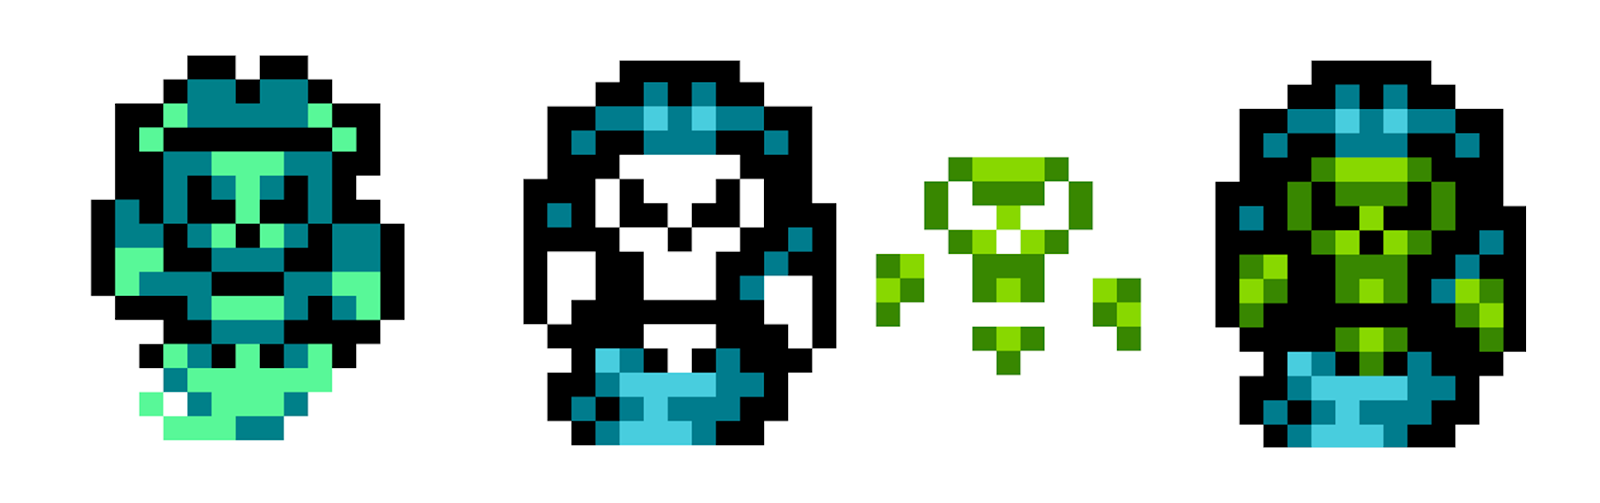
In the portrait of a ghost pirate, layers of sprites are also used, giving it a greater depth. His green skull is rendered on the screen as a sprite, and his collar and hat are part of the background. This allows the artist to use more colors in the 16 × 16 segment to completely circumvent the limitations of the attribute table.Graphic Banks
To explain another important limitation of NES, we first need to return to the fact that graphics are stored in tiles. Graphics tiles are stored on pages of 256 tiles, and tiles from these pages cannot be loaded into VRAM in different places, so it becomes difficult to combine and mix tiles from different pages on the fly. The NES console VRAM is capable of displaying 512 such tiles simultaneously. In addition, she divides the tiles in half, for sprites and backgrounds. This means that at the same time the console can only display 256 sprite tiles and 256 background tiles. If an artist wants to display a wide variety of sprites and background elements, such a restriction greatly hinders him.
Here is a graphical representation of the background and sprite tiles of the game loaded into VRAM. The console stores backgrounds and sprites on separate pages.To get around this limitation, NES uses a feature that allows an artist to split each page into partial pages called banks. Therefore, although NES cannot load individual tiles from different points of graphic data, it is able to load separate parts of a page at different times. In most games, such banks are 1 KB and 2 KB in size. A 1 KB bank corresponds to one fourth page, or 64 tiles, and a 2 KB bank corresponds to half a page, or 128 tiles. The artist must decide whether he wants to reserve each type of bank for elements of sprites or backgrounds, because it is necessary to use both types. This means that it is impossible to have 1 KB banks for sprites and for backgrounds. One page should use 1 KB banks, and the other 2 KB. As a rule, most games use 1 KB banks for sprites, and 2 KB for backgrounds, because background tilesets are usually more static and require less variability and replacements on the fly.
The canned image we saw above. The left side shows backgrounds that use 2 KB banks, that is, divided in half, and the right side shows sprites divided into 1 KB banks. Each bank can be freely replaced on the fly.The usefulness of 1K banks for sprites is pretty important. If a character’s sprite has a large number of animations that do not fit on one page, and at the same time it is necessary to load other sprites, then individual actions can be downloaded to 1 KB banks, and then replaced with them depending on what is happening on the screen. It also increases the variability of sprites that can be used in one area of the game. For example, if a player has to meet six types of enemies at the game level, but only the player and three other types of sprites are placed on the sprite page, then when one type of enemy disappears from the screen, the game can replace one of the enemy banks with a new type of enemy.
One of the few serious drawbacks of using banks at 1 KB for sprites and 2 KB for backgrounds is the way the NES console handles background animation. To animate a background element of a game for NES, an artist must create duplicate banks of animated background elements. Each new duplicate bank will contain the next frame of animation for each of the animated elements. These banks replace each other, creating animation. If an artist uses half-page-sized banks for backgrounds, then storing all these duplicate banks may take a lot of space. One way around this limitation is to place all animated background elements for the entire game in one bank. But then the artist is faced with another limitation: he has only 128 tiles left for the static elements of each background. Each artist himself decides which storage method is best for him.
Layer Tricks
Many games of that era used tricks to create effects such as parallax background scrolling, but they also pose a challenge for artists and designers. Later 16-bit consoles had support for multiple background layers, but NES did not have this feature. All backgrounds were a single flat image. To create a sense of depth and layering, various program tricks were used. For example, to create parallax scrolling, developers could set a register that reported when a certain horizontal line (called a scan line) was drawn on the screen.
Then they could use this register to control the speed and direction of scrolling the screen. Thanks to this, you can create a horizontal line of the background, which scrolls at a speed different from the rest of the background. For artists and designers, the trick was to keep in mind that the background is still one flat image. If a platform or any other element that should be “in front” of a slowly moving background is placed in this area, then it will also scroll more slowly than the rest of the image. This means that designers had to arrange the background elements in the scene so that the effect was not distorted.
In this example, the area highlighted in red to simulate depth can be made to scroll more slowly than the rest of the background. The interface at the top of the screen does not scroll, although it is also part of a flat background image.There is one more trick, thanks to which artists could “move” one of the background elements forward. At NES, developers could make sprite priority less than zero. If this is done, then the sprite will be displayed under all the opaque pixels of the background. The sprite priorities can also be changed and switched on the fly, due to which individual elements can, if necessary, change the priority of the sprite.
Unity workflows for the ultimate retro feel
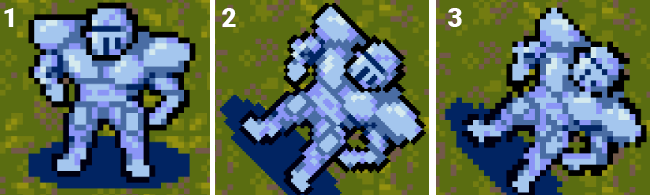
Download an example project and start working with us!Mega Cat Studios from Pittsburgh, PA has turned the creation of retro games into an art form. In fact, some of their games can even be purchased on cartridges and played on retro consoles such as Sega Genesis.
Little Medusa and Coffee CrisisRecent changes in Unity workflows have turned the engine into an environment very well suited for creating retro games.
2D Tilemap has been enhanced and now supports tile cards of rectangular, hexagonal and isometric tiles! In addition, you can use the new Pixel Perfect Camera component to achieve holistic pixel-by-pixel motion and graphic effects. You can even use
the post-processing stack to add all sorts of beautiful screen retro effects. However, before doing all this, you must correctly import and configure the assets.
Preparation of sprite assets
For assets to be clear and pixelated, they must first be configured correctly. Select each of the assets used in the Project window, and then change the following parameters in the inspector:
- Change filter mode to “Point”
- Compression change to "None"
Other filtering modes result in a slight blur of the image, which violates the clear pixel style that we are striving for. When using Compression, image data is compressed, resulting in a slight decrease in accuracy. This is important to consider, because some pixels may change color due to compression, potentially changing the entire color palette.
The smaller the size and number of colors in the sprite, the more compression will affect it. Here is an example of comparing normal compression (default) and lack of compression.
Normal compression / Image without compression - looks exactly the same as the originalAnother aspect to consider is the Max Size parameter of the image in the Inspector. If the sprite image is larger on any axis than the Max Size property (by default it is 2048), then it will be automatically adjusted to the maximum size. This usually results in a loss of quality and the image begins to look blurry. Since some platforms cannot support textures larger than 2048 along any axis, it is best to stay within that range.
Max size is 2048 / And now max size is 4096The image above shows a sprite from a sprite sheet (sprite sheet) having a single axis size of 2208 with a maximum size of 2048. As you can see, increasing the Max Size property to 4096, we were able to ensure the correct image size without loss of quality.
Finally, when preparing a sprite or sprite sheet, you must set the pivot unit mode parameter to Pixels instead of Normalized.
Due to this, the pivot point of the image will be determined on the basis of pixels, and not in a smooth interval from 0 to 1 along each axis of the image. If the anchor point of the sprite is not precisely aligned with the pixel, then we will lose the location of the sprite to the pixel precision. Anchor points for sprites can be set in the Sprite Editor, which opens in the Inspector when the sprite asset is selected.
Installing the Pixel Perfect 2D Package
Having prepared the assets, we can make the camera pixel perfect. The pixel-accurate result will look clear and pronounced. Signs of inaccurate pixel art become blur (distortion) and the rectangularity of some pixels.
The 2D Pixel Perfect package can be imported using the Unity engine's Package Manager. Click on the Window menu in the toolbar and then select Package Manager. In the new window, click on Advanced and select the Show preview packages check box. Select 2D Pixel Perfect from the list on the left, and then click Install in the upper right corner of the window.
That's all. You are now ready to get started with the pixel-accurate camera component.
High Pixel Accuracy
The Pixel Perfect Camera component is added to and complements the Camera component of the Unity engine. To add it, go to the main camera and add the Pixel Perfect Camera component to it. If the Pixel Perfect Camera component is not in the menu, then follow the steps above to import it into the project.
Now let's examine the options available.
First, I recommend turning on “Run In Edit Mode” and setting the aspect ratio to “Free Aspect” in the Game window so that you can freely change the game window. The component will display useful messages in the game window, indicating whether the display is pixel-accurate in the current resolution.
Now you can go through each parameter and see how they affect the appearance of the game.
- Assets Pixels Per Unit - this field is a link to a parameter that can be selected for each asset in the inspector. In the general case, every asset that will be used in the global space of the game must have the same pixel per unit (pixels per unit, PPU), and here you must also specify the same value. If the game world is presented in the form of a grid of tiles and sprites, and each size is 16 by 16 pixels, then it is logical to specify PPU 16 - each grid tile will have a size of 1 in world coordinates. Be sure to enter the selected PPU value here.
- Reference Resolution - here you need to specify the resolution. in which all assets should be displayed. If you need a retro look, this is usually a very low resolution. For example, Sega Genesis had a resolution of 320 × 224. When porting a game with Sega Genesis, we use a reference resolution of 320 × 224. For example, with an aspect ratio of 16: 9, 320 × 180 or 398 × 224 will work well (if you want to keep the vertical resolution).
- Upscale Render Texture - this parameter causes the scene to be rendered as close as possible to the reference resolution, and then stretched to the screen size. Since when using this parameter the screen fills up completely, we recommend it if you need full-screen pixel-accurate graphics without borders at the edges. Upscale Render Texture also greatly affects the appearance of sprites when they are rotated.
- Pixel Snapping (can only be enabled when Upscale Render Texture is disabled) - when this option is enabled, sprite renderer will automatically snap to the grid in world space, and the grid size will depend on the PPU selected. Keep in mind that this does not actually affect the position of transform objects. As a result of this, you can still smoothly interpolate objects between positions, but visually the movement will remain pixel-precise and snapped to the grid.
On the left, Pixel Snapping is disabled. The background is in position (0, 0), and the character’s sprite is in (1.075, 0). Some pixels are not aligned correctly. Notice that some pixels are only half covered by the shadow. On the right, Pixel Snapping is on. The same positions are the background at (0, 0), the character’s sprite at (1.075, 0). Pixels are perfectly attached to each other.- Crop Frame (X and Y) - this parameter truncates the visible region of the world space so that it exactly matches the reference resolution, and adds black borders that fill all the spaces at the edges of the screen.
- Stretch Fill - always available if you enable x and y for Crop Frame. This option causes the camera to scale the game window to fit the screen while maintaining aspect ratio. Since scaling is performed not only for integer multiples of the reference resolution, in all other cases the pixel accuracy will be lost. However, the advantage of this parameter is that despite the loss of pixel accuracy in many resolutions, there will be no black bars at the edges and the screen will be completely full. Although stretch fill often causes blur, a normal warning is not displayed.
Character and background, blurry stretch fillPixel Perfect Camera Recommendations
If you need a pixel-accurate display with a snap to the grid, then I recommend the following:
- Choose a reference resolution that will never be greater than the resolution of the player’s window (for example, 320 × 180).
- Enable or Disable Upscale Render Texture
- Turn this option on if there are turns in the game that differ from 90, 180 and 270 degrees and if you like the visual effect created by this parameter for rotated sprites.
- Upscale Render Texture in some resolutions may create non-pixel-accurate images; it depends on the reference permission. Experiment with this option in different screen resolutions by turning on the Run in Edit Mode option in the Pixel Perfect Camera component and check if there are problems with your reference resolution. If you managed to achieve a pixel-accurate image in all target resolutions, then this configuration would be best for a pixel-accurate game.
- Enable or disable Pixel Snapping
- It mainly depends on your personal preferences. Without snap, the movement will be much smoother, but the pixels will not be aligned.
- Enable Crop Frame X and / or Y if Upscale Render Texture is disabled
- If you are unable to achieve pixel-accurate results with an upscale render texture, truncating along X and / or Y will provide a pixel-accurate image in all resolutions above the reference, but in some resolutions it will create large borders at the edges of the screen.
- Disable Stretch Fill
We recommend setting up the camera so that it is optimized for a 16: 9 screen ratio, including reference resolution, if possible. At the time of writing, most players are playing on monitors with an aspect ratio of 16: 9 and a resolution of 1920 × 1080. For example, the reference resolution 320 × 180 has a 16: 9 ratio, and therefore, with a resolution of 1920 × 1080 and other resolutions that are multiples of 320 × 180, for example, 1280 × 720, there will be no black borders at the edges of the screen.In the Unity toolbar, you can go to Edit> Project Settings> Player and limit the aspect ratios supported by the game. If you find that a certain configuration looks good in the ratio you need, but does not fit well into individual ratios, then here you can turn off these ratios. However, keep in mind that not all users will have a screen that is well compatible with your limitations, so this is not recommended. Instead, use cropping so that such users display black borders and the game does not start at a resolution that does not match their screen.Conclusion
When you try to create a project that is authentic for a retro console, you need to consider many technical aspects that no one thinks about in modern development. Due to the nature of image rendering and the low memory footprint of older machines, designers had to think creatively and circumvent hardware limitations. In the modern era, we need to know about these limitations and techniques to accurately recreate the look and design of games of that era. In the next post, we will look at the design limitations of the era of 16-bit games, as well as the Unity workflow necessary to recreate the real style of the “old TV”.