एंड्रॉइड यूआई पैटर्न: डैशबोर्ड

छवि मेरे हालिया लेख के बाद 
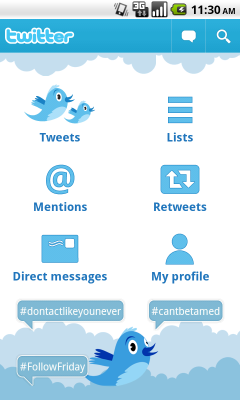
, कई लोगों ने पीएम से पूछा कि डैशबोर्ड कैसे बनाया जाता है। डैशबोर्ड एंड्रॉइड के लिए मुख्य यूआई पैटर्न में से एक है, जिसे आप यहां पढ़ सकते हैं। Habr में खोज ने संकेत दिया कि आप क्विकएक्शन डायलॉग्स और एक्शनबार को कैसे लागू कर सकते हैं। इस लेख में मैं आपको बताऊंगा कि अपना खुद का डैशबोर्ड बनाना कितना आसान है।

पहले हमें इस वर्ग की आवश्यकता है:
import android.content.Context; import android.util.AttributeSet; import android.view.View; import android.view.ViewGroup; /** * Custom layout that arranges children in a grid-like manner, optimizing for even horizontal and * vertical whitespace. */ public class DashboardLayout extends ViewGroup { private static final int UNEVEN_GRID_PENALTY_MULTIPLIER = 10; private int mMaxChildWidth = 0; private int mMaxChildHeight = 0; public DashboardLayout(Context context) { super(context, null); } public DashboardLayout(Context context, AttributeSet attrs) { super(context, attrs, 0); } public DashboardLayout(Context context, AttributeSet attrs, int defStyle) { super(context, attrs, defStyle); } @Override protected void onMeasure(int widthMeasureSpec, int heightMeasureSpec) { mMaxChildWidth = 0; mMaxChildHeight = 0; // Measure once to find the maximum child size. int childWidthMeasureSpec = MeasureSpec.makeMeasureSpec( MeasureSpec.getSize(widthMeasureSpec), MeasureSpec.AT_MOST); int childHeightMeasureSpec = MeasureSpec.makeMeasureSpec( MeasureSpec.getSize(heightMeasureSpec), MeasureSpec.AT_MOST); final int count = getChildCount(); for (int i = 0; i < count; i++) { final View child = getChildAt(i); if (child.getVisibility() == GONE) { continue; } child.measure(childWidthMeasureSpec, childHeightMeasureSpec); mMaxChildWidth = Math.max(mMaxChildWidth, child.getMeasuredWidth()); mMaxChildHeight = Math.max(mMaxChildHeight, child.getMeasuredHeight()); } // Measure again for each child to be exactly the same size. childWidthMeasureSpec = MeasureSpec.makeMeasureSpec( mMaxChildWidth, MeasureSpec.EXACTLY); childHeightMeasureSpec = MeasureSpec.makeMeasureSpec( mMaxChildHeight, MeasureSpec.EXACTLY); for (int i = 0; i < count; i++) { final View child = getChildAt(i); if (child.getVisibility() == GONE) { continue; } child.measure(childWidthMeasureSpec, childHeightMeasureSpec); } setMeasuredDimension( resolveSize(mMaxChildWidth, widthMeasureSpec), resolveSize(mMaxChildHeight, heightMeasureSpec)); } @Override protected void onLayout(boolean changed, int l, int t, int r, int b) { int width = r - l; int height = b - t; final int count = getChildCount(); // Calculate the number of visible children. int visibleCount = 0; for (int i = 0; i < count; i++) { final View child = getChildAt(i); if (child.getVisibility() == GONE) { continue; } ++visibleCount; } if (visibleCount == 0) { return; } // Calculate what number of rows and columns will optimize for even horizontal and // vertical whitespace between items. Start with a 1 x N grid, then try 2 x N, and so on. int bestSpaceDifference = Integer.MAX_VALUE; int spaceDifference; // Horizontal and vertical space between items int hSpace = 0; int vSpace = 0; int cols = 1; int rows; while (true) { rows = (visibleCount - 1) / cols + 1; hSpace = ((width - mMaxChildWidth * cols) / (cols + 1)); vSpace = ((height - mMaxChildHeight * rows) / (rows + 1)); spaceDifference = Math.abs(vSpace - hSpace); if (rows * cols != visibleCount) { spaceDifference *= UNEVEN_GRID_PENALTY_MULTIPLIER; } if (spaceDifference < bestSpaceDifference) { // Found a better whitespace squareness/ratio bestSpaceDifference = spaceDifference; // If we found a better whitespace squareness and there's only 1 row, this is // the best we can do. if (rows == 1) { break; } } else { // This is a worse whitespace ratio, use the previous value of cols and exit. --cols; rows = (visibleCount - 1) / cols + 1; hSpace = ((width - mMaxChildWidth * cols) / (cols + 1)); vSpace = ((height - mMaxChildHeight * rows) / (rows + 1)); break; } ++cols; } // Lay out children based on calculated best-fit number of rows and cols. // If we chose a layout that has negative horizontal or vertical space, force it to zero. hSpace = Math.max(0, hSpace); vSpace = Math.max(0, vSpace); // Re-use width/height variables to be child width/height. width = (width - hSpace * (cols + 1)) / cols; height = (height - vSpace * (rows + 1)) / rows; int left, top; int col, row; int visibleIndex = 0; for (int i = 0; i < count; i++) { final View child = getChildAt(i); if (child.getVisibility() == GONE) { continue; } row = visibleIndex / cols; col = visibleIndex % cols; left = hSpace * (col + 1) + width * col; top = vSpace * (row + 1) + height * row; child.layout(left, top, (hSpace == 0 && col == cols - 1) ? r : (left + width), (vSpace == 0 && row == rows - 1) ? b : (top + height)); ++visibleIndex; } } } 

यह Google IO कार्यक्रम के स्रोतों से लिया गया है और एक निश्चित रोमन नुरिक द्वारा संपादित किया गया है, क्योंकि मूल में कुछ कीड़े हैं। कक्षा स्वचालित रूप से हमारे बटन को उनके आकार, मात्रा, स्क्रीन अभिविन्यास के आधार पर रखती है।

अब हमें XML फ़ाइल dashboard_layout.xml (या किसी अन्य नाम से) बनाने की आवश्यकता है, जिसे हमें Res / लेआउट फ़ोल्डर में डालना होगा। इसमें, हम प्रत्येक बटन के साथ-साथ पूरे लेआउट के लिए बैकग्राउंड और ड्रॉबल का संकेत देते हैं:
 <?xml version="1.0" encoding="utf-8"?> <LinearLayout xmlns:android="http://schemas.android.com/apk/res/android" android:layout_width="fill_parent" android:layout_height="fill_parent" android:orientation="vertical" <!-   layout'a -> android:background="@drawable/background"> <!-        -> <com.illidane.animado.layouts.DashboardLayout android:layout_width="fill_parent" android:layout_height="fill_parent"> <Button android:id="@+id/home_btn_new_message" style="@style/DashboardButton" <!-   -> android:text="@string/btn_new_message" <!-   -> android:drawableTop="@drawable/home_new_message" /> <Button android:id="@+id/home_btn_messages" style="@style/DashboardButton" android:text="@string/btn_messages" android:drawableTop="@drawable/home_messages" /> <Button android:id="@+id/home_btn_preferences" style="@style/DashboardButton" android:text="@string/btn_preferences" android:drawableTop="@drawable/home_preferences" /> <Button android:id="@+id/home_btn_full_version" style="@style/DashboardButton" android:text="@string/btn_full_version" android:drawableTop="@drawable/home_upgrade" /> </com.illidane.animado.layouts.DashboardLayout> </LinearLayout> 

अब हमारे पास हमारे बटन के लिए शैली की कमी है, जिसमें हमें आइकन और पाठ मापदंडों को निर्दिष्ट करने की आवश्यकता है। Res / मान फ़ोल्डर में style.xml फ़ाइल बनाएँ:
 <resources> <style name="DashboardButton"> <item name="android:layout_gravity">center_vertical</item> <item name="android:layout_width">wrap_content</item> <item name="android:layout_height">wrap_content</item> <item name="android:gravity">center_horizontal</item> <item name="android:drawablePadding">5dp</item> <item name="android:textSize">@dimen/text_size_small</item> <item name="android:textStyle">bold</item> <item name="android:textColor">@color/white</item> <item name="android:background">@null</item> </style> </resources> 

इसी तरह, आपको color.xml, dens.xml और strings.xml फ़ाइलों को बनाने की आवश्यकता है जिसमें उन रंगों, आकारों और रेखाओं को निर्दिष्ट करना है, या उन्हें सीधे style.xml और dashboard_layout.xml में लिखना है।

इन क्रियाओं के बाद, अंतिम चरण बना रहा - एक गतिविधि बनाने के लिए:
 import android.app.Activity; import android.content.Context; import android.content.Intent; import android.os.Bundle; import android.view.View; import android.view.View.OnClickListener; import android.view.Window; import android.widget.Button; import android.widget.ImageButton; import android.widget.Toast; public class DashboardActivity extends Activity { @Override public void onCreate(Bundle savedInstanceState) { super.onCreate(savedInstanceState); this.requestWindowFeature(Window.FEATURE_NO_TITLE); setContentView(R.layout.dashboard_layout); final Context mContext = this; Button btnNewMessage = (Button) findViewById(R.id.home_btn_new_message); btnNewMessage.setOnClickListener(new OnClickListener() { public void onClick(View arg0) { //     dashboard'a    Activity } }); Button btnMessages = (Button) findViewById(R.id.home_btn_messages); btnMessages.setOnClickListener(new OnClickListener() { public void onClick(View arg0) { } }); Button btnPreferences = (Button) findViewById(R.id.home_btn_preferences); btnPreferences.setOnClickListener(new OnClickListener() { public void onClick(View arg0) { } }); Button btnFullVersion = (Button) findViewById(R.id.home_btn_full_version); btnFullVersion.setOnClickListener(new OnClickListener() { public void onClick(View arg0) { } }); } } 


बस इतना ही, इसका उपयोग करो!

Source: https://habr.com/ru/post/In130194/


All Articles