
अपने अंतिम
विषय में , मैंने
रीढ़ की
हड्डी के ढांचे के साथ काम करने के बुनियादी सिद्धांतों का वर्णन किया। अब मैं अभ्यास करने और कुछ उपयोगी करने का प्रस्ताव करता हूं।
कार्य
मान लीजिए कि हमारी साइट अक्सर विभिन्न प्रकार के पॉपअप का उपयोग करती है। उन सभी में समान विशेषताएं हैं, उन्हें बड़ी संख्या में खोला जा सकता है, खींचें और छोड़ सकते हैं। इसके अलावा, सक्रिय और निष्क्रिय पॉपअप प्रतिष्ठित हैं, और सक्रिय बाकी के शीर्ष पर स्थित है और छायांकित नहीं है (हम्म ... मैं कहूंगा कि यह विंडो-मैनेजर की तरह है)।
Vobschem कुछ इस तरह से:
ओओपी वाचाओं के अनुसार, हम पॉपअप के लिए एक वर्ग विकसित करने की कोशिश करेंगे जिससे हम सभी के लिए सामान्य व्यवहार के साथ अपने स्वाद के लिए इनहेरिट और पॉपअप बना सकें।
डाउनलोड करें
backbone.js ,
jquery ,
jquery ui ,
underscore.js और
index.html
सबसे पहले, कनेक्ट किए गए पुस्तकालयों, हमारे (अभी तक लिखित नहीं) एप्लिकेशन और टेम्पलेट्स के साथ एक इंडेक्स फ़ाइल बनाएं।
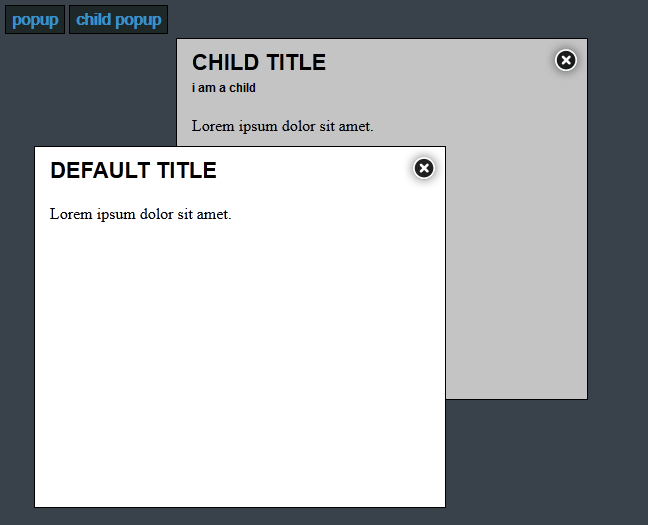
<!doctype html> <html> <head> <title>Popup demo</title> <link rel="stylesheet" href="css/main.css" /> <script type="text/javascript" src="js/lib/jquery.js"></script> <script type="text/javascript" src="js/lib/jquery-ui.js"></script> <script type="text/javascript" src="js/lib/underscore.js"></script> <script type="text/javascript" src="js/lib/backbone.js"></script> <script type="text/javascript" src="js/app/app.js"></script> <script type="text/javascript" src="js/app/views/PopupView.js"></script> <script type="text/javascript" src="js/app/views/ChildPopupView.js"></script> <script id="popup-template" type="text/template"> <div class="title"> <h1><%= title %></h1> </div> <div class="content"> <%= content %> </div> <div class="popup-close"> </div> </script> <script id="child-popup-template" type="text/template"> <div class="title"> <h1><%= title %></h1> <h3>i am a child</h3> </div> <div class="content"> <%= content %> </div> <div class="popup-close"> </div> </script> </head> <body> <button id="popup-button">popup</button> <button id="child-popup-button">child popup</button> </body> </html>
"बॉडी" में हमारे पास केवल 2 बटन हैं जिनके साथ हम पॉप-अप बनाएंगे।
app.js
इस फ़ाइल में, बटन पर क्लिक करें लटका हुआ कोड है जो पॉप-अप बनाता है और उन्हें हमारे डोम में जोड़ता है।
function getRandomInt(min, max) { return Math.floor(Math.random() * (max - min + 1)) + min; } $(function () { $('#popup-button').click(function () { var popup = new PopupView(); $('body').append(popup.render().el); }); $('#child-popup-button').click(function () { var popup = new ChildPopupView(); $('body').append(popup.render().el); }); });
मैंने एक यादृच्छिक पूर्णांक प्राप्त करने के लिए यहां एक फ़ंक्शन भी भरा, यह बाद में काम में आएगा।
और अब मज़ा हिस्सा!
PopupView.js
var PopupView = Backbone.View.extend({ className: 'popup', events: { 'click .popup-close': 'close', 'mousedown': 'raise' }, initialize: function () { this.template = $('#popup-template').html(); this.width = '400px'; this.height = '350px'; this.top = getRandomInt(100, 400) + 'px'; this.left = getRandomInt(200, 500) + 'px'; this.context = { title: 'Default Title', content: 'Lorem ipsum dolor sit amet.' } $(this.el).css({ 'width': this.width, 'height': this.height, 'top': this.top, 'left': this.left, 'position': 'absolute' }); $(this.el).draggable(); }, render: function () { $(this.el).html(_.template(this.template, this.context));
यहां हमने एक पॉप-अप का वर्णन किया है जो अन्य सभी पॉप-अप के लिए माता-पिता बन जाएगा, यह सभी विशिष्ट कार्यक्षमता को लागू करता है।
अब, एक नया पॉपअप बनाने के लिए जो कुछ नए व्यवहार को लागू करता है, या एक अलग टेम्पलेट का उपयोग करता है, हमें कोड की केवल कुछ पंक्तियों की आवश्यकता होती है।
ChildPopupView.js
var ChildPopupView = PopupView.extend({ initialize: function () { ChildPopupView.__super__.initialize.call(this); this.template = $('#child-popup-template').html(); this.context = { title: 'Child Title', content: 'Lorem ipsum dolor sit amet.' } } });
इस वंश में, हमने एक अलग टेम्पलेट कनेक्ट किया और पॉपअप का शीर्षक बदल दिया। तो यह इतना आसान है!
डेमो कोड