この投稿は、「
Smart Posts for Smart Posts 」というコンテストに参加しています。
Drag'n'Dropは、ユーザーとグラフィカル環境の相互作用において紛れもなく重要な要素です。 残念ながら、QMLにはViewの組み込みのドラッグアンドドロップメカニズムはありません。 したがって、16個の画像を含むGridViewに基づいた小さな例を作成しました。
このDrag'n'Dropの例は完全なふりをしているわけではなく(視覚的にもっと完璧な実装がいくつかあります)、QMLが非常に柔軟でシンプルな開発ツールであることを示すことを目的としています。
最初に、短いビデオ、そしてカットの下で、同様の結果を得るための5つの簡単なステップ。
ステップ1. GridViewを作成する
GridViewと小さなモデルを作成することから始めましょう。 テストデータとして、Nokia N8から標準画像を取得しました。
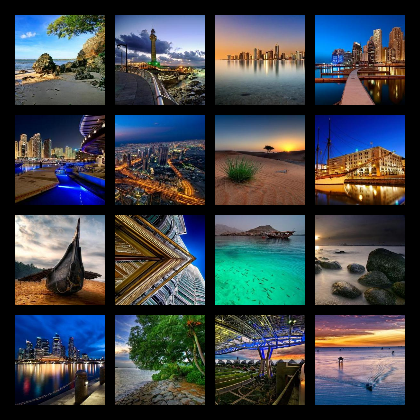
グリッドを4x4の画像サイズにしましょう。
Rectangle { width: 420 height: 420 color: "#000000" Component { id: dndDelegate Item { id: wrapper width: dndGrid.cellWidth height: dndGrid.cellHeight Image { id: itemImage source: imagePath anchors.centerIn: parent width: 90 height: 90 smooth: true fillMode: Image.PreserveAspectFit } } } ListModel { id: dndModel ListElement { imagePath: "images/1.jpg" }
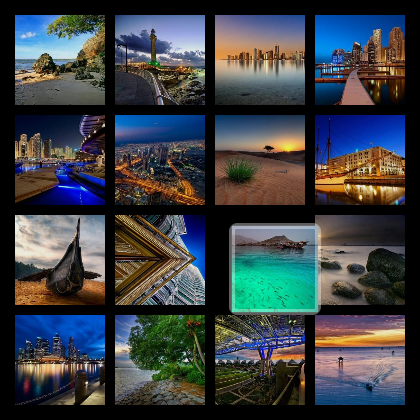
qmlviewerで起動した後、次の図が表示されます
ステップ2. Drag'nDropを追加する
次に、このグリッドに画像をドラッグアンドドロップする機能を追加する必要があります。
タスクを簡素化するには、GridViewをスクロールする機能を無効にします。 これをせずに(D'n'Dの通常の押しの代わりに長押しを使用し、対応するMouseAreaコールバックで
インタラクティブプロパティ(GridViewがスクロールするかどうかを決定する)を操作します)が、これは例を複雑にします。
また、GridView全体のサイズのMouseArea要素を追加します。これにより、ドラッグの開始時にマウスクリックをキャッチし、マウスを離したときに要素をモデル内の目的の位置に移動します。 さらに、GridViewに別の
dndContainer要素を追加します。これについては後で説明します
最後の作業は、GridViewにプロパティを追加して、移動する現在のアイテム(またはモデル内のインデックス)を保存することです。
property int draggedItemIndex: -1 interactive: false Item { id: dndContainer anchors.fill: parent } MouseArea { id: coords anchors.fill: parent onReleased: { if (dndGrid.draggedItemIndex != -1) { var draggedIndex = dndGrid.draggedItemIndex dndGrid.draggedItemIndex = -1 dndModel.move(draggedIndex,dndGrid.indexAt(mouseX, mouseY),1) } } onPressed: { dndGrid.draggedItemIndex = dndGrid.indexAt(mouseX, mouseY) } }
inDrag状態を
デリゲートに追加します。これは、この要素が移動可能なときにアクティブになります。 これは、
dndContainerが必要な
場所です。 ローミング要素に固執します(より正確には、親をこのコンテナに変更します)。 親の変更に加えて、要素のアンカーを解いて(移動できるように)、マウスの座標に応じてxとyを設定します(バインドのおかげで、結び付けられていない画像の位置はマウスカーソルの移動に応じて変化します)。 状態が非アクティブになると、これらの変更はすべてロールバックされます。
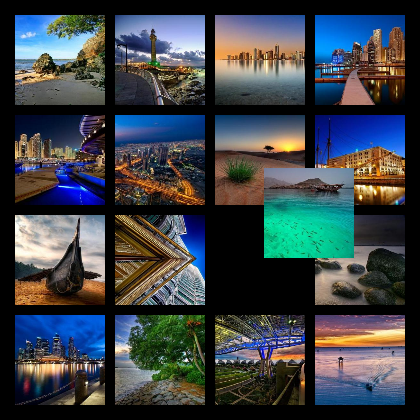
states: [ State { name: "inDrag" when: index == dndGrid.draggedItemIndex PropertyChanges { target: itemImage; parent: dndContainer } PropertyChanges { target: itemImage; anchors.centerIn: undefined } PropertyChanges { target: itemImage; x: coords.mouseX - itemImage.width / 2 } PropertyChanges { target: itemImage; y: coords.mouseY - itemImage.height / 2 } } ]
実行すると、この図のようなものが表示されます。 これで、グリッド内の要素を安全に移動できます。
ステップ3.可動アイテムをレンダリングする
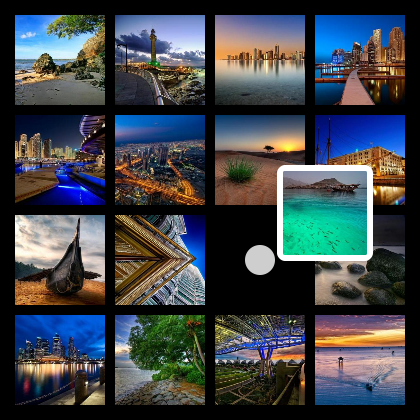
わかりました、私たちはこの記事が書かれたことをすることを学びました(それは簡単ですよね?)。 しかし、移動された要素はほとんど目立たないので、残りに対して少し強調する必要があります。 ドラッグした画像の周りに白いフレームを追加します。
次のコードを
itemImageに貼り付けます。
Rectangle { id: imageBorder anchors.fill: parent radius: 5 color: "transparent" border.color: "#ffffff" border.width: 6 opacity: 0 }
さらに、ドラッグされたアイテムの取得元を何らかの形でマークすると便利です。 この場所の中央に白い円を追加します。 このコードは、
itemImageの隣に配置されます
。 Rectangle { id: circlePlaceholder width: 30; height: 30; radius: 30 smooth: true anchors.centerIn: parent color: "#cecece" opacity: 0 }
さて、デリゲートの
inDrag状態にドラッグを開始するときに表示を追加します。
State { name: "inDrag" when: index == dndGrid.draggedItemIndex PropertyChanges { target: circlePlaceholder; opacity: 1 } PropertyChanges { target: imageBorder; opacity: 1 } PropertyChanges { target: itemImage; parent: dndContainer } PropertyChanges { target: itemImage; anchors.centerIn: undefined } PropertyChanges { target: itemImage; x: coords.mouseX - itemImage.width / 2 } PropertyChanges { target: itemImage; y: coords.mouseY - itemImage.height / 2 } }
これで、例は次のようになります。
ステップ4.アニメーションを追加する
さて、ドラッグアンドドロップを使用したグリッドのベースは準備ができています。 ホイッスルを追加します。 より具体的には、アニメーションを追加します。
まず、
辛抱強いitemImageに 2つの状態を追加します。
- greyedOut-画像を隠します。 ドラッグアンドドロップがアクティブなときに使用されますが、この要素には使用されません。
- 非アクティブ -drag'n'dropが非アクティブの場合、またはドラッグされたアイテムに使用
したがって、ドラッグされた要素を除くすべての要素をわずかに隠し、残りの背景に対して後者の可視性を高めます。
また、画像の透明度、幅、高さのアニメーション化された変更を追加します。
state: "inactive" states: [ State { name: "greyedOut" when: (dndGrid.draggedItemIndex != -1) && (dndGrid.draggedItemIndex != index) PropertyChanges { target: itemImage; opacity: 0.8} }, State { name: "inactive" when: (dndGrid.draggedItemIndex == -1) || (dndGrid.draggedItemIndex == index) PropertyChanges { target: itemImage; opacity: 1.0} } ] Behavior on width { NumberAnimation { duration: 300; easing.type: Easing.InOutQuad } } Behavior on height { NumberAnimation { duration: 300; easing.type: Easing.InOutQuad } } Behavior on opacity {NumberAnimation { duration: 300; easing.type: Easing.InOutQuad } }
inDrag状態で
は 、画像の高さと幅にこの変更
を追加し、この状態から他の状態への移行(つまり、アクティブなドラッグアンドドロップから通常モードへの移行)を追加します。 この移行では、スケールアニメーションを作成します。
states: [ State { name: "inDrag" when: index == dndGrid.draggedItemIndex PropertyChanges { target: circlePlaceholder; opacity: 1 } PropertyChanges { target: imageBorder; opacity: 1 } PropertyChanges { target: itemImage; parent: dndContainer } PropertyChanges { target: itemImage; width: 80 } PropertyChanges { target: itemImage; height: 80 } PropertyChanges { target: itemImage; anchors.centerIn: undefined } PropertyChanges { target: itemImage; x: coords.mouseX - itemImage.width / 2 } PropertyChanges { target: itemImage; y: coords.mouseY - itemImage.height / 2 } } ] transitions: [ Transition { from: "inDrag" to: "*" PropertyAnimation { target: itemImage properties: "scale, opacity" easing.overshoot: 1.5 easing.type: "OutBack" from: 0.0 to: 1.0 duration: 750 } } ]
また、ドラッグしたアイテムの周囲のフレームと円に透明度変更アニメーションをゼロから追加します。
Behavior on opacity { NumberAnimation { duration: 300; easing.type: Easing.InOutQuad } }
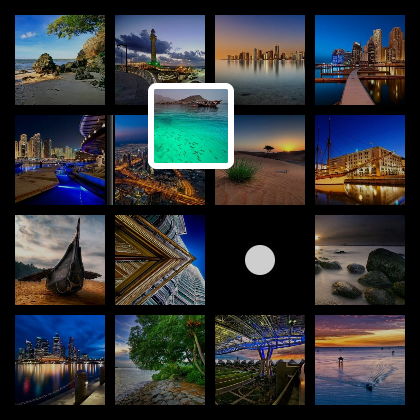
その結果、すでにそのような写真が得られました。
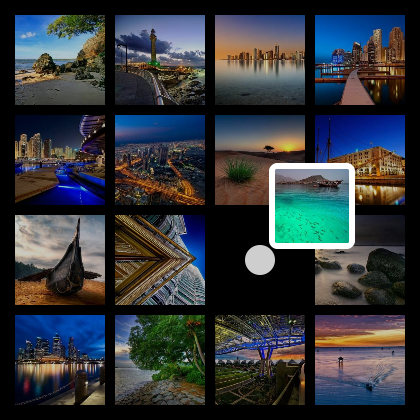
そして、これはアニメーションがうまくいく中間の瞬間に撮影されました。
ステップ5.最後の仕上げ
そして、結論として、アイテムが移動される位置のインジケータを追加します。 この要素の左側に垂直の帯の形で表示します。
この要素の親はGridViewであり、それを使用するすべてのアクションは同じ場所で発生します。
最初に、3つの新しいプロパティをGridViewに追加します。ターゲット要素インデックス(
possibleDropIndex )と現在のマウス座標(
xCoordinateInPossibleDropおよび
yCoordinateInPossibleDrop )。
さらに、インジケーター要素自体を追加します。 これは、垂直に複製された通常の6x1ピクセルのグラデーション画像です。 インジケーターには、非表示(デフォルト)と表示の2つの状態があり
ます 。 2番目の状態では、インジケータ要素はターゲットの左側の2つの画像の間に配置されます。 要素の位置は、モデル内のインデックスではなく、最後の2つのプロパティに基づいて計算されるため、テーブル内の現在の列数には依存しません。
property int possibleDropIndex: -1 property int xCoordinateInPossibleDrop: -1 property int yCoordinateInPossibleDrop: -1 Item { id: dropPosIndicator visible: false height: dndGrid.cellHeight width: 10 Image { visible: parent.visible anchors.centerIn: parent height: parent.height-10 source: "drop-indicator.png" } states: [ State { name: "shown" when: dndGrid.possibleDropIndex != -1 PropertyChanges { target: dropPosIndicator visible: true x: Math.floor(dndGrid.xCoordinateInPossibleDrop/dndGrid.cellWidth) * dndGrid.cellWidth - 5 y: Math.floor(dndGrid.yCoordinateInPossibleDrop/dndGrid.cellHeight) * dndGrid.cellHeight } } ] }
また、MouseAreaに別のハンドラーを追加します。 ここでは、毎回マウスの座標を更新せず、ターゲット要素を変更するときにのみ座標を変更するために、ドロップ位置のインデックスを持つプロパティが必要です。
onPositionChanged: { var newPos = dndGrid.indexAt(mouseX, mouseY) if (newPos != dndGrid.possibleDropIndex) { dndGrid.possibleDropIndex = newPos dndGrid.xCoordinateInPossibleDrop = mouseX dndGrid.yCoordinateInPossibleDrop = mouseY } }
その結果、このようなアプリケーションが得られます。 投稿の冒頭のビデオと同じ:)
はい、はい、
ここから完全なソースをダウンロードできます(各ステップに個別の.qmlファイルがあります)