誰もがcss borderパラメーターに精通していますが、それについて私たちが知らないことはありますか?
基本
誰もがこの使用法に精通しています:
border: 1px solid black;
これは単一ピクセルのソリッドフレームです。 構文を少し変更します。
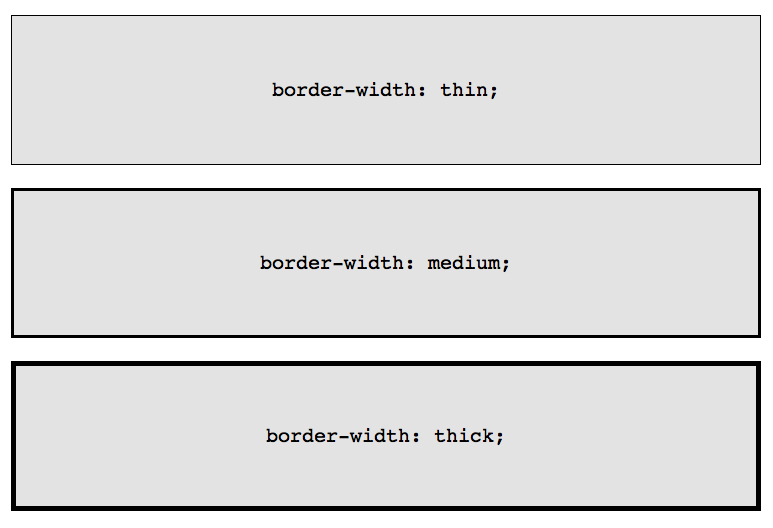
border-width: thick; border-style: solid; border-color: black;
たとえば、border-widthパラメーターには、thin、medium、thickの3つのパラメーターがあります。
オブジェクトにカーソルを合わせたときに境界線の色を変更する必要がある場合:
.box { border: 1px solid red; } .box:hover { border: 1px solid green; }
しかし、これは実装がより簡単で正確です。
.box { border: 1px solid red; } .box:hover { border-color: green; }
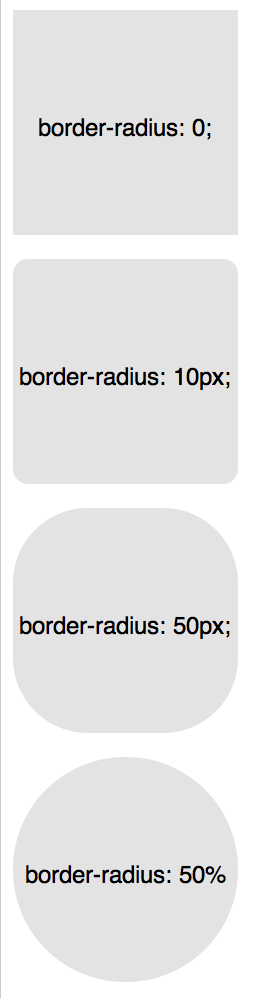
境界半径
border-radiusは、丸い角を表示するための新しいCSS3パラメーターです。これは、Internet Explorer 8(および以前のバージョン)を除くすべての最新ブラウザーで正しく動作します。
各コーナーに対して、丸みを割り当てることができます:
border-top-left-radius: 20px; border-top-right-radius: 0; border-bottom-right-radius: 30px; border-bottom-left-radius: 0;
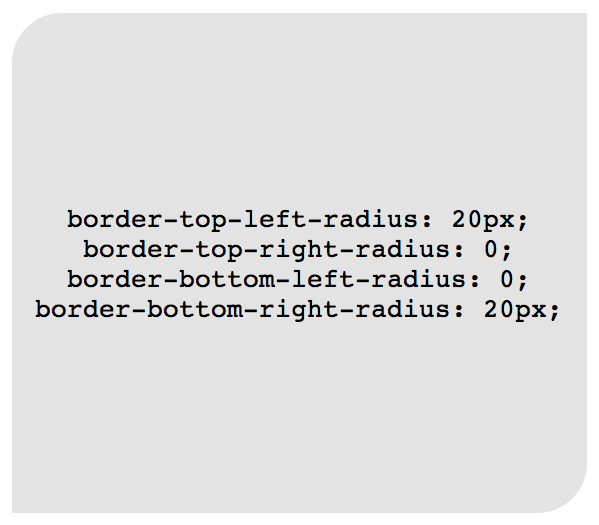
上記の例では、変更が必要な値を継承しない場合、「0」border-top-right-radiusおよびborder-bottom-left-radiusを設定する必要はありません。
構造全体を1行に圧縮できます。
border-radius: 20px 0 30px 0;
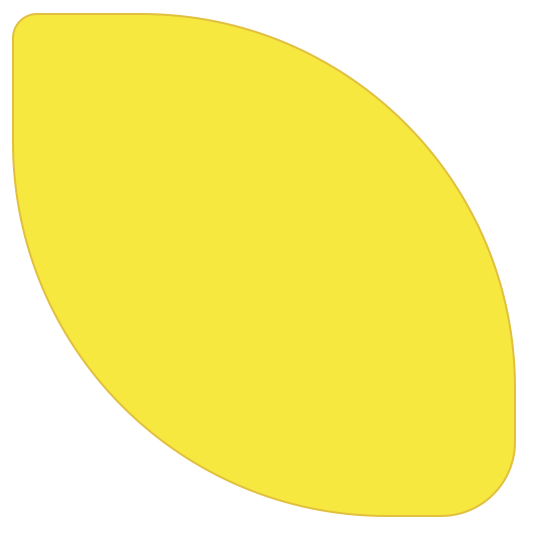
CSSを使用してレモンを描く方法は次のとおりです。
.lemon { width: 200px; height: 200px; background: #F5F240; border: 1px solid #F0D900; border-radius: 10px 150px 30px 150px; }
ここでは、ボーダーパラメーターを使用する最も簡単で最も一般的な例を説明します。 さらに複雑なものに移りましょう。
いくつかの国境
ボーダースタイル
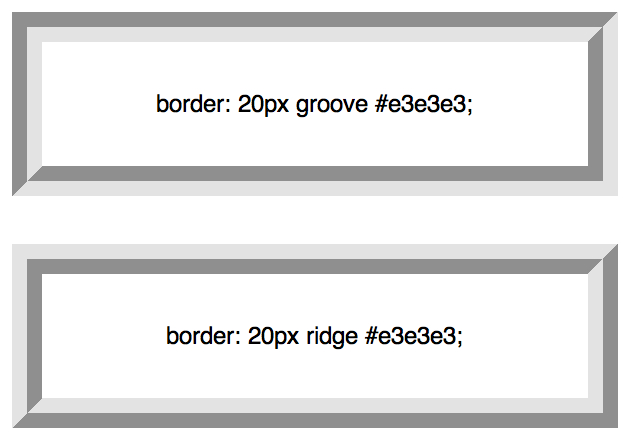
実線、破線、点線が最も一般的な境界線スタイルの値ですが、溝や隆線など、他の値を見てみましょう。
border: 20px groove #e3e3e3;
または詳細:
border-color: #e3e3e3; border-width: 20px; border-style: groove;
アウトライン
二重罫線を作成する最も一般的な方法は、outlineパラメーターを使用することです。
.box { border: 5px solid #292929; outline: 5px solid #e3e3e3; }

この方法はうまく機能しますが、二重境界線の作成に限定されます。 要素の複数の境界線を表示する必要がある場合は、別の手法を使用する必要があります。
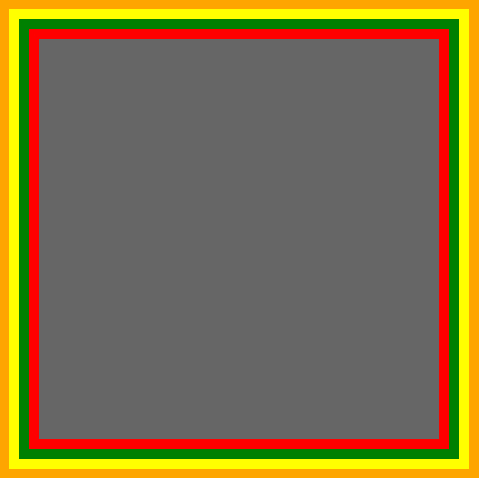
擬似要素
この設計を使用できます:
.box { width: 200px; height: 200px; background: #e3e3e3; position: relative; border: 10px solid green; } .box:after, .box:before { content: ''; position: absolute; top: 0; left: 0; bottom: 0; right: 0; } .box:after { border: 5px solid red; outline: 5px solid yellow; } .box:before { border: 10px solid blue; }

これは最もエレガントなソリューションではないかもしれませんが、動作します
ボックスシャドウ
影を使用する別の方法:
.box { border: 5px solid red; box-shadow: 0 0 0 5px green, 0 0 0 10px yellow, 0 0 0 15px orange; }
角度を変える
「/」を使用して、2つの値をborder-radiusパラメーターに適用できます。次に例を示します。
border-radius: 50px / 100px;
これは次と同じです:
border-top-left-radius: 50px 100px; border-top-right-radius: 50px 100px; border-bottom-right-radius: 50px 100px; border-bottom-left-radius: 50px 100px;
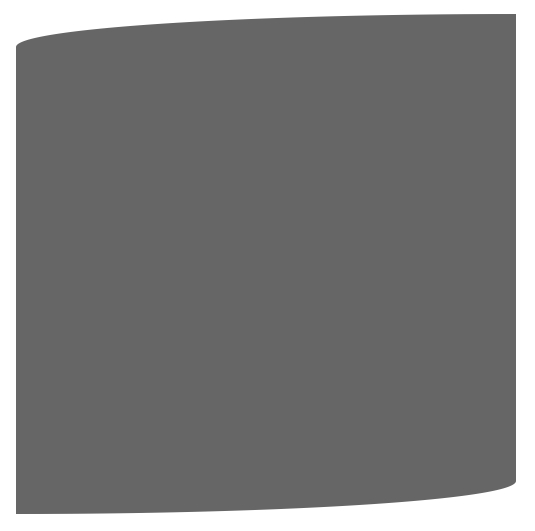
この手法は、丸めではなく曲率をシミュレートする必要がある場合に役立ちます。 たとえば、カールした紙の効果を得ることができます。
.box { width: 200px; height: 200px; background: #666; border-top-left-radius: 15em 1em; border-bottom-right-radius: 15em 1em; }
CSSシェイプ
次の例では、このマークアップを想定しています。
<div class="box"></div>
そして、そのような基本的なCSS:
.box { width: 200px; height: 200px; background: black; }
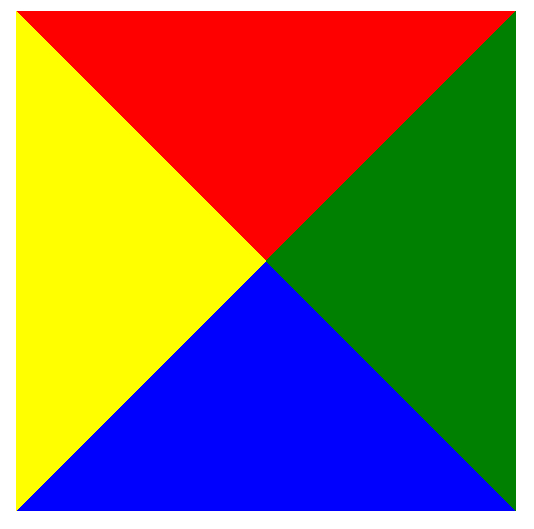
CSS図形を使用する最も一般的な例は、矢印を表示することです。 これがどのように機能するかを理解するには、各辺に別々の境界色を使用して、幅と高さを「0」に設定する必要があります。
.arrow { width: 0; height: 0; border-top: 100px solid red; border-right: 100px solid green; border-bottom: 100px solid blue; border-left: 100px solid yellow; }
または同じこと:
.arrow { width: 0; height: 0; border: 100px solid; border-top-color: red; border-right-color: green; border-bottom-color: blue; border-left-color: yellow; }
または:
.arrow { width: 0; height: 0; border: 100px solid; border-color: red green blue yellow; }
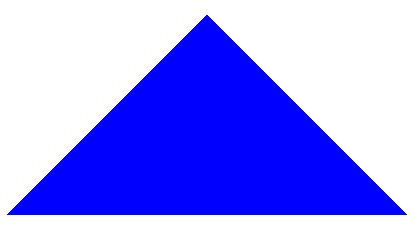
そして今、青い三角形だけを残します:
.arrow { width: 0; height: 0; border: 100px solid; border-bottom-color: blue; }
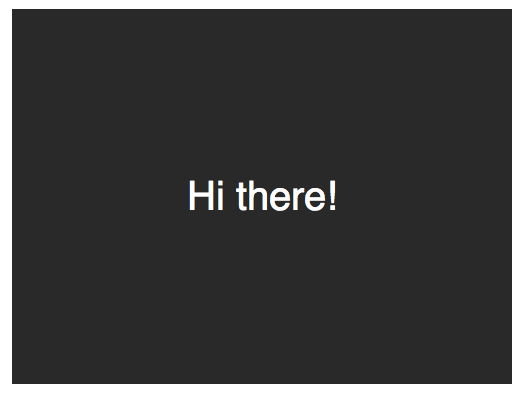
吹き出しの作成
基本的なマークアップ:
<div class="speech-bubble">Hi there!</div>
スタイル:
.speech-bubble { position: relative; background-color: #292929; width: 200px; height: 150px; line-height: 150px; color: white; text-align: center; }
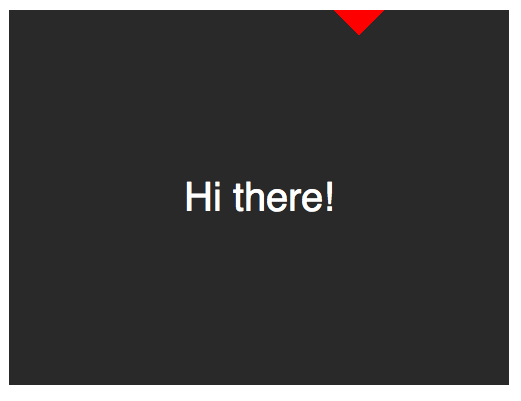
次に、矢印の三角形を適切な場所に配置する必要があります。 カラーボックスは次のとおりです。
.speech-bubble:after { content: ''; position: absolute; width: 0; height: 0; border: 10px solid; border-color: red green blue yellow; }
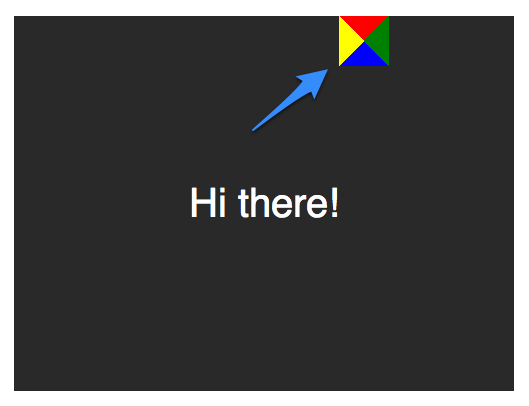
ボックスの4分の1だけを残します。
.speech-bubble:after { content: ''; position: absolute; width: 0; height: 0; border: 10px solid; border-top-color: red; }
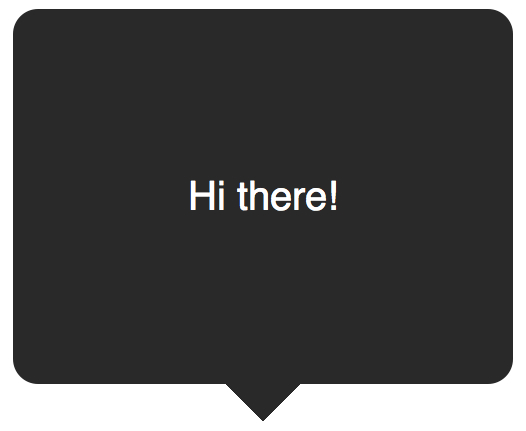
次に下に移動してペイントします。
.speech-bubble { border-radius: 10px; } .speech-bubble:after { content: ''; position: absolute; width: 0; height: 0; border: 15px solid; border-top-color: #292929; top: 100%; left: 50%; margin-left: -15px; }
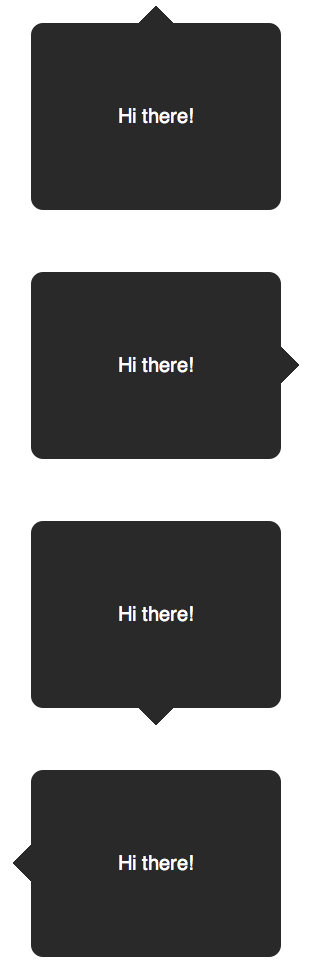
適用例:
.speech-bubble { position: relative; background-color: #292929; width: 200px; height: 150px; line-height: 150px; color: white; text-align: center; border-radius: 10px; font-family: sans-serif; } .speech-bubble:after { content: ''; position: absolute; width: 0; height: 0; border: 15px solid; } .speech-bubble-top:after { border-bottom-color: #292929; left: 50%; bottom: 100%; margin-left: -15px; } .speech-bubble-right:after { border-left-color: #292929; left: 100%; top: 50%; margin-top: -15px; } .speech-bubble-bottom:after { border-top-color: #292929; top: 100%; left: 50%; margin-left: -15px; } .speech-bubble-left:after { border-right-color: #292929; top: 50%; right: 100%; margin-top: -15px; }
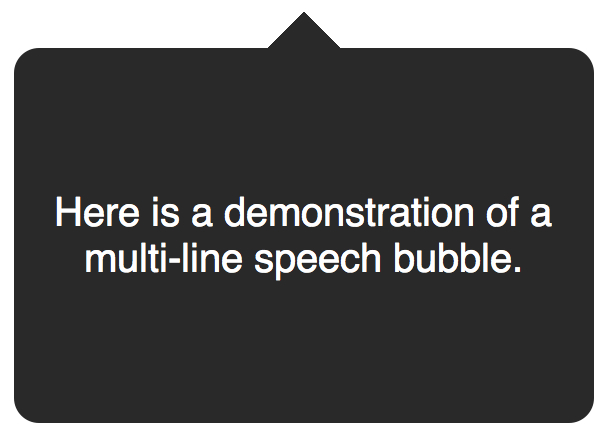
テキストを垂直方向に中央揃え
テキストを1行に制限するために、垂直方向の中央揃えを使用してline-heightを使用する必要はありません。 この問題を解決するには、display:tableをSpeech Bubbleに適用し、display:table-cellをテキストに適用します。
.speech-bubble { display: table; } .speech-bubble p { display: table-cell; vertical-align: middle; }
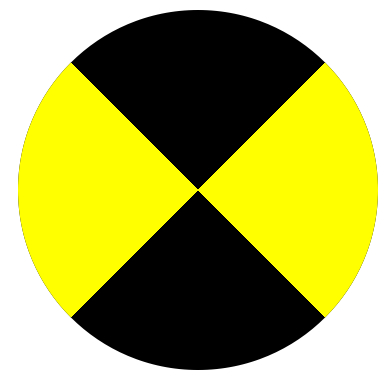
カスタム境界線の使用の別の例:
.biohazard { width: 0; height: 0; border: 60px solid; border-radius: 50%; border-top-color: black; border-bottom-color: black; border-left-color: yellow; border-right-color: yellow; }
まとめ
境界線パラメーターの使用は単なる「1pxソリッドブラック」に限定されず、境界線を使用してさまざまな形状を作成できます。CSSクラスを一度書くだけで、ページ上の多くの要素に適用できます。