最近、ライブラリの新しいバージョンがリリースされました。これは、クロスプラットフォームモバイルアプリケーションの開発または開発を計画しているC#開発者に役立ちます。
SQLitePCLを使用して、Windows、Windowsストア、Windows Phone、Android(
Xamarin )およびiOS(
Xamarin )のアプリケーションにローカルデータベースを実装できます。 無料で、コードはすべてのユーザーに公開されています。
私はそれを実際にテストしました、そしてあなたとそれを共有したいと思います。
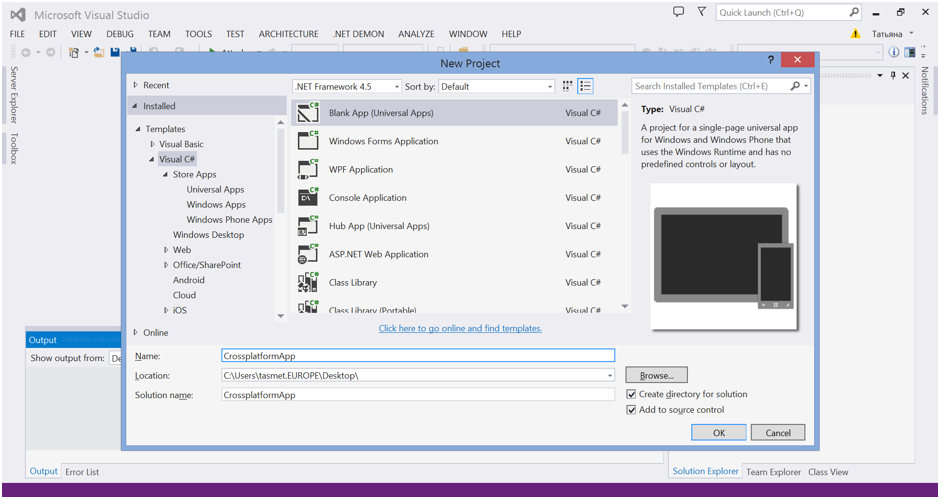
プロジェクトを作成する
実験には、WindowsとPhoneのユニバーサルアプリケーションプロジェクトが必要です。
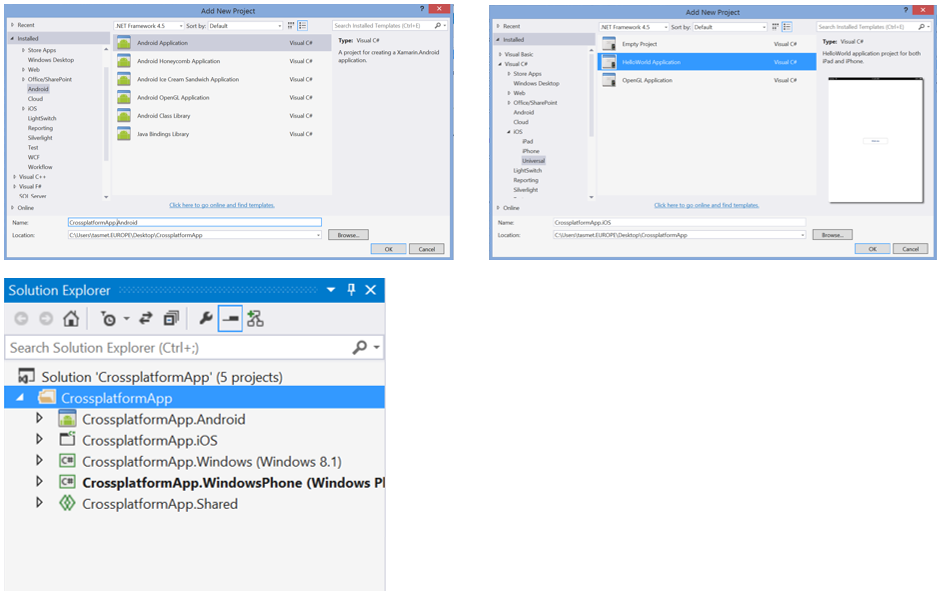
また、AndroidおよびiOSアプリケーション用の
Xamarinプロジェクト。
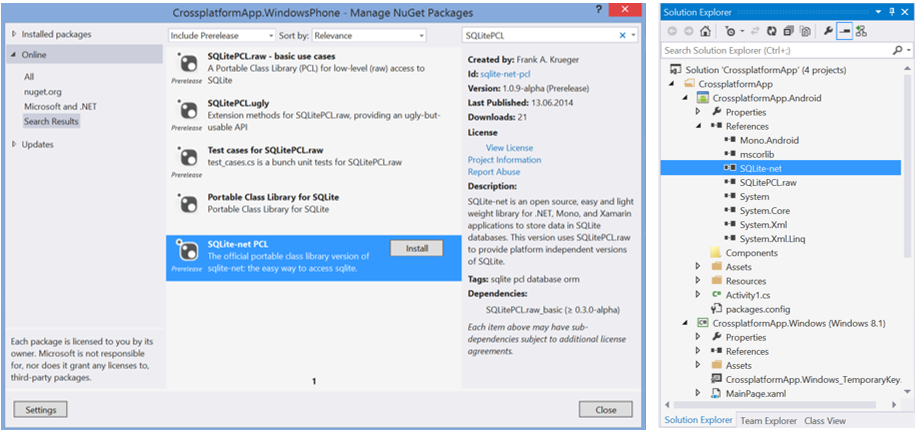
必要なライブラリを接続します
プロジェクトごとに、
SQLite-net PCLパッケージをインストールして
Referencesに追加します。
SQLitePCL.rawが自動的にインストールされ
ます 。 使用する必要があるのはそれだけです。
データベースを作成し、CRUD操作を実装します
すべてのアプリケーションに共通の、すでに所有している
共有プロジェクトのデータを操作するロジックを実装します。 ただし、この目的のために作成された新しい
ポータブルクラスライブラリでこれを行うことができます。
そのため、
共有プロジェクトに2つのファイルを追加します。 それらの1つである
MessageItem.csには、データベースに格納するオブジェクトの構造が含まれ、2番目の
DataBase.csは SQLiteデータベースとの対話を実装します。

コードMessageItem.csusing SQLite; using System; using System.Collections.Generic; using System.Text; namespace CrossplatformApp { public class MessageItem { [PrimaryKey, AutoIncrement] public Guid Id { get; set; } public string Text { get; set; } public string User { get; set; } public string Created { get; set; } } }
コードDataBase.cs using System; using System.Collections.Generic; using System.Text; using SQLitePCL; using System.Threading.Tasks; using System.Linq; using System.IO; using SQLite; namespace CrossplatformApp { public class Database { private const string _db = "CrossplatformApp.db"; private SQLiteConnection _connection = null; public Database(string path) { string _dbpath = Path.Combine(path, _db); _connection = new SQLiteConnection(_dbpath); _connection.CreateTable<MessageItem>(); } ~Database() { if(_connection!=null) _connection.Close(); } public int AddNewItem(MessageItem item) { var result = _connection.Insert(item); return result; } public int UpdateItem(MessageItem item) { var result = _connection.Update(item); return result; } public int DeleteItem(MessageItem item) { var result = _connection.Delete(item); return result; } public IQueryable<MessageItem> GetAllItems() { var result = _connection.Table<MessageItem>().OrderByDescending(t => t.Created); return result.AsQueryable<MessageItem>(); } } }
W8、WP、iOS、Androidで使用
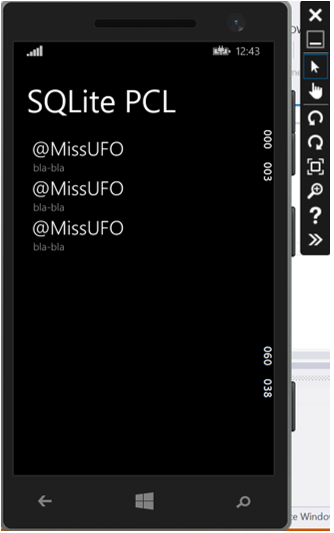
データベースがWindows Phoneでどのように機能するかを見てみましょう。
Windows Phoneアプリケーションプロジェクトに移動して、メインページを変更しましょう。
1. MainPage.xamlのすべてのXAMLコードを置き換えて、アプリケーションをシンプルなインターフェイスにし、データベースからユーザーにデータを表示します。
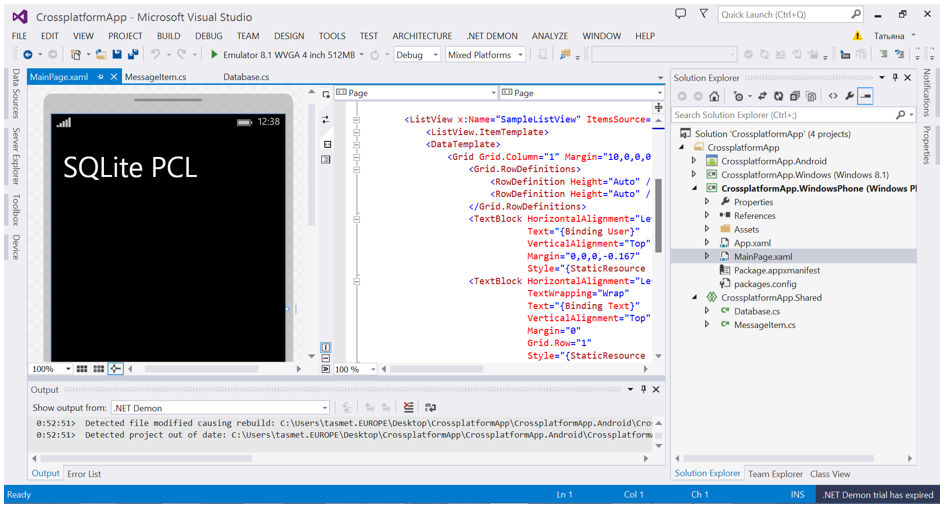
MainPage.xaml <Page x:Class="CrossplatformApp.MainPage" xmlns="http://schemas.microsoft.com/winfx/2006/xaml/presentation" xmlns:x="http://schemas.microsoft.com/winfx/2006/xaml" xmlns:local="using:CrossplatformApp" xmlns:d="http://schemas.microsoft.com/expression/blend/2008" xmlns:mc="http://schemas.openxmlformats.org/markup-compatibility/2006" mc:Ignorable="d" Background="{ThemeResource ApplicationPageBackgroundThemeBrush}"> <Grid Background="{ThemeResource ApplicationPageBackgroundThemeBrush}"> <Grid.RowDefinitions> <RowDefinition Height="100*"/> <RowDefinition Height="567*"/> </Grid.RowDefinitions> <ListView x:Name="SampleListView" ItemsSource="{Binding}" Grid.RowSpan="2" Grid.Row="1" Margin="20,20,20,0" > <ListView.ItemTemplate> <DataTemplate> <Grid Grid.Column="1" Margin="10,0,0,0"> <Grid.RowDefinitions> <RowDefinition Height="Auto" /> <RowDefinition Height="Auto" /> </Grid.RowDefinitions> <TextBlock HorizontalAlignment="Left" Text="{Binding User}" VerticalAlignment="Top" Margin="0,0,0,-0.167" Style="{StaticResource ListViewItemTextBlockStyle}"/> <TextBlock HorizontalAlignment="Left" TextWrapping="Wrap" Text="{Binding Text}" VerticalAlignment="Top" Margin="0" Grid.Row="1" Style="{StaticResource ListViewItemSubheaderTextBlockStyle}"/> </Grid> </DataTemplate> </ListView.ItemTemplate> </ListView> <TextBlock HorizontalAlignment="Left" TextWrapping="Wrap" Text="SQLite PCL" VerticalAlignment="Bottom" FontSize="48" FontFamily="Global User Interface" Margin="20,0,0,0"/> </Grid> </Page>
2.アプリケーションコードを記述します。 データベースを作成し、データを入力して画面に表示します。
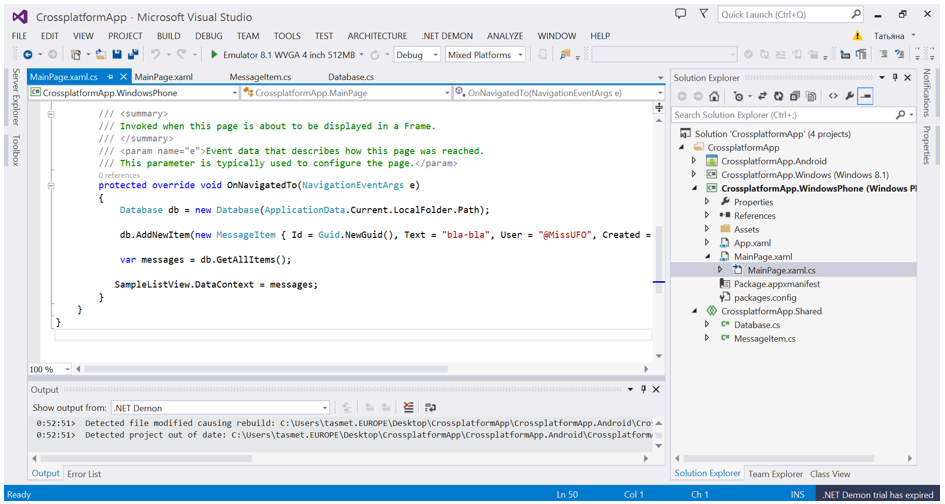
MainPage.xaml.cs Database db = new Database(ApplicationData.Current.LocalFolder.Path); db.AddNewItem(new MessageItem { Id = Guid.NewGuid(), Text = "bla-bla", User = "@MissUFO", Created = DateTime.UtcNow.ToString() }); var messages = db.GetAllItems(); SampleListView.DataContext = messages;
3.プロジェクトを実行し、結果を確認します。 データベースが正常に作成され、データの書き込みと読み取りが行われました。
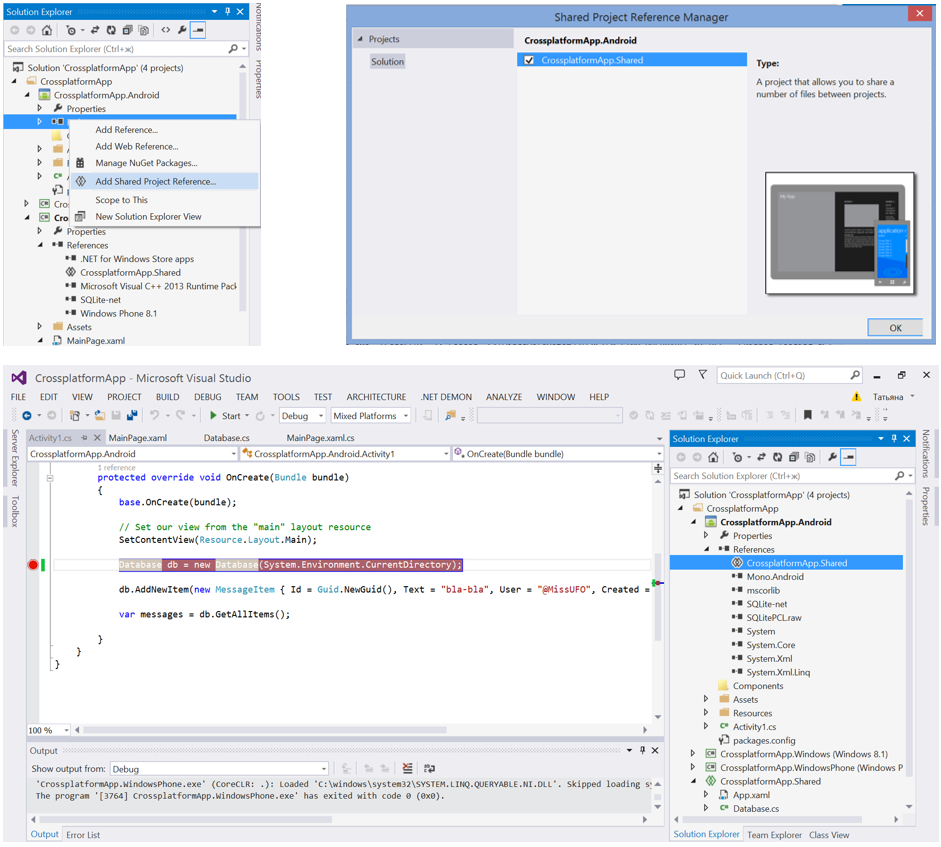
AndroidとiOSの場合、手順はまったく同じに見えます。
共有プロジェクトを
参照として接続し、クラスを使用できます。
おわりに
SQLitePCLの
最新バージョンがリリースされたばかりなので、何か問題
が発生した場合は、
ドキュメントを参照し、問題や質問を
作成者にコードプレックスに書き込みます。
便利なリンク
ダウンロードSQLitePCLSQLiteのドキュメントを読むVisual Studio 2013 Update 2をダウンロードするサイトリンク