こんにちは、%ユーザー名%。
すぐに言わなければならないのは、この投稿の99%がJava EEコネクタアーキテクチャに関するものであり、コード例があるということです。 Fidonetについて1%を獲得したのは、最後に理解できるでしょう。
怠け者のために再開JMSおよびJCA-兄弟受信ボックスはMessageDrivenBeanを受け入れ、発信送信者はConnectionFactoryを介して送信されます。
インバウンド接続の最小パッケージは、アウトバウンド接続の場合は4クラス-8クラスであり、アダプターはアプリケーションサーバー側で構成されます。
さらに-詳細と痛みのみ
そもそも-問題の歴史とビジネス上の問題の解決策。
問題の声明
既存のビジネスシステム(「システムA」)を、何年も前に開発された独自のデータ転送プロトコル(「システムB」)のみを理解する別のシステムと統合するタスクを与えられました。 他の人のシステムを変更することは不可能です;したがって、タスクは特定のバス/プロキシを書くことに要約されます。 統合は、メッセージをある形式から別の形式に変換するプロセスでやり取りすることにあります。
システム「A」には多くの最新の統合メカニズムがあり、最も使いやすいものはWebサービスとして認識されていました。 JEEの標準的な統合スケルトン-JAX-WS + EJB +保証されたメッセージ配信のためのJMSが、この場合に速やかに提出されました。
しかし、システム「B」で動作する標準ツールはありませんでした。 EJBコンテキストからネットワークを操作しようとするTimidの試みは失敗に終わりました。Googleはこの問題に対する2つの解決策を提案しました。 2番目のパスが選択されたことは明らかです。以前はJCAで働いたことはなかったので、何か新しいことを学ぶのは常に面白いです。
リサーチ
Googleを掘り始めて、私はかなり中断しました。 彼らはWHATを書いたすべての場所(コネクター、マネージャー、アダプターなど)を正確に行う必要がありますが、それを行う方法をほとんど書きませんでした。 「他の人のコードを見てプロセスを理解する」標準的な方法は失敗しました-他の人のコードは非常に貧弱であるため、何かを理解することができませんでした。
JSR 322と
google codeで唯一のgoogle adapterの2つが助けになりました。 実際、これが出発点でした。jca-socketsからサンプルを展開し、pdfを開くと、実際の動作を実際に理解して理解し始めました。
調査と実験に約16時間を費やして、次のことがわかりました。
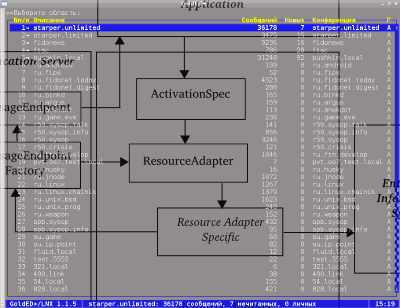
JCAモジュールには、内部にInboxとOutboxの2つの独立した部分があります。 これらのパーツは、一緒にすることも別々にすることもできます。 さらに、いくつかあります。 モジュール自体は
javax.resource.spi.ResourceAdapterを実装するクラスに登録され、
META-INF / ra.xmlで指定され
ますが 、ResourceAdapterは主にInboxでの作業に必要です。 Outboxの場合、アダプターは何もせず、そのスケルトンを埋めることさえできません。
受信トレイ
着信チャネルは
MessageEndpoint 'y(通常は
@MessageDrivenBeanです。はい、JCAはJMSの
根源です)に
バインドし 、
ActivationSpec ' ohmによって
アクティブ化されます。
META-INF / ra.xml -ResourceAdapterおよびインバウンドストリームの説明
ra.xml<connector xmlns="http://xmlns.jcp.org/xml/ns/javaee" xmlns:xsi="http://www.w3.org/2001/XMLSchema-instance" xsi:schemaLocation="http://xmlns.jcp.org/xml/ns/javaee http://xmlns.jcp.org/xml/ns/javaee/connector_1_7.xsd" version="1.7" metadata-complete="true"> <vendor-name>xxx-services</vendor-name> <eis-type>FidoNet</eis-type> <resourceadapter-version>2.5</resourceadapter-version> <resourceadapter> <resourceadapter-class>in.fidonode.binkp.ra.BinkpServerResourceAdapter</resourceadapter-class> <config-property> <config-property-name>version</config-property-name> <config-property-type>java.lang.String</config-property-type> <config-property-value>jnode-jee 2.5 binkp/1.1</config-property-value> </config-property> <inbound-resourceadapter> <messageadapter> <messagelistener> <messagelistener-type>in.fidonode.binkp.ra.BinkpMessageListener</messagelistener-type> <activationspec> <activationspec-class>in.fidonode.binkp.ra.BinkpActivationSpec</activationspec-class> <required-config-property> <config-property-name>listenPort</config-property-name> </required-config-property> <config-property> <config-property-name>listenPort</config-property-name> <config-property-type>java.lang.Integer</config-property-type> <config-property-value>24554</config-property-value> </config-property> </activationspec> </messagelistener> </messageadapter> </inbound-resourceadapter> </resourceadapter> </connector>
BinkpMessageListenerインターフェイスはクライアント用であり、クラスパスにある必要があります。
ここに持ってきます:
public interface BinkpMessageListener { public void onMessage(FidoMessage message); }
次に、
ResourceAdapterの最も単純な実装を検討し
ます。BinkpServerResourceAdapter.java public class BinkpServerResourceAdapter implements ResourceAdapter, Serializable { private static final long serialVersionUID = 1L; private static Logger log = Logger.getLogger(BinkpServerResourceAdapter.class .getName()); private ConcurrentHashMap<BinkpActivationSpec, BinkpEndpoint> activationMap = new ConcurrentHashMap<BinkpActivationSpec, BinkpEndpoint>(); private BootstrapContext ctx; private String version; @Override public void endpointActivation(MessageEndpointFactory endpointFactory, ActivationSpec spec) throws ResourceException { BinkpEndpoint activation = new BinkpEndpoint(ctx.getWorkManager(), (BinkpActivationSpec) spec, endpointFactory); activationMap.put((BinkpActivationSpec) spec, activation); activation.start(); log.info("endpointActivation(" + activation + ")"); } @Override public void endpointDeactivation(MessageEndpointFactory endpointFactory, ActivationSpec spec) { BinkpEndpoint activation = activationMap.remove(spec); if (activation != null) activation.stop(); log.info("endpointDeactivation(" + activation + ")"); } @Override public void start(BootstrapContext ctx) throws ResourceAdapterInternalException { this.ctx = ctx; log.info("start()"); } @Override public void stop() { for (BinkpEndpoint act : activationMap.values()) { act.stop(); } activationMap.clear(); log.info("stop()"); } @Override public XAResource[] getXAResources(ActivationSpec[] arg0) throws ResourceException { return null; } public String getVersion() { return version; } public void setVersion(String version) { this.version = version; } }
ここで何が起こっていますか? JCAモジュールがロードされると、BinkpServerResourceAdapterクラスのインスタンスが作成され、そのパラメーター(この場合はバージョンフィールド)が入力され、start()メソッドが呼び出されます。
実際、start()メソッド内で多くのことができますが、この例では、後で
WorkManagerを取得するためにコンテキストを保存するだけです。
アプリケーションサーバーが
@MessageDrivenBeanを見つけると、Beanが実装するインターフェースにメッセージを送信するアダプターを見つけようとします。 JMSの場合、これは
MessageListenerであり、
BinkpMessageListenerがあります。 ActivationSpecが作成され(
javax.resource.spi.ActivationSpecを実装するBinkpActivationSpecがあります)、activationConfigのデータに従って入力されるフィールド、MessageEndpointFactoryが作成され、ResourceAdapter.endpointActivation()が呼び出されます。 この機能では、MDBにあった構成に基づいて作成するために、tcp / ipサーバーまたはunix-socketで動作するストリームのいずれであっても、着信接続を受け入れる「サーバー」を作成する必要があります。
BinkpEndpointクラスは、まさにこの「サーバー」です。
Binkpendnd.java public class BinkpEndpoint implements Work, FidoMessageListener { private static final Logger logger = Logger.getLogger(BinkpEndpoint.class .getName()); private BinkpServer server; private final WorkManager workManager; private final MessageEndpointFactory messageEndpointFactory; public BinkpEndpoint(WorkManager workManager, BinkpActivationSpec activationSpec, MessageEndpointFactory messageEndpointFactory) { this.workManager = workManager; this.messageEndpointFactory = messageEndpointFactory; server = new BinkpServer(activationSpec.getListenPort(), this); } public void start() throws ResourceException { workManager.scheduleWork(this); } public void stop() { if (server != null) { server.stop(); } } @Override public Message incomingMessage(FidoMessage message) { String message = msg.encode(); BinkpMessageListener listener = (BinkpMessageListener) messageEndpointFactory .createEndpoint(null); listener.onMessage(message); } @Override public void run() { server.start(); } @Override public void release() { stop(); } }
一部のエンドポイントがどこにでも表示されることに気付くかもしれません。 私はこれにいくつかのギャグがあったので、解読します:
エンドポイントは、着信ストリームがリッスンしているものです。 これは、endpointActication関数が適用される場所です。
MessageEndpoint-特定のメッセージを処理するMDBインスタンス。
MessageEndpointFactory.createEndpoint()を呼び出して取得します(この関数はメインスレッドから呼び出すことはできません)。 MDBインターフェースに簡単にキャストできます。
実際には、それだけです。 不要なBinkpServerの実装は省略しますが、原則は明確である必要があります。最小の「インバウンド」JCAは4つのクラス(ResourceAdapter、MessageListener、ActivationSpec、Endpoint)で構成されます。
エンドポイントの作成と着信の処理:
@MessageDriven(messageListenerInterface = BinkpMessageListener.class, activationConfig = { @ActivationConfigProperty(propertyName = "listenPort", propertyValue = "24554") }) public class ReceiveMessageBean implements BinkpMessageListener { @Override public void onMessage(FidoMessage msg) {
発信
そしてここでは、すべてがもっと楽しく、最小の「発信」JCAは最大8クラスで構成されており、これは「着信」の2倍です。 しかし、順番に見てみましょう。
META-INF / ra.xml -ResourceAdapterおよびアウトバウンドストリームの説明
ra.xml <connector xmlns="http://xmlns.jcp.org/xml/ns/javaee" xmlns:xsi="http://www.w3.org/2001/XMLSchema-instance" xsi:schemaLocation="http://xmlns.jcp.org/xml/ns/javaee http://xmlns.jcp.org/xml/ns/javaee/connector_1_7.xsd" version="1.7" metadata-complete="true"> <vendor-name>xxx-services</vendor-name> <eis-type>FidoNet</eis-type> <resourceadapter-version>2.5</resourceadapter-version> <resourceadapter> <resourceadapter-class>in.fidonode.binkp.ra.BinkpServerResourceAdapter</resourceadapter-class> <config-property> <config-property-name>version</config-property-name> <config-property-type>java.lang.String</config-property-type> <config-property-value>jnode-jee 2.5 binkp/1.1</config-property-value> </config-property> <outbound-resourceadapter> <connection-definition> <managedconnectionfactory-class>in.fidonode.binkp.ra.ManagedConnectionFactory</managedconnectionfactory-class> <connectionfactory-interface>in.fidonode.binkp.ra.ConnectionFactory</connectionfactory-interface> <connectionfactory-impl-class>in.fidonode.binkp.ra.ConnectionFactoryImpl</connectionfactory-impl-class> <connection-interface>in.fidonode.binkp.ra.Connection</connection-interface> <connection-impl-class>in.fidonode.binkp.ra.ConnectionImpl</connection-impl-class> </connection-definition> <transaction-support>NoTransaction</transaction-support> <reauthentication-support>false</reauthentication-support> </outbound-resourceadapter> <inbound-resourceadapter> </inbound-resourceadapter> </resourceadapter> </connector>
Connectionおよび
ConnectionFactoryインターフェースはクライアント用であり、クラスパスにある必要があります。 すぐにそれらをここに持ってきてください、面白いものは何もありません。
BinkpClientは提供しません:-)
public interface Connection { public BinkpClient connect(String hostname, int port); } public interface ConnectionFactory { public Connection createConnection(); }
接続は管理対象および管理対象外です。 1つ目-ホイッスル、リスナー、その他、2つ目-なし。
ManagedConnectionFactoryを実装するクラスは、両方のタイプの接続を作成できる必要があります。
ManagedConnectionFactory.java public class ManagedConnectionFactory implements javax.resource.spi.ManagedConnectionFactory { private PrintWriter logwriter; private static final long serialVersionUID = 1L; @Override public Object createConnectionFactory() throws ResourceException { return new ConnectionFactoryImpl(); } @Override public Object createConnectionFactory(ConnectionManager cxManager) throws ResourceException { return new ManagedConnectionFactoryImpl(this, cxManager); } @Override public ManagedConnection createManagedConnection(Subject subject, ConnectionRequestInfo cxRequestInfo) throws ResourceException { return new in.fidonode.binkp.ra.ManagedConnection(); } @Override public PrintWriter getLogWriter() throws ResourceException { return logwriter; } @SuppressWarnings("rawtypes") @Override public ManagedConnection matchManagedConnections(Set connectionSet, Subject subject, ConnectionRequestInfo cxRequestInfo) throws ResourceException { ManagedConnection result = null; Iterator it = connectionSet.iterator(); while (result == null && it.hasNext()) { ManagedConnection mc = (ManagedConnection) it.next(); if (mc instanceof in.fidonode.binkp.ra.ManagedConnection) { result = mc; } } return result; } @Override public void setLogWriter(PrintWriter out) throws ResourceException { logwriter = out; } }
アプリケーションがJEEサーバーからコネクタを要求すると、アプリケーションサーバーは
ManagedConnectionFactoryに
ConnectionFactoryを作成するよう要求し、それをアプリケーションに渡します。
ご覧のとおり、
ConnectionFactoryも管理および非管理です。 原則として、これはすべて1つのクラスに減らすことができますが、何をどのように転送するか、トランザクションがあるかどうかなどに大きく依存します。
ConnectionFactoryImlは
新しいConnectionImpl()を作成するだけですが、
ManagedConnectionFactoryImplはもう少し複雑です。
ManagedConnectionFactoryImpl.java public class ManagedConnectionFactoryImpl implements ConnectionFactory { private ManagedConnectionFactory factory; private ConnectionManager manager; public ManagedConnectionFactoryImpl(ManagedConnectionFactory factory, ConnectionManager manager) { super(); this.factory = factory; this.manager = manager; } @Override public Connection createConnection() { try { return (Connection) manager.allocateConnection(factory, null); } catch (ResourceException e) { return null; } } }
javax.resource.spi.ManagedConnectionを実装する
ManagedConnectionは、ホイッスルとリスナーを追加するだけのConnectionインターフェイスのラッパーです。
ManagedConnectionFactoryImpl.createConnection()から
ConnectionManager.allocateConnection()経由で
接続を作成するときに呼び出す
ManagedConnectionFactory.createManagedConnection()を返すのはこのクラスです。
ManagedConnection.java public class ManagedConnection implements javax.resource.spi.ManagedConnection { private PrintWriter logWriter; private Connection connection; private List<ConnectionEventListener> listeners; public ManagedConnection() { listeners = Collections .synchronizedList(new ArrayList<ConnectionEventListener>()); } @Override public void associateConnection(Object connection) throws ResourceException { if (connection != null && connection instanceof Connection) { this.connection = (Connection) connection; } } @Override public Object getConnection(Subject subject, ConnectionRequestInfo cxRequestInfo) throws ResourceException { if (connection == null) { connection = new ManagedConnectionImpl(); } return connection; } @Override public void cleanup() throws ResourceException { } @Override public void destroy() throws ResourceException { } @Override public PrintWriter getLogWriter() throws ResourceException { return logWriter; } @Override public ManagedConnectionMetaData getMetaData() throws ResourceException { throw new NotSupportedException(); } @Override public XAResource getXAResource() throws ResourceException { throw new NotSupportedException(); } @Override public LocalTransaction getLocalTransaction() throws ResourceException { return null; } @Override public void setLogWriter(PrintWriter out) throws ResourceException { logWriter = out; } @Override public void addConnectionEventListener(ConnectionEventListener listener) { if (listener != null) { listeners.add(listener); } } @Override public void removeConnectionEventListener(ConnectionEventListener listener) { if (listener != null) { listeners.remove(listener); } } }
さて、今、私たちは最も簡単なことになります-接続を実装する:-)
public class ConnectionImpl implements Connection { @Override public BinkpClient connect(String hostname, int port) { return new BinkpClient(hostname, port); } }
アウトバウンド接続を確立する発信コールチェーンManagedConnectionFactory.createConnectionFactory()->
ManagedConnectionFactoryImpl.createConnection()->
onnectionManager.allocateConnection()--->
ManagedConnectionFactory.createManagedConnection()---->
ManagedConnection.getConnection()----->
ManagedConnectionImpl.connect()さて、このアダプタで動作するようにアプリケーションサーバーを構成することを忘れないでください。まあ、jndiを指定してください。
呼び出すコード:
private BinkpClient createBinkpClient(String host, int port) { ConnectionFactory cf = ((ConnectionFactory) new InitialContext().lookup("java:eis/BinkpConnectionFactory")); Connection conn = cf.getConnection(); return conn.connect(host, port); }
そして、フィドはどこにいますか?
そして、ほとんど理由はありません。 実際のところ、元のタスクはbinkpに関するものではなく、機能していたため、NDAの対象となりました。 したがって、JCAを理解し、Habréに関する記事を書くために必要なものを決定した後(振り返ってみると、誰もそのような記事を書いていない理由を理解し始めます。これはトランザクションなしです!)ノードを単一の耳として実行します。 かつて、私がプロジェクトを開始するにはJCAの知識では不十分でした:-)
このために、私は上記の例を書きました、そして、彼らは働きさえしました。 したがって、一般的にJava eeを練習し、特にJava seからリファクタリングする場合は、文字を書いてコードをコミットしてください。 はい、私はまだポイントを取ります。
ご静聴ありがとうございました。 タイプミスはコメントに書くことができます、私はそれらがたくさんあることは間違いありません。