歌詞
過去数か月間、私はさまざまなラップトップコンピューターについて頻繁に議論する必要がありました:製造元が優れている理由と紛争についてのやり取りを破り、GNU / Linuxとの互換性と、このシステムでこのまたはその機能を構成する方法について議論し、定期的に、私は構成を共有するように求められました。 これらの非常に議論の影響を受けて、この記事が生まれました。
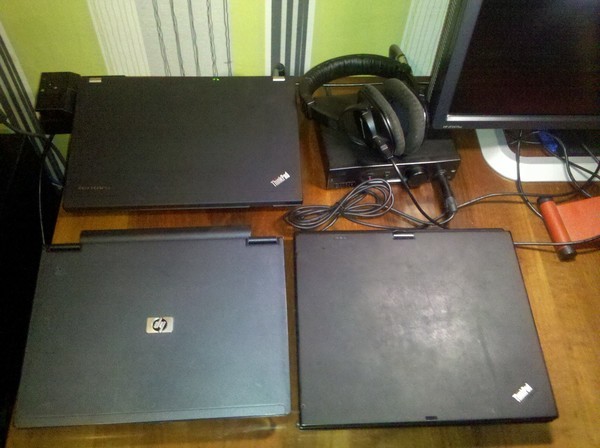
私のコンピューター経験のほとんどは、いわゆる「ビジネスシリーズ」のラップトップを使用しています:IBM ThinkPad 600、HP-Compaq nc2400、Lenovo ThinkPad X61T、Lenovo ThinkPad X220。

Apple ibook G4とAcer aspire 5112の消費者セグメントのコンピューターを中断する必要がある場合は、短い休憩が必要でした。トラックポイントやドッキングステーションのような明白で馴染みのあるものがどれほど不足しているかに気付いたのはまさにその瞬間でした。
これは何ですか 電源コネクタとさまざまな追加ポートを備えたラップトップスタンド。 一部のモデルでは、追加のハードドライブまたはバッテリーを取り付けることができます。 ドッキングステーションを使用すると、毎回ケーブルセット全体を接続し、職場に来て、接続を切断する必要がなくなります。
この構成は、GNU / Linux(私の場合はDebian安定版)の制御下で特に便利です。いくつかのスクリプトはコンピューターの動作を詳細に記述できます。
シナリオの説明
職場では、外部モニターとBluetoothキーボードLenovo ThinkPad kt1255を使用して構成を使用しています。 ラップトップがシャットダウンすることはほとんどなく、代わりにRAMへのサスペンドが使用されます。 ハンドラーのスクリプトについて説明します。
-ふたを閉じた状態でドックで目覚める:外部モニターをオンにし、Bluetoothを有効にしてキーボードを接続し、CPUパフォーマンス
-ドックの蓋を開く:外部モニターを消灯し、画像を内部に転送します
-カバーを開いたまま取り外す:さらにキーボードとbtを無効にし、CPUをオンデマンドで
-ふたを閉じた状態での取り外し:画面をロックし、外部画面を無効にして画像を内部画面に転送し、キーボードとbt-moduleを削減し、CPUをオンデマンドに、pm-suspendに移動します
-ふたを閉じることはドックにありません:画面ロック、午後サスペンド
直接設定
私はDEを使用していません。また、DEに電源管理機能を割り当てる理由はありません。 したがって、acpidを使用して構成します。
通常どおり、必要なプログラムをインストールしてセットアップを開始します。
#apt-get install acpid acpi-support cpufrequtils
次に、ラップトップのドッキング解除時に生成されたイベントを確認します。
#acpi_listen ac_adapter ACPI0003:00 00000080 00000000 ibm/hotkey LEN0068:00 00000080 00006030 thermal_zone LNXTHERM:00 00000081 00000000 battery PNP0C0A:00 00000080 00000001 ibm/hotkey LEN0068:00 00000080 00004011
ドッキング時:
#acpi_listen ibm/hotkey LEN0068:00 00000080 00004010 ac_adapter ACPI0003:00 00000080 00000001 ibm/hotkey LEN0068:00 00000080 00006030 thermal_zone LNXTHERM:00 00000081 00000000 battery PNP0C0A:00 00000080 00000001 button/lid LID close
ThinkPad Mini Dock Series 3がprocインターフェースを提供しないことに注意してください。
イベントのルールを書きましょう:
#vim /etc/acpi/events/thinkpad-dock event=ibm/hotkey LEN0068:00 00000080 00004010 action=/etc/acpi/thinkpad-dock.sh #vim /etc/acpi/events/thinkpad-undock event=ibm/hotkey LEN0068:00 00000080 00004011 action=/etc/acpi/thinkpad-undock.sh
ふたを閉じるための規則は、acpi-supportパッケージに付属しています。 ハンドラスクリプトへのパスを指定して、適切な形式にしましょう。
#vim /etc/acpi/events/lidbtn event=button[ /]lid action=/etc/acpi/lid.sh
次に、最も興味深いものに移りましょう。上記の条件下でのイベントへの反応を記述するスクリプトです。
念のため、90:7F:61:10:A3:BCはキーボードのアドレスであることを説明します。 Bluetoothデバイスは非常に簡単に構成されます。
#apt-get install bluez #bluetoothctl [NEW] Controller 40:2C:F4:BB:3C:FC nethack [default] [bluetooth]# agent on Agent registered [bluetooth]# default-agent Default agent request successful [bluetooth]# scan on Discovery started [CHG] Controller 40:2C:F4:BB:3C:FC nethack [default] [NEW] Device 90:7F:61:10:A3:BC ThinkPad Compact Bluetooth Keyboard with TrackPoint [bluetooth]# pair 90:7F:61:10:A3:BC Attempting to pair with 90:7F:61:10:A3:BC [CHG] Device 90:7F:61:10:A3:BC Connected: yes [agent] PIN code: 12345 # PIN [bluetooth]# connect 90:7F:61:10:A3:BC Attempting to connect to 90:7F:61:10:A3:BC Connection successful
将来、デバイスが接続されたら、転送するだけです
#echo 'connect 90:7F:61:10:A3:BC'| bluetoothctl
スクリプトで使用するもの。
ドッキングハンドラについて説明します。
そして、ドッキング解除:
落とし穴
systemdがシステムに表示されるdebian 8にアップグレードした後、次の問題に遭遇しました:ふたを閉じると、何らかの理由でpm-suspendが2回機能しました。 つまり、lid.shスクリプトが実行されましたが、それと並行して、スクリプトバインドなしでpm-suspendアクションが実行されました。
もちろん、主な容疑者は新しい初期化コンバインでした。 無駄ではありません:10分間グーグルで調べた結果、systemdはヒープに、acpiイベント管理機能を引き継ごうとしていることが判明しましたが、当分はあまりうまくいっていません:現時点では、電源アダプターとバッテリーを接続するイベントを処理できません。
ファッションの新しいトレンドの下でスクリプトを書き直すために、次のことが行われたため、欲求も生じませんでした。
#sed -i 's/HandleLidSwitch=yes/HandleLidSwitch=ignore/' /etc/systemd/logind.conf
したがって、我々は彼らが求めていないことをするためにsystemdを離乳させ、すべてが適切に落ちました。 acpidを介してクリックを処理する場合は、原則として、HandleSuspendKey、HandleHibernateKey、およびHandlePowerKeyで同じことを行う必要があります。
おわりに
したがって、不要なルーチン操作を必要としない便利な構成が得られます。 午前中に仕事に着くと、私はラップトップをバックパックから取り出し、ドックに挿入し、このドック自体の電源ボタンを押します。その後、固定コンピューターのように作業します。 離れるときは、アンドックボタンを押して、コンピューターをバックパックに入れます。
このアプローチの欠点はまさに1つです。非常に中毒性があります。