良い一日。 この記事では、javafx.scene.layoutのクラスの操作の基本について説明します。 また、JavaFxクラス階層について簡単に説明します。
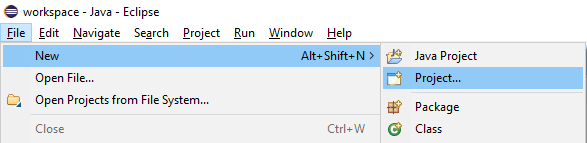
Eclipseとe(fx)lipseプラグインをインストールした後、新しいプロジェクトを作成します。
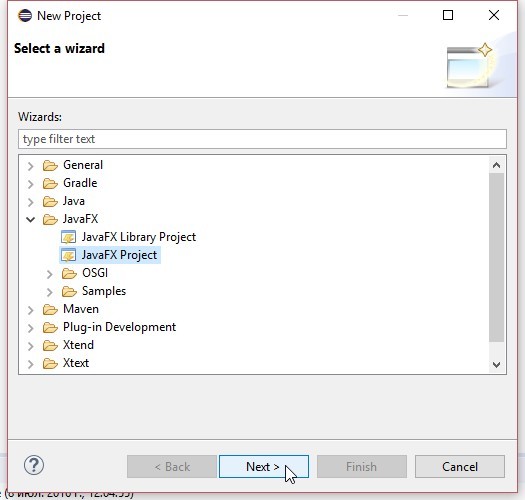
JavaFxプロジェクトを選択します。
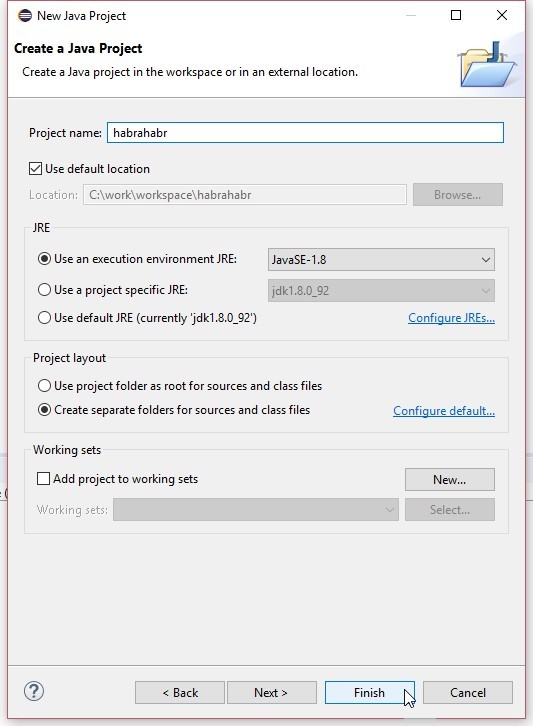
プロジェクトをセットアップします。
デフォルトでは、Eclipseは次のスタブを作成します。
package application; import javafx.application.Application; import javafx.stage.Stage; import javafx.scene.Scene; import javafx.scene.layout.BorderPane; public class Main extends Application { @Override public void start(Stage primaryStage) { try { BorderPane root = new BorderPane(); Scene scene = new Scene(root,400,400); scene.getStylesheets().add(getClass().getResource("application.css").toExternalForm()); primaryStage.setScene(scene); primaryStage.show(); } catch(Exception e) { e.printStackTrace(); } } public static void main(String[] args) { launch(args); } }
ルートノードはシーンに追加され、それは親(子を持つことができるノード)から継承されたクラスである必要があり、ルートノードはシーン(ノードグラフのコンテンツ全体の特別なコンテナー)に追加され、次にステージに表示されます。
JavaFxクラスの階層を見てみましょう。
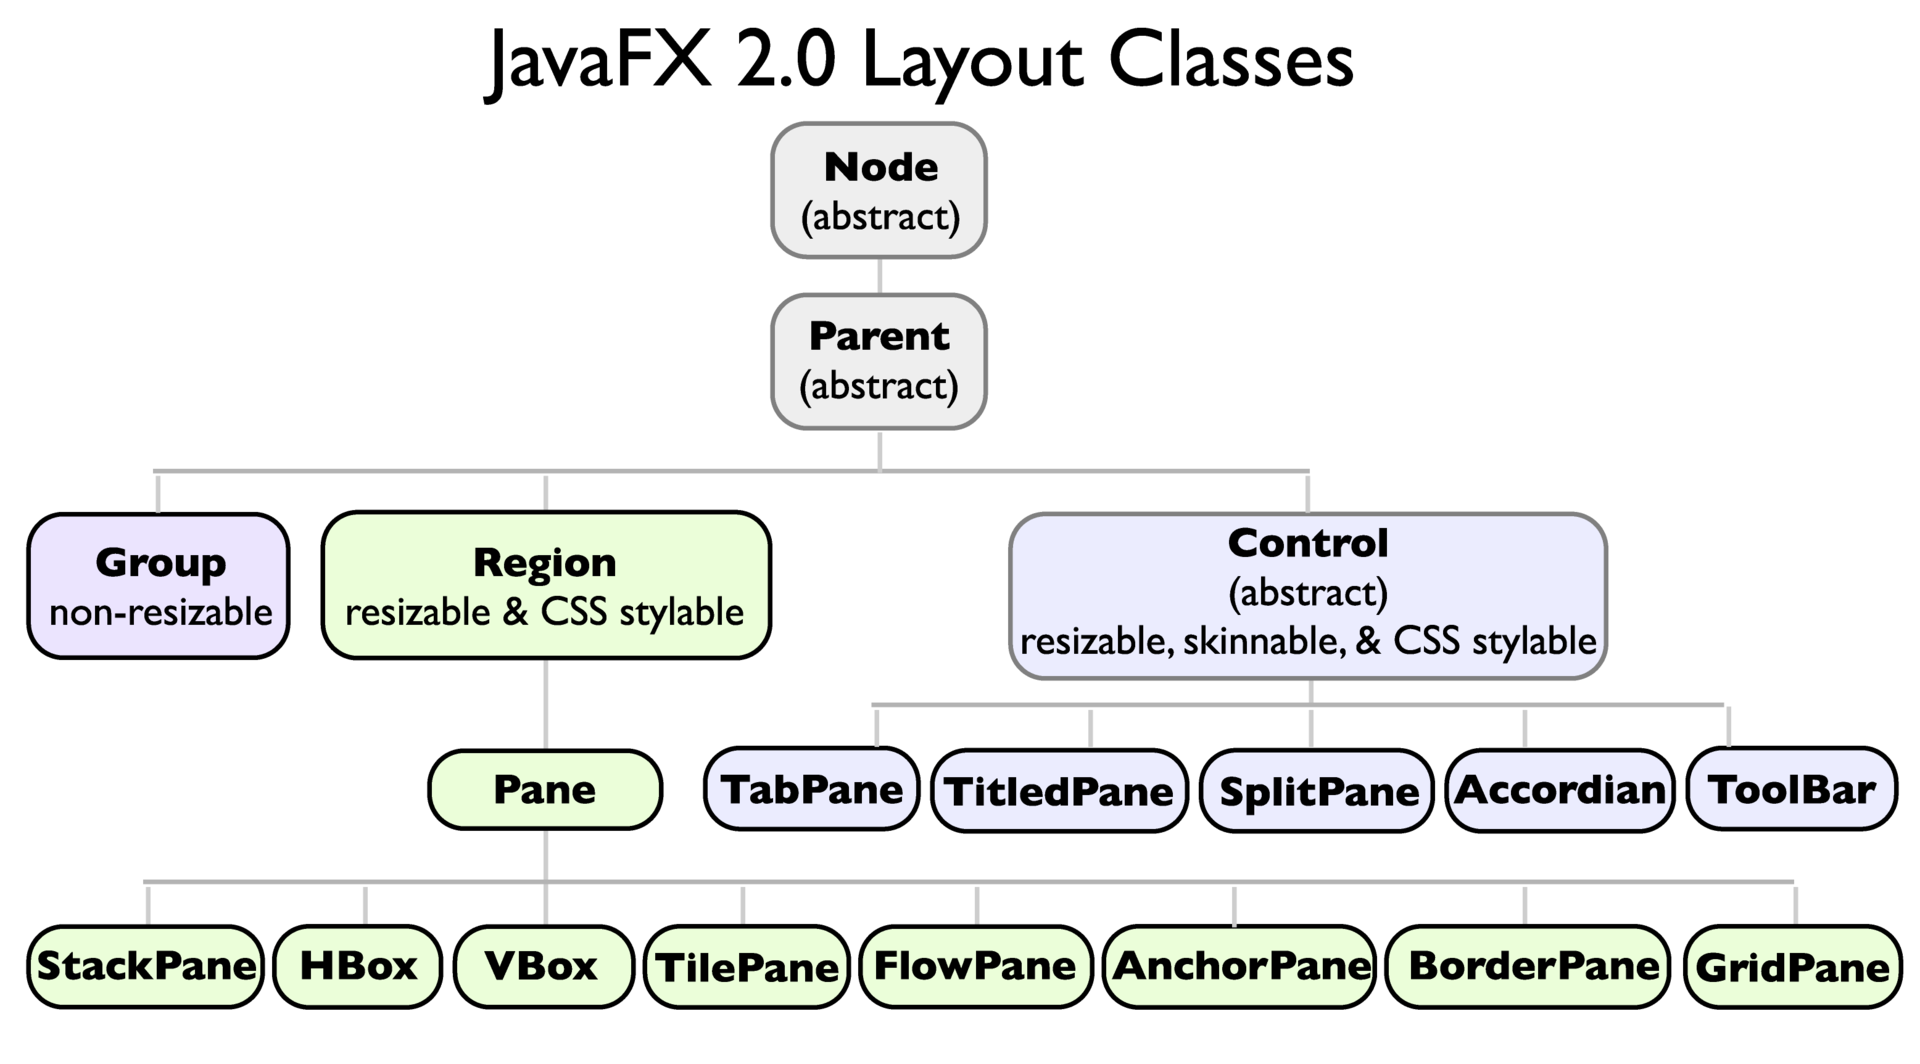
最も基本的な抽象クラスはNode-シーングラフのノードであり、相続人がサイズを調整するためのフィールドが提供されます: 。
ノード座標:getLayoutX()およびgetLayoutY()
relocate(double x、double y) -ノードの座標を変更します。各座標の位置を個別に調整する必要がある場合は、
setLayoutX(double value)および
setLayoutY(double value)を使用しますノードグラフの階層とその設定に応じて、レイアウト中に設定される座標と寸法(優先、つまり優先)が、予想されるものと異なる場合があることを理解することが重要です。 少し後で例を示します。
ノードには子を含めることはできません;これは論理的であり、これには、子を追加および削除できるNodeの
親の直接の子孫があります。 ところで、ノードを表すが子ノードを含まないクラスがあります:Camera、Canvas、ImageView、LightBase、MediaView、Parent、Shape、Shape3D、SubScene、SwingNode。
今日は、
Regionクラス(すべてのlayuatコンテナの基本クラス)の継承者のサブグループに興味があります。特に、日常の開発で最も頻繁に必要なパネルについて、Paneクラスの主要な子孫について説明します。
ボーダーパン
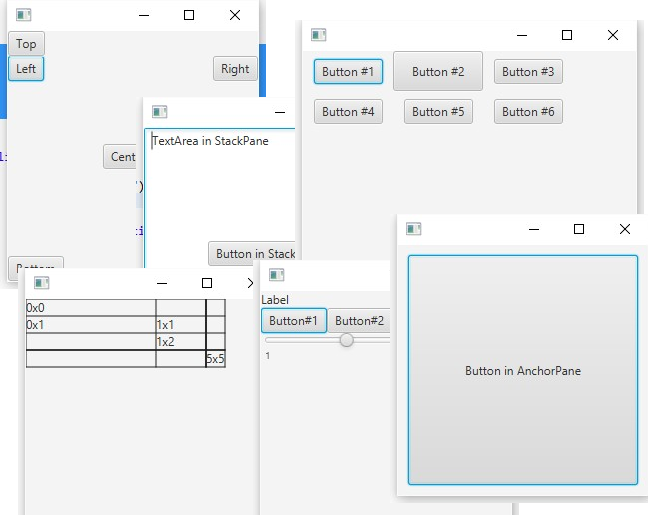
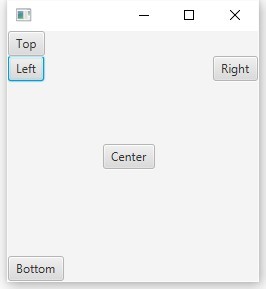
これは、子ノードを上(setTop(ノード))、下(setBottom(注))、左(setLeft(ノード))、右(setRight(ノード))、中央(setCenter(ノード))の位置に追加する特別なパネルです。 BotderPaneのこれらすべての位置にあるいくつかのボタン:
BorderPane root = new BorderPane(); root.setLeft(new Button("Left")); root.setTop(new Button("Top")); root.setRight(new Button("Right")); root.setBottom(new Button("Bottom")); root.setCenter(new Button("Center"));
上部と下部のセクションが優先されるため、残りの高さを絞り込みます。
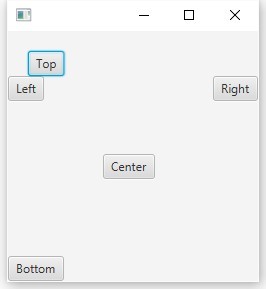
上部のボタンなどで座標を設定しようとする場合:
BorderPane root = new BorderPane(); root.setLeft(new Button("Left")); Button topButton = new Button("Top"); topButton.setLayoutX(20.0); topButton.setLayoutY(20.0); root.setTop(topButton); root.setRight(new Button("Right")); root.setBottom(new Button("Bottom")); root.setCenter(new Button("Center"));
ボタンはその位置を変更しません、なぜこれが起こっているのですか?
BorderPaneクラスの
layoutChildrenメソッドで子を配置する場合、すべての設定を考慮して、各ノードの位置が再定義されます。 たとえば、すべてのパネルのベースなど、追加の適切なコンテナにボタンを配置(ラップ)するなど、いくつかの解決策があります。
ペイン
BorderPane root = new BorderPane(); root.setLeft(new Button("Left"));
ペインは子供の位置を再定義しないため、望ましいバイアスが得られます。
ボタンをラップすることはできませんが、静的な
setMargin(ノードの子、インセット値)メソッドを使用してインデントに設定するだけです:
BorderPane.setMargin(topButton, new Insets(20.0));
Insetsはインデントを設定するためのヘルパークラスであり、コンストラクターはオーバーロードされ、すべての側面に対して1つの引数を取り、各側面に対して個別に1つの引数を取ることができます。

下と右からインデントを削除し、目的のボタンオフセットを取得します。
BorderPane.setMargin(topButton, new Insets(20.0, 0.0, 0.0, 20.0));
スタックパン
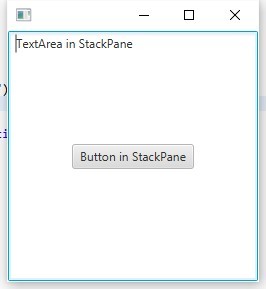
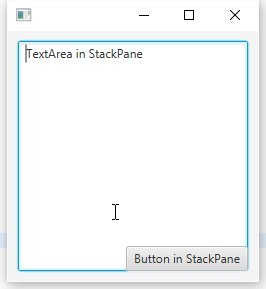
次に、パネルが子に位置を強制するだけでなく、幅と高さ全体にそれらを伸ばし、コンテンツ領域全体を埋め、BorderPaneを置き換え、そこにTextAreaとButtonを最初に追加する状況を見てみましょう。
StackPane root = new StackPane(); root.getChildren().add(new TextArea("TextArea in StackPane")); root.getChildren().add(new Button("Button in StackPane")); Scene scene = new Scene(root,250,250);
ところで、このメソッドを使用して、いくつかのノードを希望の順序で追加できます。
root.getChildren().addAll(Node1, Node2, ....);
表示されているとおり、テキストフィールドはパネル全体に広がり、ボタンは中央に配置されています。
センタリングは
setAlignment(Pos)を使用して調整できます
root.setAlignment(Pos.BOTTOM_RIGHT);
setPaddingによるインデント(インセット)
root.setPadding(new Insets(10.0));
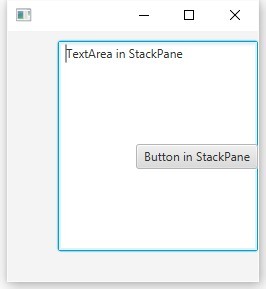
静的メソッドを使用して、各ノードのセンタリングとインデントをカスタマイズできます。
StackPane root = new StackPane(); TextArea textArea = new TextArea("TextArea in StackPane"); StackPane.setMargin(textArea, new Insets(10.0, 0.0, 30.0, 50.0)); Button button = new Button("Button in StackPane"); StackPane.setAlignment(button, Pos.CENTER_RIGHT); root.getChildren().addAll(textArea, button);
結果:
アンカーパン
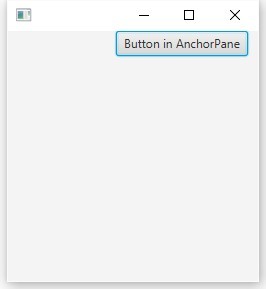
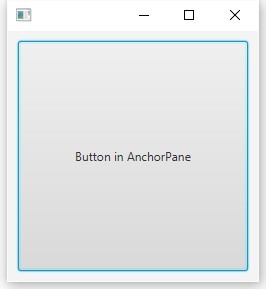
アンカーパネルを使用すると、子ノードオフセットのエッジをパネルのエッジにスナップできます。例を考えてみましょう。
ボタンを追加して、右端にスナップします。
AnchorPane root = new AnchorPane();
Button button = new Button("Button in AnchorPane");
root.getChildren().add(button);
AnchorPane.setRightAnchor(button, 10.0);
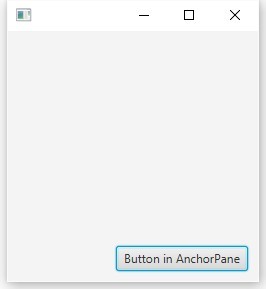
下端にスナップを追加します。
AnchorPane.setBottomAnchor(button, 10.0);
今、左端と上部に:
AnchorPane.setRightAnchor(button, 10.0); AnchorPane.setTopAnchor(button, 10.0);
これで、ボタンの端がパネルの端にしっかりと接続され、ウィンドウのドラッグを開始すると、ボタンも伸縮します。
グリッドパン
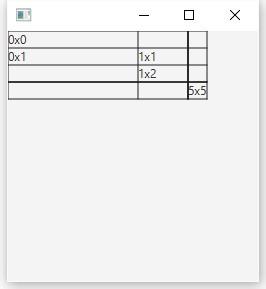
非常に便利なグリッドパネルを検討してください。このパネルに子を追加するには、最初のパラメーターをノードに追加するaddメソッド(Node child、int columnIndex、int rowIndex)を使用する必要があります。
GridPane root = new GridPane();
ノードを任意のセルに追加でき、空の列と行が自動的に作成されることがわかります。

列を操作するには、特別なクラス
ColumnConstraintsがあります。このため、たとえば、最初の列の幅を130、2番目の列の幅を20%に設定する場合、列を作成して構成し、GridPaneに追加する必要があります。
GridPane root = new GridPane(); root.setGridLinesVisible(true); root.add(new Label("0x0"), 0, 0); root.add(new Label("0x1"), 0, 1); root.add(new Label("1x1"), 1, 1); root.add(new Label("1x2"), 1, 2); root.add(new Label("5x5"), 5, 5);
取得するもの:
これらは最も基本的な機能です。GridPane設定のすべての複雑さをカバーするために、別の記事を書く必要があります。
フローパン
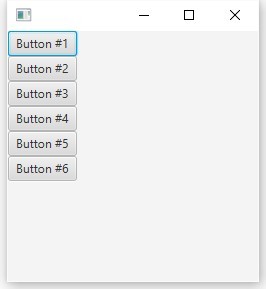
すぐに、たとえば、そこからすべてがすぐに明らかになり、FlowPaneに6つのボタンを追加します。
FlowPane root = new FlowPane(); root.getChildren().add(new Button("Button #1")); root.getChildren().add(new Button("Button #2")); root.getChildren().add(new Button("Button #3")); root.getChildren().add(new Button("Button #4")); root.getChildren().add(new Button("Button #5")); root.getChildren().add(new Button("Button #6"));
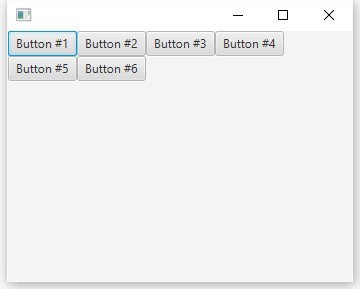
結果を見てみましょう、ボタンは次々に表示されます(デフォルトでは、FlowPaneには水平出力Orientation.HORIZONTALがあります)
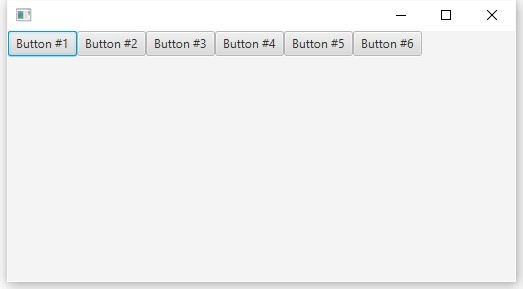
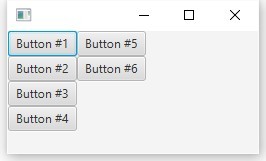
これで、ウィンドウの幅が縮小されると、子ノードがラップし始めることがわかります。
したがって、垂直方向を設定すると
root.setOrientation(Orientation.VERTICAL);
ウィンドウの高さを減らすと、転送が行われます:
要素間の垂直および水平マージンは、次を使用してカスタマイズできます。
root.setVgap(8); root.setHgap(4);
タイルパンこのパネルの動作はFlowPaneの動作と似ています。違いは、子ノードが同じサイズのセルのグリッドに配置されることです。前の例を示しますが、今回は1つのボタンを他のボタンより大きくします。

ご覧のとおり、すべてのノードは同じサイズの「タイル」にあり、最大のノードにまたがっています。
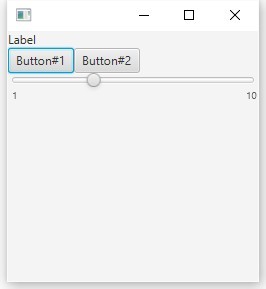
HBoxおよびVBox
これらは通常の水平および垂直リストであり、それらを組み合わせて目的の結果を実現します。
VBox root = new VBox(); HBox hBox = new HBox(); hBox.getChildren().addAll(new Button("Button#1"), new Button("Button#2")); Slider slider = new Slider(1.0, 10.0, 4.0); slider.setShowTickLabels(true); root.getChildren().add(new Label("Label")); root.getChildren().addAll(hBox, slider);
これらはすべて、ペインクラスの子孫です。ご覧いただきありがとうございます。