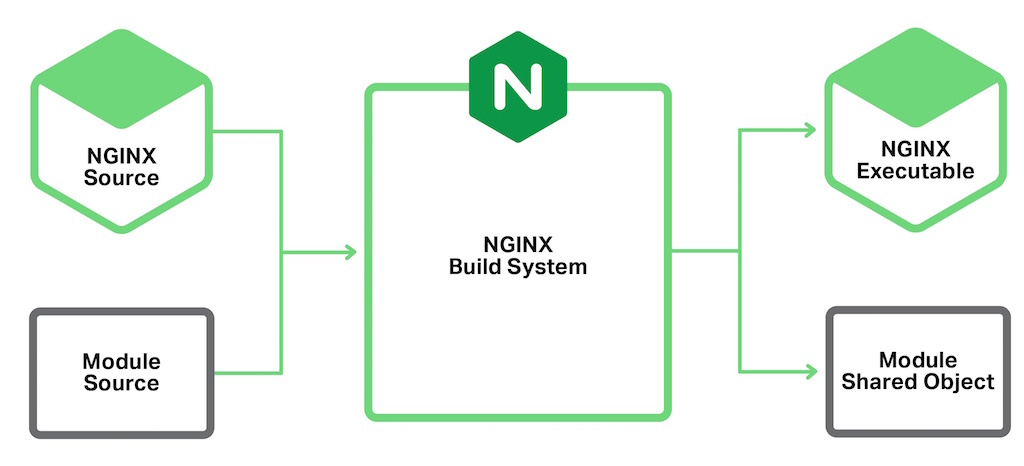
この記事では、現在のインストールでnginxに動的モジュールをコンパイルしてインストールする方法を説明します。
Webサーバーをインストールする必要があり、さらに適切なモジュールを備えた適切なサーバーをインストールする必要がある状況に多くの人が遭遇したと思います。 このため、nginxは他に類をみません。 そして、特に最初にそれを置いた場合、あなたはおそらく何をしているでしょうか? タイピング
apt-get install nginx yum install nginx
次に、http2でモジュールを試してみるか、echoモジュールを使用するか、またはPassengerモジュールをnginxに接続してRubyスクリプトを処理するためのサポートを追加することに気付きます。
以前にApache2を使用したことがある場合、失望するでしょう。 リポジトリからモジュールを取得して配置し、コンソール(a2enmod)でアクティブ化することはできません。
バージョン1.9.11以降、nginxは動的モジュールをサポートしています。 Apacheほどインストールは簡単ではありませんが、難しくはありません。今から分析します。
もちろん、nginx開発者自身による既製の動的モジュールがあり、カブからインストールできます。
sudo apt-get install nginx-module-geoip
しかし、ここではサードパーティのモジュールについて話しています。
nginxをゼロからコンパイルしないために、必要なモジュールを指定してから、システムの構成、パスなどを変更します。 -現在のnginxインストールに動的モジュールを追加できます。
これには次のものが必要です。
- サーバー上のバージョンに対応するnginxソース( nginx -vを使用してバージョンを確認できます)。 ここからソースをダウンロードしてください 。
- Passengerをインストールしました(その動的モジュールをnginxに追加するため)
- 基本的なnginxパッケージにはない、必要な他のモジュールのソース: Echoモジュール
現在のnginxインストールにモジュールを追加するには、ビルドされたパラメーターを調べる必要があります。 新しいモジュールのみが存在するパラメーターで収集すると、nginxはそのようなモジュールの使用を許可せず、誓います。
nginxがインストールされたパラメーター(リポジトリーを含む)を調べるには、コマンドを入力する必要があります
nginx -V
出力は次のようになります。
--prefix=/etc/nginx --sbin-path=/usr/sbin/nginx --modules-path=/usr/lib64/nginx/modules --conf-path=/etc/nginx/nginx.conf --error-log-path=/var/log/nginx/error.log --http-log-path=/var/log/nginx/access.log --pid-path=/var/run/nginx.pid --lock-path=/var/run/nginx.lock --http-client-body-temp-path=/var/cache/nginx/client_temp --http-proxy-temp-path=/var/cache/nginx/proxy_temp --http-fastcgi-temp-path=/var/cache/nginx/fastcgi_temp --http-uwsgi-temp-path=/var/cache/nginx/uwsgi_temp --http-scgi-temp-path=/var/cache/nginx/scgi_temp --user=nginx --group=nginx --with-http_ssl_module --with-http_realip_module --with-http_addition_module --with-http_sub_module --with-http_dav_module --with-http_flv_module --with-http_mp4_module --with-http_gunzip_module --with-http_gzip_static_module --with-http_random_index_module --with-http_secure_link_module --with-http_stub_status_module --with-http_auth_request_module --with-http_xslt_module=dynamic --with-http_image_filter_module=dynamic --with-http_geoip_module=dynamic --with-http_perl_module=dynamic --with-threads --with-stream --with-stream_ssl_module --with-http_slice_module --with-mail --with-mail_ssl_module --with-file-aio --with-ipv6 --with-http_v2_module --with-cc-opt='-O2 -g -pipe -Wall -Wp,-D_FORTIFY_SOURCE=2 -fexceptions -fstack-protector-strong --param=ssp-buffer-size=4 -grecord-gcc-switches -m64 -mtune=generic'
ここに必要なモジュールを追加するだけです。
--add-dynamic-module=/usr/share/passenger/ngx_http_passenger_module --add-dynamic-module=/tmp/echo-nginx-module --with-http_v2_module
、ここで
/ usr / share / passenger / ngx_http_passenger_moduleはPassengerモジュールへのパスであり、システムにインストールされた後に表示されます。
/ tmp / echo-nginx-module -Echoモジュールのクローンリポジトリのパス。
結果は1つのコマンドです。
./configure --prefix=/etc/nginx --sbin-path=/usr/sbin/nginx --modules-path=/usr/lib64/nginx/modules --conf-path=/etc/nginx/nginx.conf --error-log-path=/var/log/nginx/error.log --http-log-path=/var/log/nginx/access.log --pid-path=/var/run/nginx.pid --lock-path=/var/run/nginx.lock --http-client-body-temp-path=/var/cache/nginx/client_temp --http-proxy-temp-path=/var/cache/nginx/proxy_temp --http-fastcgi-temp-path=/var/cache/nginx/fastcgi_temp --http-uwsgi-temp-path=/var/cache/nginx/uwsgi_temp --http-scgi-temp-path=/var/cache/nginx/scgi_temp --user=nginx --group=nginx --with-http_ssl_module --with-http_realip_module --with-http_addition_module --with-http_sub_module --with-http_dav_module --with-http_flv_module --with-http_mp4_module --with-http_gunzip_module --with-http_gzip_static_module --with-http_random_index_module --with-http_secure_link_module --with-http_stub_status_module --with-http_auth_request_module --with-http_xslt_module=dynamic --with-http_image_filter_module=dynamic --with-http_geoip_module=dynamic --with-http_perl_module=dynamic --with-threads --with-stream --with-stream_ssl_module --with-http_slice_module --with-mail --with-mail_ssl_module --with-file-aio --with-ipv6 --with-http_v2_module --with-cc-opt='-O2 -g -pipe -Wall -Wp,-D_FORTIFY_SOURCE=2 -fexceptions -fstack-protector-strong --param=ssp-buffer-size=4 -grecord-gcc-switches -m64 -mtune=generic' -add-dynamic-module=/usr/share/passenger/ngx_http_passenger_module --add-dynamic-module=/tmp/echo-nginx-module --with-http_v2_module
実行します。
nginxのモジュールを収集および更新します。
make modules sudo make install
その後、現在のnginxが更新され、必要なモジュールが追加され、動的モジュールが/ etc / nginx / modulesフォルダーに配置されます。
nginxでそれらを使用するには、次の行をグローバルnginx構成(/etc/nginx/nginx.conf)のファイルの先頭に追加するだけです。
load_module modules/ngx_http_passenger_module.so;
load_module modules/ngx_http_echo_module.so;
できた! Webサーバーを再起動し、必要なモジュールを楽しんでください:
service nginx reload
追伸 この記事を知っている人にとってキャプテンであることを理解しています。 しかし、これに遭遇しておらず、ソフトウェアのコンパイルを恐れている人にとっては、この記事は、nginxに新しいモジュールや興味深いモジュールを簡単に追加するのに役立ちます。