こんにちは この記事は、 Core Data Frameworkが最小限の開発者を対象としています。 Core Dataは、デバイスにデータを保存し、それと対話するためのフレームワークであることを思い出させてください。 この主題に関するロシア語の記事がハブとネットワーク上にたくさんあるので、コンテンツを繰り返す必要はありません。
多くの場合初心者 特にスタックオーバーフロー 開発者はCore Data Frameworkを使用するのが怖いので怖いです。または、機能のごく一部しか使用していません。 実際には、このフレームワークのクラスの基本機能の知識により、開発者はモデルを簡単に操作できます。
この記事では、次の点に焦点を当てたいと思います。
- モデルからデータを取得するクエリを作成するために使用される
NSFetchRequestクラスを見てNSFetchRequestます。 その基本的な特性とケースをアプリケーションで調べます。 - 例として
NSFetchRequestを使用して、 NSFetchRequestを使用して抽出されたデータを効率的に提示する際に、 NSFetchedResultsController機能と操作を詳細にNSFetchedResultsController NSFetchRequest 。

デモプロジェクトの説明
「実験を設定する」デモプロジェクトは非常に原始的です。 これには、 UITableViewを含むModelとViewControllerが含まれUITableView 。
具体的には、製品の名前と価格の一般的なリストを使用します。
モデル
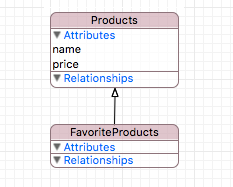
モデルには、 name属性とprice属性を持つProductsと、これらの属性を継承するFavoriteProducts name 2つのエンティティが含まれます。
たとえば、ランダムな価格( 1000 )とリストからの製品名を持つ特定の数の製品をデータベースに入力します: ””, “”, “”, “”, “ «»”, “ «»”, “”, “” 。
コントローラー
コードを使用して、コントローラーでテーブルを初期化し、フルスクリーンに配置します。
Objective-c - (UITableView *)tableView { if (_tableView != nil) return _tableView; _tableView = [[UITableView alloc] initWithFrame:CGRectZero style:UITableViewStyleGrouped]; _tableView.backgroundColor = [UIColor whiteColor]; _tableView.dataSource = self; return _tableView; } - (void)loadView { [super loadView]; [self.view addSubview:self.tableView]; } - (void)viewDidLayoutSubviews { [super viewDidLayoutSubviews]; _tableView.frame = self.view.frame; }
スイフト var tableView: UITableView = { let tableView = UITableView(frame: CGRectZero, style: .Grouped) tableView.backgroundColor = UIColor.whiteColor() return tableView }() override func loadView() { super.loadView() self.view.addSubview(tableView) } override func viewDidLoad() { super.viewDidLoad() tableView.dataSource = self } override func viewDidLayoutSubviews() { super.viewDidLayoutSubviews() tableView.frame = self.view.frame }
データ抽出
NSManagedObjectContext executeFetchRequest(_:)メソッドを使用して、モデルからデータが抽出されます。 このメソッドの引数は、クエリクエリNSFetchRequestこの記事の主人公です。
Objective-c NSManagedObjectContext *context = [[CoreDataManager instance] managedObjectContext]; NSEntityDescription *entityDescription = [NSEntityDescription entityForName:@"Products" inManagedObjectContext:context]; NSFetchRequest *request = [[NSFetchRequest alloc] init]; request.entity = entityDescription; NSError *error = nil; NSArray* objects = [context executeFetchRequest:request error:&error];
スイフト let context = CoreDataManager.instance.managedObjectContext let entityDescription = NSEntityDescription.entityForName("Products", inManagedObjectContext: context) let request = NSFetchRequest() request.entity = entityDescription do { let objects = try context.executeFetchRequest(request) } catch { fatalError("Failed to fetch employees: \(error)") }
executeFetchRequest(_:)メソッドの戻り値の型は、 NSManagedObjectオブジェクトのexecuteFetchRequest(_:)配列です。 明確にするために、モデルから抽出された要素を印刷して、出力を変換します。
おわりに NAME: , PRICE: 156 NAME: , PRICE: 425 NAME: , PRICE: 85 NAME: «», PRICE: 400 NAME: , PRICE: 920 NAME: «», PRICE: 861 NAME: , PRICE: 76 NAME: , PRICE: 633 NAME: , PRICE: 635 NAME: «», PRICE: 718 NAME: , PRICE: 701 NAME: , PRICE: 176 NAME: , PRICE: 731 NAME: «», PRICE: 746 NAME: , PRICE: 456 NAME: , PRICE: 519 NAME: «», PRICE: 221 NAME: , PRICE: 560 NAME: «», PRICE: 646 NAME: , PRICE: 492 NAME: , PRICE: 185 NAME: , PRICE: 539 NAME: «», PRICE: 872 NAME: , PRICE: 972 NAME: , PRICE: 821 NAME: , PRICE: 409 NAME: , PRICE: 334 NAME: , PRICE: 734 NAME: , PRICE: 448 NAME: «», PRICE: 345
NSFetchRequestクラスの基本的なメソッドとプロパティ
上で言ったように、 NSFetchRequestクラスNSFetchRequest 、モデルからデータを取得するためのクエリとして使用されます。 このツールを使用すると、データベースからオブジェクトを抽出する段階で、オブジェクトのフィルタリングと並べ替えのルールを設定できます。 この操作は、最初にすべてのオブジェクトを抽出する場合(そして10,000以上ある場合)よりも何倍も効率的かつ生産的になります。そして、目的のデータを手動でソートまたはフィルター処理します。
このクラスの基本的なプロパティを知っていれば、追加のアルゴリズムや松葉杖を開発することなく、クエリで簡単に操作し、特定の選択を取得できます。すべてがCore Data既に実装されています。 始めましょう。
sortDescriptors
Objective-c @property (nonatomic, strong) NSArray <NSSortDescriptor *> *sortDescriptors
スイフト var sortDescriptors: [NSSortDescriptor]?
NSSortDescriptorクラスのオブジェクトの配列であるsortDesctriptors 、クラスプロパティの概要を開始したいと思います。 ソートメカニズムが実装されるのは、それらの助けを借りてです。 ソート記述子の使用方法については、 Appleポータルを参照してください。 このプロパティは、並べ替え記述子の配列を受け入れます。これにより、いくつかの並べ替え規則を使用できます。 この使用の優先順位は、キューのルール(FIFO、先入れ先出し)と同等です。オブジェクトが配列内にあるインデックスが小さいほど、ソートの優先順位が高くなります。
使用例
便宜上、このリストを最初に製品名でソートし、ソートキーで名前属性nameを指定してから価格でソートします。 名前をアルファベット順に並べ替え、価格を昇順で並べ替えます。 これを行うには、両方の述語のascending値をブール値trueに設定しtrue (ブール値false降順でソートするために使用されます)。
Objective-c NSSortDescriptor *nameSortDescriptor = [[NSSortDescriptor alloc] initWithKey:@"name" ascending:YES]; NSSortDescriptor *priceSortDescriptor = [[NSSortDescriptor alloc] initWithKey:@"price" ascending:YES]; fetchRequest.sortDescriptors = @[nameSortDescriptor, priceSortDescriptor];
スイフト let nameSortDescriptor = NSSortDescriptor(key: "name", ascending: true) let priceSortDescriptor = NSSortDescriptor(key: "price", ascending: true) fetchRequest.sortDescriptors = [nameSortDescriptor, priceSortDescriptor]
ソート結果 NAME: , PRICE: 185 NAME: , PRICE: 334 NAME: , PRICE: 731 NAME: , PRICE: 972 NAME: , PRICE: 156 NAME: , PRICE: 492 NAME: , PRICE: 701 NAME: , PRICE: 821 NAME: , PRICE: 76 NAME: , PRICE: 85 NAME: , PRICE: 176 NAME: , PRICE: 425 NAME: , PRICE: 448 NAME: , PRICE: 539 NAME: , PRICE: 635 NAME: «», PRICE: 345 NAME: «», PRICE: 646 NAME: «», PRICE: 718 NAME: «», PRICE: 746 NAME: «», PRICE: 861 NAME: «», PRICE: 872 NAME: «», PRICE: 221 NAME: «», PRICE: 400 NAME: , PRICE: 409 NAME: , PRICE: 633 NAME: , PRICE: 734 NAME: , PRICE: 456 NAME: , PRICE: 519 NAME: , PRICE: 560 NAME: , PRICE: 920
述語
Objective-c @property (nonatomic, strong) NSPredicate *predicate
スイフト var predicate: NSPredicate?
検討中の次のプロパティは、データをフィルタリングするための強力で高速なツールであるNSPredicateクラスのpredicateです。 述語の使用に関するAppleの優れたガイドがあります( Translation )。 データは、前述のガイドで説明されている述語の特別な文字列構文のため、要求に応じて除外されます。
使用例
簡単な例から始めましょう。私たちは乳製品ソーセージの情熱的な愛好家であり、製品リストに掲載されている価格を知りたいと思っています。 これを行うために、述語で、名前属性nameが行" «»" 。に等しいオブジェクトを取得することを示します。
Objective-c NSPredicate *predicate = [NSPredicate predicateWithFormat:@"name == %@", @" «»"]; fetchRequest.predicate = predicate;
スイフト let predicate = NSPredicate(format: "name == %@", " «»") fetchRequest.predicate = predicate
結果 NAME: «», PRICE: 400 NAME: «», PRICE: 221
等価演算子==を使用して述語を正しく構成するには、大文字と小文字を区別して文字列値を指定する必要があることに注意してください。
乳製品だけでなく、あらゆる種類のソーセージの価格を確認したい場合はどうすればよいですか? これを行うには、 CONTAINS演算子(左の式は[cd]を追加します。 AND演算子が役立ついくつかの条件を使用することもできます。 値によって結果を制限-最大500通貨単位。
Objective-c NSPredicate *predicate = [NSPredicate predicateWithFormat:@"name CONTAINS[cd] %@ AND price < %d", @"", 500]; fetchRequest.predicate = predicate;
スイフト let predicate = NSPredicate(format: "name CONTAINS[cd] %@ AND price < %d", "", 500) fetchRequest.predicate = predicate
結果 NAME: «», PRICE: 400 NAME: «», PRICE: 221 NAME: «», PRICE: 345
fetchLimit
Objective-c @property (nonatomic) NSUInteger fetchLimit
fetchLimitプロパティを使用fetchLimitと、取得するオブジェクトの数を制限できfetchLimit 。
使用例
実証するために、製品リストから最も安い12個の製品を取得します。 これを行うには、価格と回復可能なオブジェクトの数の制限による並べ替えを追加します12 。
スイフト // let priceSortDescriptor = NSSortDescriptor(key: "price", ascending: true) fetchRequest.sortDescriptors = [priceSortDescriptor] // = 12 fetchRequest.fetchLimit = 12
結果 NAME: , PRICE: 76 NAME: , PRICE: 85 NAME: , PRICE: 156 NAME: , PRICE: 176 NAME: , PRICE: 185 NAME: «», PRICE: 221 NAME: , PRICE: 334 NAME: «», PRICE: 345 NAME: «», PRICE: 400 NAME: , PRICE: 409 NAME: , PRICE: 425 NAME: , PRICE: 448
fetchOffset
Objective-c @property (nonatomic) NSUInteger fetchOffset
このプロパティを使用すると、指定したオブジェクト数だけ選択結果をシフトできます。
使用例
このプロパティの操作を示すために、前のクエリを使用して、2つのオブジェクトによるオフセットを追加します。 結果として、最初の2つが欠落している12個のオブジェクトを取得し、結果を含むテーブルを2つのセルにシフトしたかのように、次のものが最後に追加されます。
Objective-c fetchRequest.fetchOffset = 2;
スイフト fetchRequest.fetchOffset = 2
明確にするために、抽出したオブジェクトを点線に制限しました。
結果 : : NAME: , PRICE: 76 NAME: , PRICE: 85 --------------------------------------------------------------------------------- NAME: , PRICE: 76 NAME: , PRICE: 156 NAME: , PRICE: 85 NAME: , PRICE: 176 NAME: , PRICE: 156 NAME: , PRICE: 185 NAME: , PRICE: 176 NAME: «», PRICE: 221 NAME: , PRICE: 185 NAME: , PRICE: 334 NAME: «», PRICE: 221 NAME: «», PRICE: 345 NAME: , PRICE: 334 NAME: «», PRICE: 400 NAME: «», PRICE: 345 NAME: , PRICE: 409 NAME: «», PRICE: 400 NAME: , PRICE: 425 NAME: , PRICE: 409 NAME: , PRICE: 448 NAME: , PRICE: 425 NAME: , PRICE: 456 NAME: , PRICE: 448 NAME: , PRICE: 492 --------------------------------------------------------------------------------- NAME: , PRICE: 456 ... NAME: , PRICE: 492 ...
fetchBatchSize
Objective-c @property (nonatomic) NSUInteger fetchBatchSize
fetchBatchSizeを使用すると、 Core Data Framework動作するデータベース( Persistent Store )( SQLite 、 XMLなど)から取得するオブジェクトの数を制御fetchBatchSizeます。 特定の場合に値を正しく設定すると、データベースの処理速度が向上し、逆に速度が低下します。
UITableView作業しているとしましょう。 このモデルでは、10,000以上のオブジェクト。 これらのすべての要素を一度に抽出するには時間がかかります。 ただし、画面には20個のセルがあり、表示には20個のオブジェクトしか必要ありません。 このような場合、 fetchBatchSizeを20に設定することをお勧めします。最初に、 Core Dataはデータベースにテーブルに表示する20個のオブジェクトを要求し、スクロールすると次の20個の要素のバンドルが要求されます。 このアプローチにより、永続ストレージとの対話が大幅に最適化されます。
ただし、1などの小さすぎるパケットサイズは使用しないでください。これにより、1つの要素に対する一定のクエリでデータベースがロードされます。
Objective-c fetchRequest.fetchBatchSize = 20;
スイフト fetchRequest.fetchBatchZize = 20
resultType
Objective-c @property (nonatomic) NSFetchRequestResultType resultType
スイフト var resultType: NSFetchRequestResultType
データを取得するとき、 executeFetchRequest(_:)メソッドはデフォルトでNSManagedObjectクラスとその子孫のオブジェクトの配列を返します。
resultTypeプロパティを変更すると、抽出されたオブジェクトのタイプを選択できresultType 。 それらを考慮してください(NSプレフィックス付きのObjective-Cは、スラッシュを介してSwiftと交互になります):
NSManagedObjectResultType / ManagedObjectResultType - NSManagedObjectクラスとその子孫のオブジェクト(デフォルト)。NSManagedObjectIDResultType / ManagedObjectIDResultType - NSManagedObjectIDResultTypeの識別子。NSDictionaryResultType / DictionaryResultTypeはディクショナリです。キーはエンティティの属性の名前です。NSCountResultType / CountResultType要素数の値を持つ配列の1つの要素を返します。
propertiesToFetch
Objective-c @property (nonatomic, copy) NSArray *propertiesToFetch
スイフト var propertiesToFetch: [AnyObject]?
このプロパティを使用すると、エンティティから必要な属性のみを抽出できます。 ただし、必要条件は、 resultTypeが辞書( NSDictionaryResultType / DictionaryResultType )でなければならないことです。
使用例
例として、 name属性の値のみを抽出し、出力のために、すべての既存の辞書キーのすべての値を(key: value)形式で出力します。
Objective-c fetchRequest.resultType = NSDictionaryResultType; fetchRequest.propertiesToFetch = @[@"name"];
スイフト fetchRequest.resultType = .DictionaryResultType fetchRequest.propertiesToFetch = ["name"]
結果(キー:値) name: name: name: name: «» name: name: «» name: name: name: name: «» name: name: name: name: «» name: name: name: name: name: «» name: name: name: name: «» name: name: name: name: name: name: name: «»
含む
Objective-c @property (nonatomic) BOOL includesSubentities
スイフト var includesSubentities: Bool
このプロパティをデモンストレーションするには、 Productsの後継であるFavoriteProductsエンティティにオブジェクトを追加する必要があります。 このオブジェクトに名前""と999の価格を付けます。
Productsエンティティのクエリに移り、名前と価格でソートします。
結果 NAME: , PRICE: 185 NAME: , PRICE: 334 NAME: , PRICE: 731 NAME: , PRICE: 972 NAME: , PRICE: 156 NAME: , PRICE: 492 NAME: , PRICE: 701 NAME: , PRICE: 821 NAME: , PRICE: 76 NAME: , PRICE: 85 NAME: , PRICE: 176 NAME: , PRICE: 425 NAME: , PRICE: 448 NAME: , PRICE: 539 NAME: , PRICE: 635 NAME: «», PRICE: 345 NAME: «», PRICE: 646 NAME: «», PRICE: 718 NAME: «», PRICE: 746 NAME: «», PRICE: 861 NAME: «», PRICE: 872 NAME: «», PRICE: 221 NAME: «», PRICE: 400 NAME: , PRICE: 409 NAME: , PRICE: 633 NAME: , PRICE: 734 NAME: , PRICE: 456 NAME: , PRICE: 519 NAME: , PRICE: 560 NAME: , PRICE: 920 NAME: , PRICE: 999
リストの最後で、 FavoriteProductsエンティティに追加したオブジェクトに注目してください。 彼はここで何をしていますか? 実際には、 includesSubentitiesプロパティの要求値はデフォルトでブール値true等しいため、現在のエンティティだけでなく、子孫エンティティのオブジェクトも取得します。
これを回避するには、ブール値false変更しfalse 。
Objective-c fetchRequest.includesSubentities = NO;
スイフト fetchRequest.includesSubentities = false
結果 NAME: , PRICE: 185 NAME: , PRICE: 334 NAME: , PRICE: 731 NAME: , PRICE: 972 NAME: , PRICE: 156 NAME: , PRICE: 492 NAME: , PRICE: 701 NAME: , PRICE: 821 NAME: , PRICE: 76 NAME: , PRICE: 85 NAME: , PRICE: 176 NAME: , PRICE: 425 NAME: , PRICE: 448 NAME: , PRICE: 539 NAME: , PRICE: 635 NAME: «», PRICE: 345 NAME: «», PRICE: 646 NAME: «», PRICE: 718 NAME: «», PRICE: 746 NAME: «», PRICE: 861 NAME: «», PRICE: 872 NAME: «», PRICE: 221 NAME: «», PRICE: 400 NAME: , PRICE: 409 NAME: , PRICE: 633 NAME: , PRICE: 734 NAME: , PRICE: 456 NAME: , PRICE: 519 NAME: , PRICE: 560 NAME: , PRICE: 920
フェッチ結果コントローラー(FRC)
NSFetchedResultsControllerクラスのコントローラーは、 Core DataとViewController間に任意に配置できます。ここで、データベースのデータを表示する必要があります。 このコントローラーのメソッドとプロパティを使用すると、 Core Dataオブジェクトを、最適化されたUITableViewテーブルと組み合わせて、簡単に対話、表現、管理できます。
このコントローラーは、抽出されたオブジェクトをテーブル要素(これらのセクションのセクションおよびオブジェクト)に変換できます。 FRCにはNSFetchedResultsControllerDelegateプロトコルがあり、委任されると、コントローラーの初期化時に特定のNSFetchRequest要求のオブジェクトで発生する変更をキャッチできます。
FRCを初期化する
Objective-c - (instancetype)initWithFetchRequest:(NSFetchRequest *)fetchRequest managedObjectContext: (NSManagedObjectContext *)context sectionNameKeyPath:(nullable NSString *)sectionNameKeyPath cacheName:(nullable NSString *)name;
スイフト public init(fetchRequest: NSFetchRequest, managedObjectContext context: NSManagedObjectContext, sectionNameKeyPath: String?, cacheName name: String?)
初期化パラメーターを分析しましょう。
fetchRequest - NSFetchRequestオブジェクトを取得するリクエスト。 重要: FRCが機能するには、リクエストに少なくとも1つのソート記述子が必要であり、そのresultTypeがNSManagedObjectResultType / ManagedObjectResultType必要があります。NSManagedObjectContextしているNSManagedObjectContextのコンテキスト。sectionNameKeyPathオプションのパラメーター。文字列キー(エンティティー属性名)の形式で指定された場合、オブジェクトはテーブルセクションのこの属性の同じ値でグループ化されます。 このキーは、優先度が最も高いソート記述子と一致することが重要です。 このパラメーターが指定されていない場合、1つのセクションを持つテーブルが作成されます。cacheNameオプションのパラメーター。指定すると、コントローラーはクエリ結果のキャッシュを開始します。 後で詳しく検討します。
次のステップは、データベースから選択を取得するためにperformFetchコントローラーperformFetchを呼び出すことperformFetch 。
Objective-c NSError *error = nil; if (![self.fetchedResultsController performFetch:&error]) { NSLog(@"Unresolved error %@, %@", error, [error userInfo]); abort(); }
スイフト do { try fetchedResultsController.performFetch() } catch { print(error) }
メソッドはブール値を返します。 抽出が成功した場合、ブール値はtrue返し、そうでない場合はfalse返しtrue 。 抽出後、オブジェクトはfetchedObjectsコントローラーfetchedObjects 。
UITableViewとの相互作用
テーブルの使用を検討してください。 抽出されたオブジェクトはfetchedObjectプロパティにありますが、それらを操作するには、 sectionsコントローラープロパティを参照する必要があります。 これは、次のプロパティを説明するNSFetchedResultsSectionInfoプロトコルにサブスクライブされるオブジェクトの配列です。
nameセクション名。indexTitleセクションのタイトル。numbersOfObjectsセクション内のオブジェクトの数。objectsセクション自体のオブジェクトの配列。
実装
便宜上、 configureCellテーブルのセルを構成するメソッドを追加します。
Objective-c #pragma mark - Table View - (void)configureCell:(UITableViewCell *)cell withObject:(Products *)object { cell.textLabel.text = object.name; cell.detailTextLabel.text = [NSString stringWithFormat:@"%d", object.price.intValue]; } #pragma mark UITableViewDataSource - (NSInteger)numberOfSectionsInTableView:(UITableView *)tableView { return [[self.fetchedResultsController sections] count]; } - (NSString *)tableView:(UITableView *)tableView titleForHeaderInSection:(NSInteger)section { id <NSFetchedResultsSectionInfo> sectionInfo = [self.fetchedResultsController sections][section]; return sectionInfo.indexTitle; } - (NSInteger)tableView:(UITableView *)tableView numberOfRowsInSection:(NSInteger)section { id <NSFetchedResultsSectionInfo> sectionInfo = [self.fetchedResultsController sections][section]; return [sectionInfo numberOfObjects]; } - (UITableViewCell *)tableView:(UITableView *)tableView cellForRowAtIndexPath:(NSIndexPath *)indexPath { static NSString *identifier = @"Cell"; UITableViewCell *cell = [tableView dequeueReusableCellWithIdentifier:identifier]; if (!cell) { cell = [[UITableViewCell alloc] initWithStyle:UITableViewCellStyleValue1 reuseIdentifier:identifier]; } Products *object = [[self fetchedResultsController] objectAtIndexPath:indexPath]; [self configureCell:cell withObject:(Products *)object]; return cell; }
スイフト // MARK: - Table View extension ViewController { func configureCell(cell: UITableViewCell, withObject product: Products) { cell.textLabel?.text = product.name ?? "" cell.detailTextLabel?.text = String(product.price ?? 0) } } // MARK: UITableViewDataSource extension ViewController: UITableViewDataSource { func numberOfSectionsInTableView(tableView: UITableView) -> Int { guard let sections = fetchedResultsController.sections else { return 0 } return sections.count } func tableView(tableView: UITableView, titleForHeaderInSection section: Int) -> String? { guard let sections = fetchedResultsController.sections else { return nil } return sections[section].indexTitle ?? "" } func tableView(tableView: UITableView, numberOfRowsInSection section: Int) -> Int { guard let sections = fetchedResultsController.sections else { return 0 } return sections[section].numberOfObjects } func tableView(tableView: UITableView, cellForRowAtIndexPath indexPath: NSIndexPath) -> UITableViewCell { let identifier = "Cell" let product = fetchedResultsController.objectAtIndexPath(indexPath) as! Products var cell = tableView.dequeueReusableCellWithIdentifier(identifier) if cell == nil { cell = UITableViewCell(style: .Value1, reuseIdentifier: identifier) } configureCell(cell!, withObject: product) return cell! } }
NSFetchRequest sectionNameKeyPath FRC "name" , .
FRC
FRC :
(delegate = nil, cacheName = nil) — .- ,
(delegate != nil, cacheName = nil) — NSFetchedResultsControllerDelegate , . . - ,
(delegate != nil, cacheName = <#NSString/String#>) — .
NSFetchedResultsControllerDelegate
NSFetchedResultsControllerDelegate , , NSFetchRequest . UITableView , UI- , .
Objective-C #pragma mark - NSFetchedResultsControllerDelegate // 1 - (NSString *)controller:(NSFetchedResultsController *)controller sectionIndexTitleForSectionName:(NSString *)sectionName { return sectionName; } // 2 - (void)controllerWillChangeContent:(NSFetchedResultsController *)controller { [self.tableView beginUpdates]; } // 3 - (void)controller:(NSFetchedResultsController *)controller didChangeSection:(id <NSFetchedResultsSectionInfo>)sectionInfo atIndex:(NSUInteger)sectionIndex forChangeType:(NSFetchedResultsChangeType)type { switch(type) { case NSFetchedResultsChangeInsert: [self.tableView insertSections:[NSIndexSet indexSetWithIndex:sectionIndex] withRowAnimation:UITableViewRowAnimationFade]; break; case NSFetchedResultsChangeDelete: [self.tableView deleteSections:[NSIndexSet indexSetWithIndex:sectionIndex] withRowAnimation:UITableViewRowAnimationFade]; break; default: return; } } // 4 - (void)controller:(NSFetchedResultsController *)controller didChangeObject:(id)anObject atIndexPath:(NSIndexPath *)indexPath forChangeType:(NSFetchedResultsChangeType)type newIndexPath:(NSIndexPath *)newIndexPath { UITableView *tableView = self.tableView; switch(type) { case NSFetchedResultsChangeInsert: [tableView insertRowsAtIndexPaths:@[newIndexPath] withRowAnimation:UITableViewRowAnimationFade]; break; case NSFetchedResultsChangeDelete: [tableView deleteRowsAtIndexPaths:@[indexPath] withRowAnimation:UITableViewRowAnimationFade]; break; case NSFetchedResultsChangeUpdate: [self configureCell:[tableView cellForRowAtIndexPath:indexPath] withObject:anObject]; break; case NSFetchedResultsChangeMove: [tableView moveRowAtIndexPath:indexPath toIndexPath:newIndexPath]; break; } } // 5 - (void)controllerDidChangeContent:(NSFetchedResultsController *)controller { [self.tableView endUpdates]; }
Swift // MARK: - NSFetchedResultsControllerDelegate extension ViewController: NSFetchedResultsControllerDelegate { // 1 func controller(controller: NSFetchedResultsController, sectionIndexTitleForSectionName sectionName: String) -> String? { return sectionName } // 2 func controllerWillChangeContent(controller: NSFetchedResultsController) { tableView.beginUpdates() } // 3 func controller(controller: NSFetchedResultsController, didChangeSection sectionInfo: NSFetchedResultsSectionInfo, atIndex sectionIndex: Int, forChangeType type: NSFetchedResultsChangeType) { switch type { case .Insert: tableView.insertSections(NSIndexSet(index: sectionIndex), withRowAnimation: .Fade) case .Delete: tableView.deleteSections(NSIndexSet(index: sectionIndex), withRowAnimation: .Fade) default: return } } // 4 func controller(controller: NSFetchedResultsController, didChangeObject anObject: AnyObject, atIndexPath indexPath: NSIndexPath?, forChangeType type: NSFetchedResultsChangeType, newIndexPath: NSIndexPath?) { switch type { case .Insert: if let indexPath = newIndexPath { tableView.insertRowsAtIndexPaths([indexPath], withRowAnimation: .Automatic) } case .Update: if let indexPath = indexPath { let product = fetchedResultsController.objectAtIndexPath(indexPath) as! Products guard let cell = tableView.cellForRowAtIndexPath(indexPath) else { break } configureCell(cell, withObject: product) } case .Move: if let indexPath = indexPath { tableView.deleteRowsAtIndexPaths([indexPath], withRowAnimation: .Automatic) } if let newIndexPath = newIndexPath { tableView.insertRowsAtIndexPaths([newIndexPath], withRowAnimation: .Automatic) } case .Delete: if let indexPath = indexPath { tableView.deleteRowsAtIndexPaths([indexPath], withRowAnimation: .Automatic) } } } // 5 func controllerDidChangeContent(controller: NSFetchedResultsController) { tableView.endUpdates() } }
sectionIndexTitleForSectionName — , . , , ( sectionName ) . . .
controllerWillChangeContent — , . UITableView — beginUpdates .
didChangeSection — , , . : sectionInfo — , , sectionIndex — type NSFetchedResultsChangeType , (Insert, Delete, Move, Update). .
didChangeObject — , , sectionInfo , anObject , , sectionIndex — , indexPath newIndexPath , . UITableView , , , , .
controllerDidChangeContent — . endUpdates .
— "" "" 1 .
The Cache
. . . (deleteCacheWithName:) , . Core Data , cacheName .
?
cacheName , .- , ( , , ). — , , .
まとめ
NSFetchRequest , Core Data , . Fetched Results Controller , , UITableView .
, , .