みなさんこんにちは! DevOpsに関する一連の記事を継続し、設定を管理して経験を共有する最も効果的な方法を探します。
以前の記事では
、 JenkinsとServerspecを使用してAnsible構成管理を構築する方法を検討しましたが、GitLab-CIを使用して構成管理を整理する方法を検討します。
Ansible-lintは、プレイブックの構文とコードスタイルの正確性を確認するためのユーティリティであり、CIサービスに統合できます。 私たちの場合、Merge-Requestを受け入れ、チェックのステータスを設定する段階でプレイブックをチェックするために、gitlab-ciで実装します。
GitLab (GitLab Community Edition)は、Githubの有料の企業バージョンに代わるものとして最初に開発されたオープンソースプロジェクトであり、gitリポジトリマネージャーです。
GitLab CEのインストールについては、
この記事で説明し
ます 。
gitlab-ci-multirunnerをインストールする
curl -L https://packages.gitlab.com/install/repositories/runner/gitlab-ci-multi-runner/script.rpm.sh | sudo bash yum install gitlab-ci-multi-runner
ランナーを登録する
gitlab-ci-multi-runner register
次に、質問に答える必要があります。
Running in system-mode. Please enter the gitlab-ci coordinator URL (eg https:
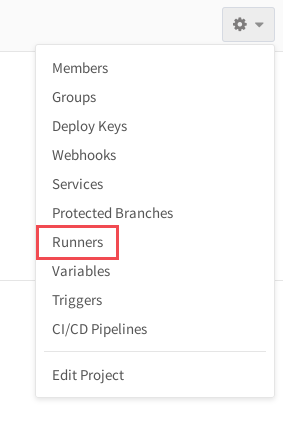
プロジェクト設定ページからトークンとURLを取得します。
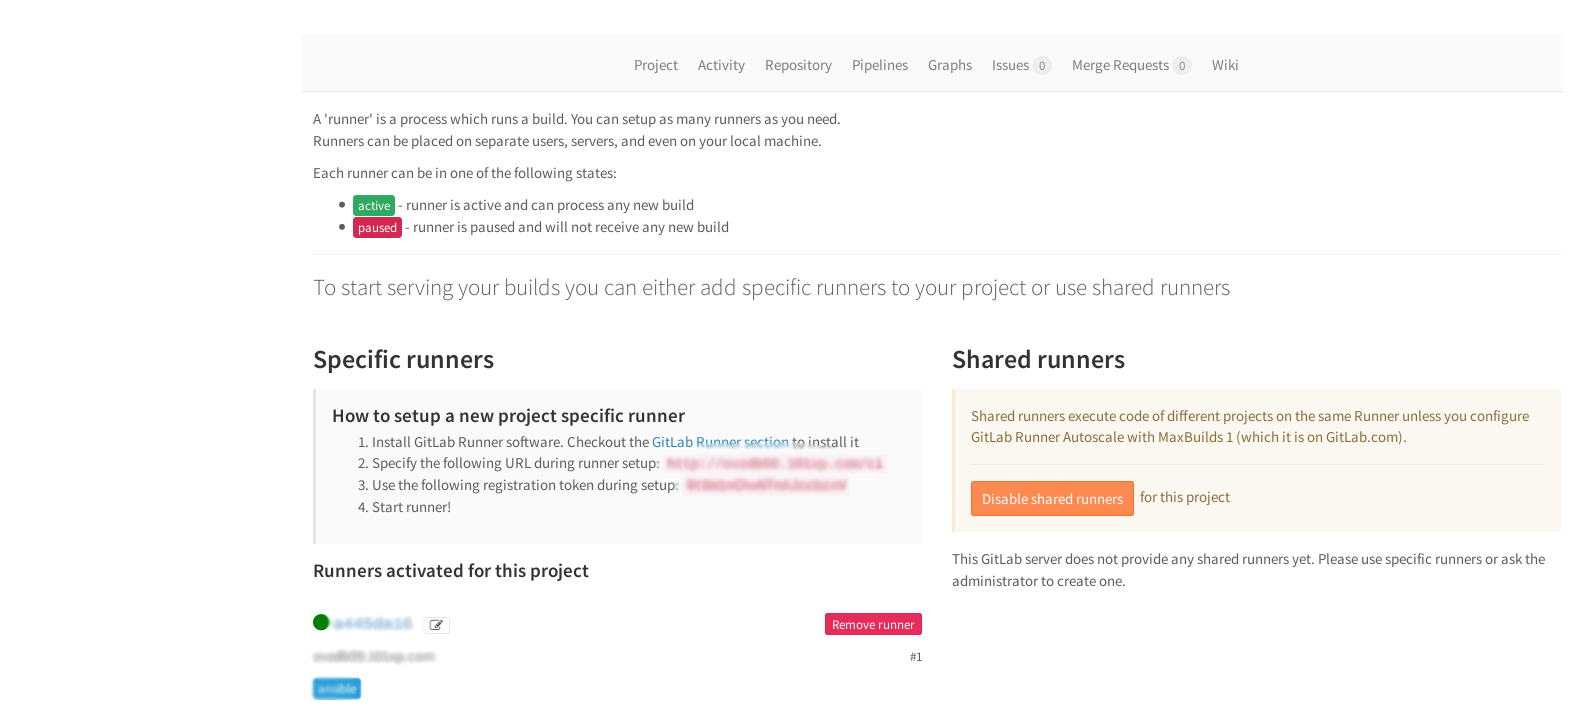
機能設定マルチランナー。
1人のランナーが複数のプロジェクトを処理できます。 1人のランナーがすべてを処理するには、タグを指定せずに新しいランナーを登録するだけです。 管理エリアで共有ランナーのトークンを取得します。
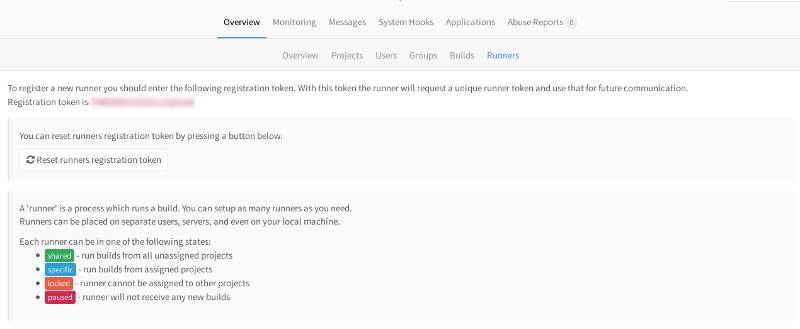
多数のランナーを異なるサーバーに配布できます。 また、Jenkinsと同様、gitlabにもタグなどがあります。 ansibleタグを持つプロジェクトは、ansibleタグでマークされたランナーを処理します。タグのない、または別のタグを持つ他のプロジェクトでは、このランナーは機能しません。
また、管理パネルでは、ランナーとプロジェクトの通信を構成できます。
domain.example.com/admin/runners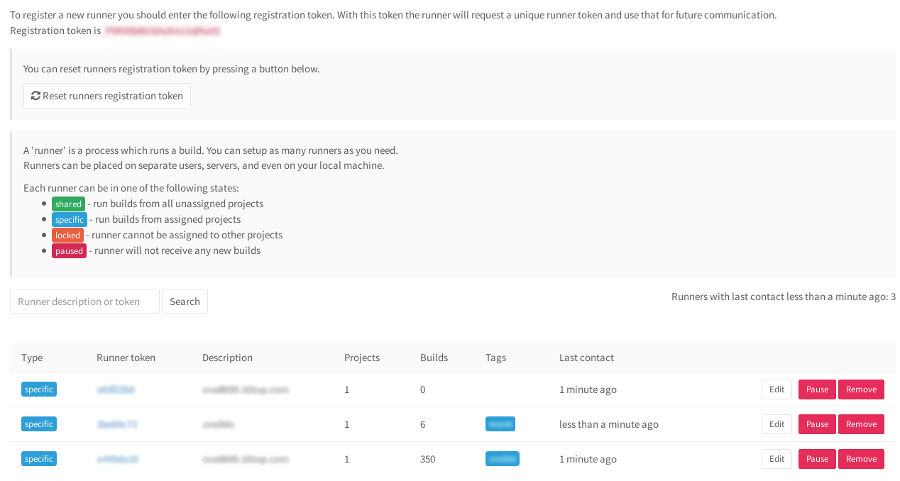
Ansible-lintをインストールする
Ansible-lintは、python-pipまたはEPELリポジトリからインストールされます。
最初の方法:
最初にpython-pipをインストールし、それからansible-lintをインストールします:
sudo yum groupinstall @Development Tools sudo yum install python-pip sudo pip install
第二の方法
簡単です-epel-releaseをインストールし、パッケージマネージャーからansible-lintをインストールします。
sudo yum install epel-release sudo yum install ansible-lint
パイプラインのセットアップ。
リポジトリのルートに
.gitlab-ci.ymlファイルを作成します。 スペースの数を確認することが重要です。そうしないと、間違いが発生します。yamlはこれを許しません。
stages: [ ]- test test_job: [ ]stage: test [ ]script: [ ]- ansible-lint *.yml [ ]tags: [ ]- ansible
ステージ-アセンブリのステージを必ず記述してください。
stages: - stagename
test_jobは、ジョブの任意の名前です。
stage:test —ステージセクションで指定されたステージテストを必ず記述してください。
jobname: stage: stagename
スクリプト-リポジトリのルートでテストを実行します
tags-ランナーのラベル。
ステージ:テストステージ名は、たとえば、収束、事前テスト、事後テスト、デプロイなど、どのような名前でもかまいません。
test_jobジョブの名前も任意です。
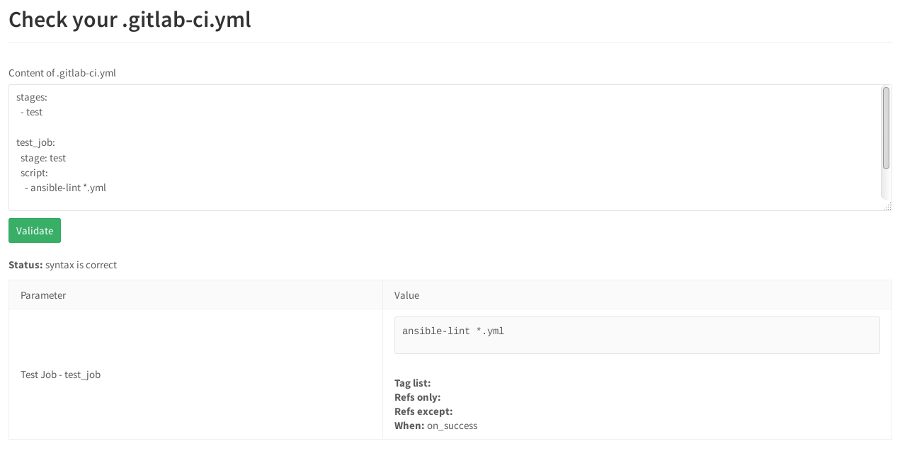
GitLabには、パイプライン用のライナーが組み込まれています。
domain.example.com/ci/lint URLで
パイプライン構文の正確性を確認できます
パイプラインを挿入し、「検証」をクリックします。
エラーが発生した場合、リンターは誓い、エラーを示します。
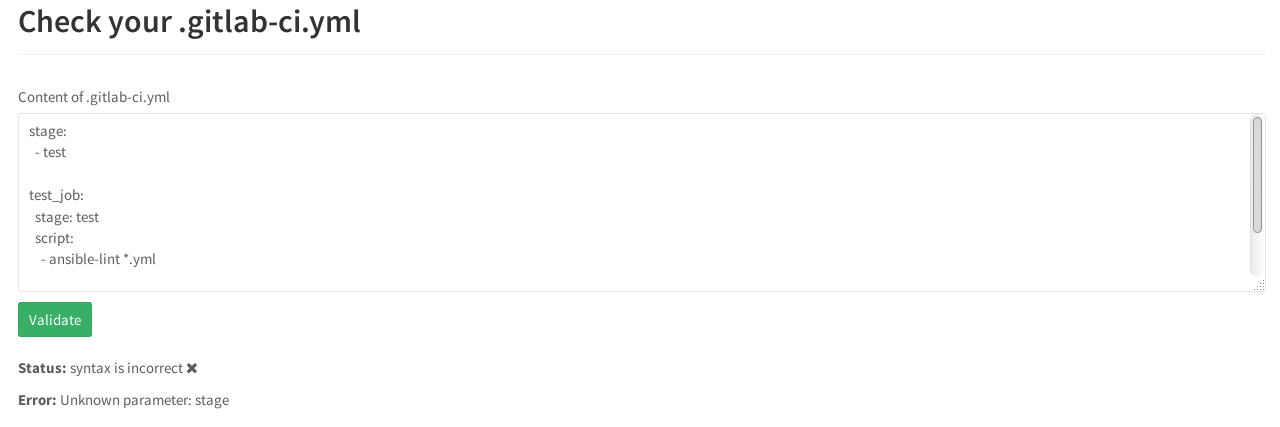 ステージ
ステージではなく、
ステージであるべきです。
したがって、
ansible-lintは、コミットするたびにリポジトリのルートから
.yml拡張子を持つすべてのプレイブックを自動的にチェックします。
リポジトリには2つの役割があります。
roles ├── monit └── openssh
そして、これらの役割を果たしている2つのプレイブック:
├── monit.yml ├── openssh.yml ├── README.md └── roles
openssh.yml
monit.yml
したがって、ロールを割り当てるプレイブックを確認し、そのすべての内容を確認します。
roles/openssh/tasks/ ├── configure_iptables.yml ├── configure_monitoring.yml ├── configure_ssh.yml └── main.ym
roles/monit/tasks/ ├── configure_monit.yml ├── configure_monit_checks.yml ├── install_monit.yml └── main.yml
これで、コミットすると
ansible-lintが自動的に起動し、プレイブックにリストされているすべてのロールがチェックされます。
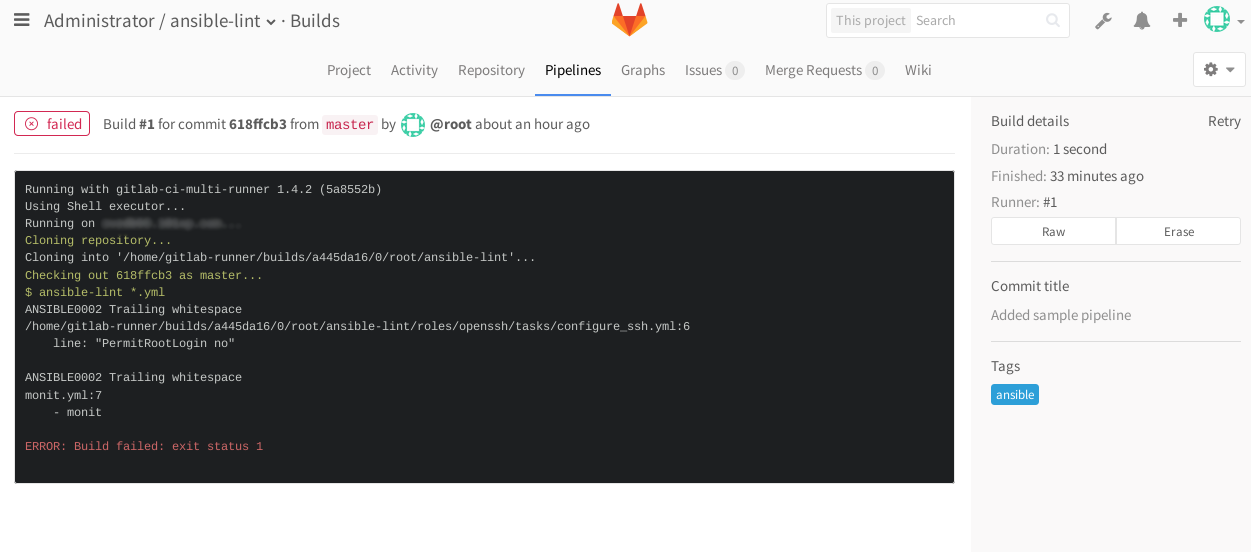
何かをコミットしてWebインターフェース([
パイプライン ]タブ)に移動しようとすると、ジョブが
失敗ステータスで表示されます。
リポジトリにプッシュするときにlintチェックを無効にするには、
ansible-lintチェックの実行に関連する
.gittab-ci.ymlファイルのすべてのステージをクリーンアップ
するだけで十分です。
プレイブック検証オプションも構成可能です:
╰─>$ ansible-lint --help Usage: ansible-lint playbook.yml Options: --version show program's version number and exit -h, --help show this help message and exit -L list all the rules -q quieter, although not silent output -p parseable output in the format of pep8 -r RULESDIR specify one or more rules directories using one or more -r arguments. Any -r flags override the default rules in /usr/local/lib/python2.7/dist- packages/ansiblelint/rules, unless -R is also used. -R Use default rules in /usr/local/lib/python2.7/dist- packages/ansiblelint/rules in addition to any extra rules directories specified with -r. There is no need to specify this if no -r flags are used -t TAGS only check rules whose id/tags match these values -T list all the tags -v Increase verbosity level -x SKIP_LIST only check rules whose id/tags do not match these values --nocolor disable colored output --exclude=EXCLUDE_PATHS path to directories or files to skip. This option is repeatable.
╰─>$ ansible-lint -L ANSIBLE0002: Trailing whitespace There should not be any trailing whitespace ANSIBLE0004: Git checkouts must contain explicit version All version control checkouts must point to an explicit commit or tag, not just "latest" ANSIBLE0005: Mercurial checkouts must contain explicit revision All version control checkouts must point to an explicit commit or tag, not just "latest" ANSIBLE0006: Using command rather than module Executing a command when there is an Ansible module is generally a bad idea ANSIBLE0007: Using command rather than an argument to eg file Executing a command when there is are arguments to modules is generally a bad idea ANSIBLE0008: Deprecated sudo Instead of sudo/sudo_user, use become/become_user. ANSIBLE0009: Octal file permissions must contain leading zero Numeric file permissions without leading zero can behavein unexpected ways. See http://docs.ansible.com/ansible/file_module.html ANSIBLE0010: Package installs should not use latest Package installs should use state=present with or without a version ANSIBLE0011: All tasks should be named All tasks should have a distinct name for readability and for
ansible-lintが
コマンドと
シェルモジュールを実際に好まない場合、一部のタスクはスキップできます。これは、ansibleイデオロギーでは、すべてのタスクに十分な通常のコアモジュールがあると考えられているためです。 実際、これは常にそうではありません。
たとえば、
コマンドモジュールを使用するロールにタスクがあります。
- name: Installing monit command: yum -y install monit tags: monit
そして、この役割を備えたプレイブックを流した場合、
ansible-lintは コマンドモジュールを使用している
と文句を言う
でしょう。 ╰─>$ ansible-lint monit.yml [ANSIBLE0002] Trailing whitespace monit.yml:7 - monit [ANSIBLE0012] Commands should not change things if nothing needs doing /tmp/ansible-lint/roles/monit/tasks/install_monit.yml:8 Task/Handler: Installing monit [ANSIBLE0006] yum used in place of yum module /tmp/ansible-lint/roles/monit/tasks/install_monit.yml:8 Task/Handler: Installing monit
これを回避するには、タグ
skip_ansible_lintでタスクをマークできます:
- name: Installing monit command: yum -y install monit tags: monit,skip_ansible_lint
現在、プレイブックでlintを実行するとき、使用される
コマンドモジュールを誓うことはありません。
╰─>$ ansible-lint monit.yml [ANSIBLE0002] Trailing whitespace monit.yml:7 - monit
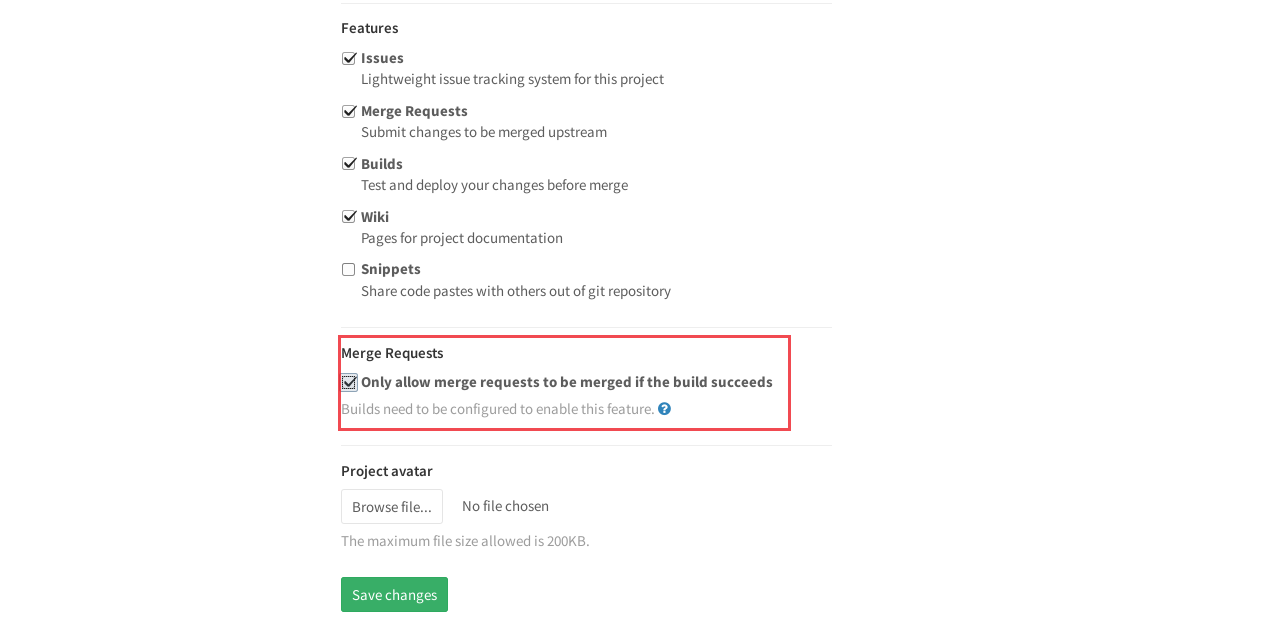
機能マージ要求。
今後、MRのチェックの機能について少し説明します。 デフォルトでは、マージ要求は検証が成功した場合にのみ受け入れられます。 プロジェクト設定の[リクエストのマージ]セクションでこれを無効にできます。
Ansible-lintは、コミットを行わずに、CIサービスによる検証を待たずに、localhostで起動することもできます。 デスクトップにLinuxまたはOS Xがある場合は、コンピューターにインストールするだけです。
gitlabで見た、エラーのあるコミットの例。
1.組み込みのGitLabエディターでファイルを開きます。
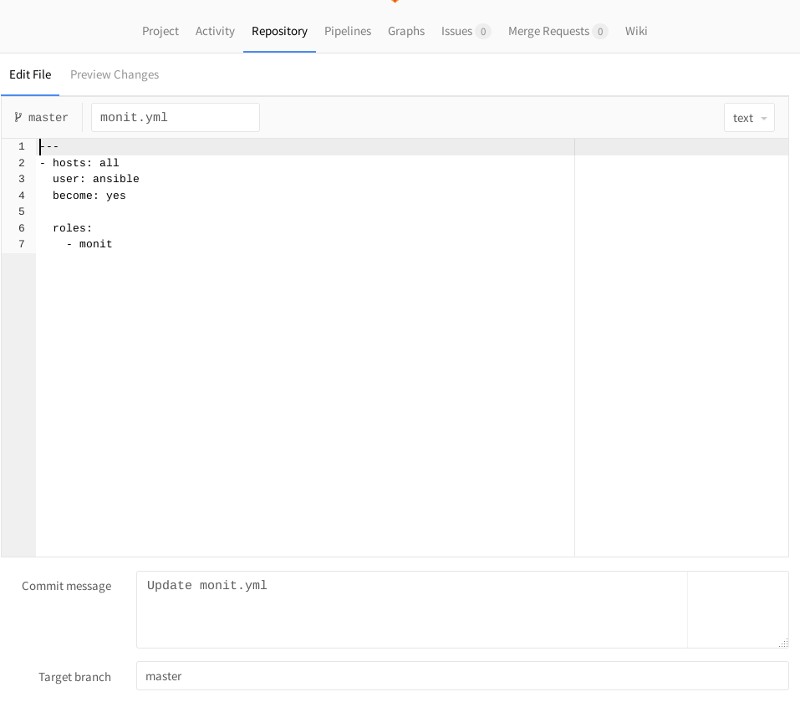 2.
2.変更を行います。 たとえば、yamlはスペースに非常に敏感です。行の先頭に余分なスペースを追加してみてください。

[Commit Changes]を押して、変更されたファイルに戻ります。 確認ステータスのアイコンが右上に表示されます:
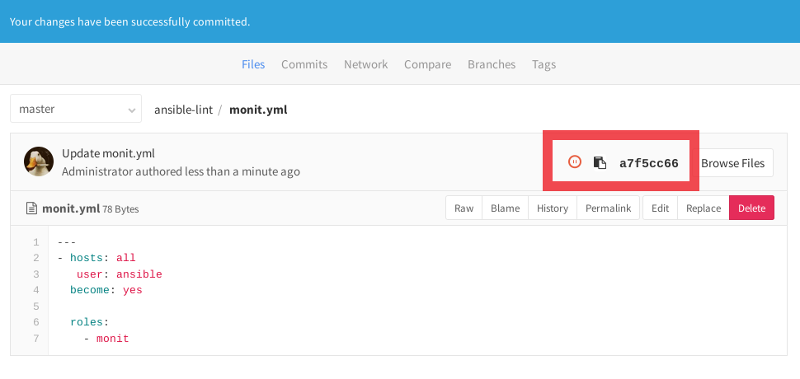
検証がまだ完了していないため、現在は保留状態になっています。 アイコンをクリックすると、新しく作成されたコミットの検証ステータスに進みます。
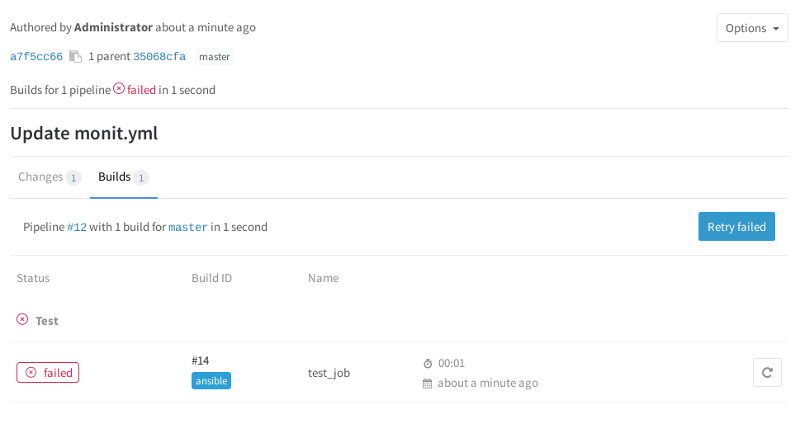
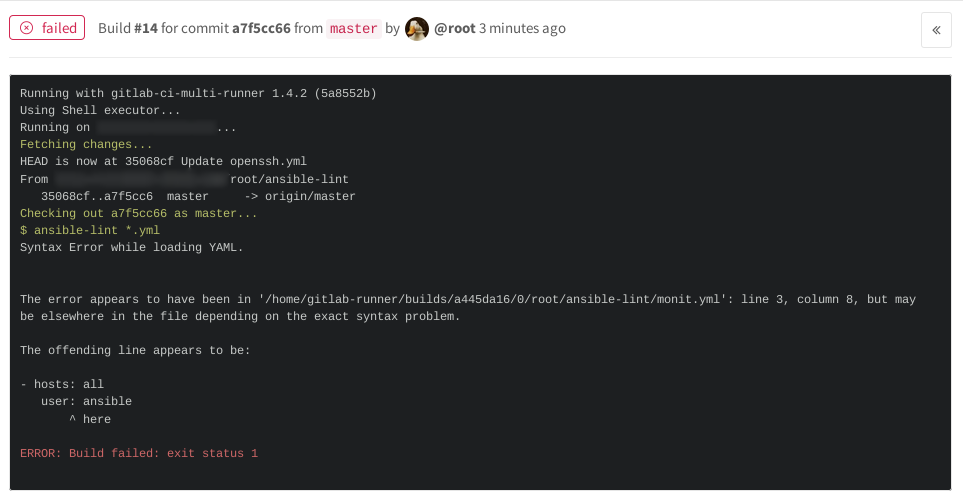
意図的に構文を間違えたため、現在は失敗ステータスになっています。 [失敗]アイコンをクリックすると、ansible-lintの結果が表示されます。
README.mdでビルドステータスに素敵なバッジを付けることができます
[](http://domain.example.com/projectname/commits/master)
プロジェクト設定のCI / CDパイプラインセクションで取得できます
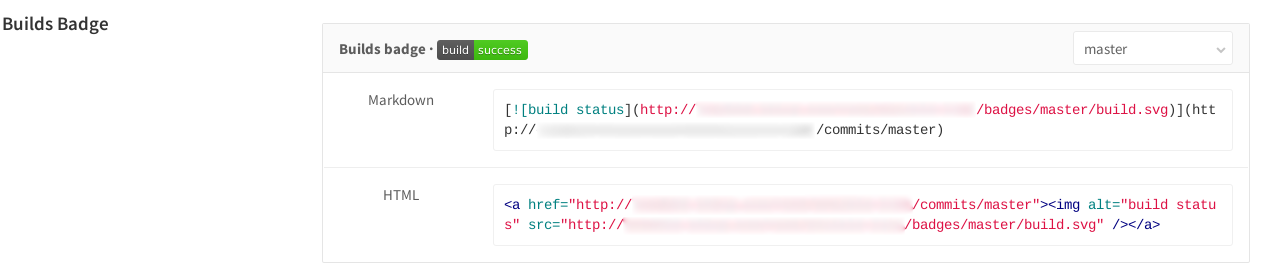
pastemarkdownをコピーし、プロジェクトルートのREADME.mdに追加してコミットします。検証ステータスがプロジェクトのメインページに表示されます。

緑/合格-テストが成功した場合。
赤/失敗-チェックが失敗した場合。
[パイプライン]タブでは、すべてのコミットのステータスを確認できます。

したがって、構成管理中に構文の正確性をチェックするプロセスを構築しました。 注意とすべての成功した自動化に感謝します!
DevOps-Centos-admin-Victor Batuevによる投稿。