
訓練されたモデルを実稼働環境にリリースする必要があるときはいつでもあります。 これを行うには、多くの場合、機械学習ライブラリのラッパーの形式で自転車を作成する必要があります。 ただし、モデルがTensorflowに実装されている場合、良いニュースがあります。自転車を書く必要はありません。 Tensorflow Servingを使用できます。
この記事では、Tensorflow Servingを使用して生産的な画像認識サービスをすばやく作成する方法について説明します。
Tensorflow Serving-次のような機能を備えたTensorflowモデルを展開するシステム
- 自動バッチ処理;
- ホットスワップとバージョン管理。
- 並列リクエストを処理する機能。
追加の利点は、KerasからTensorflowモデルにモデルを追い越して、サービング経由で展開できることです(KerasがTensorflowバックエンドを使用しない限り)。
Tensorflow Servingの仕組み

Tensorflow Servingの主要部分はモデルサーバーです。
モデルサーバーの操作スキームを検討してください。 起動後、モデルサーバーは起動時に指定されたパスからモデルを読み込み、指定されたポートのリッスンを開始します。 サーバーは、gRPCライブラリを使用したリモートプロシージャコールを通じてクライアントと通信します。 これにより、gRPCをサポートする任意の言語でクライアントアプリケーションを作成できます。
モデルサーバーがリクエストを受信すると、次のアクションを実行できます。
- このクエリのモデル実行を実行します。
- 起動時に対応するオプション(
--enable_batchingフラグ)が有効になっている場合、いくつかのリクエストをバッチにまとめ、バッチ全体の計算を実行します。 バッチ処理は(特にGPUで)より効率的であるため、この関数を使用すると、単位時間あたりに処理されるリクエストの数を増やすことができます。 - コンピューティングリソースが現在使用されている場合、リクエストをキューに入れます。
前述のように、Tensorflow Servingはホットスワップモデルをサポートしています。 モデルサーバーは、起動時に指定された新しいモデルのパスを常にスキャンし、新しいバージョンが見つかると、このバージョンを自動的にダウンロードします。 これにより、モデルサーバーを停止することなく、モデルの新しいバージョンをアップロードできます。
したがって、Tensorflow Servingには本番環境で完全に機能するのに十分な機能があります。 したがって、モデル上に独自のラッパーを作成するようなアプローチの使用は不当に見えます。 Tensorflow Servingは、自己記述ソリューションを作成および維持する必要なく、同じ機能を提供します。
設置
Tensorflow Servingの構築は、おそらくこのツールを使用する上で最も難しい部分です。 原則として、複雑なものはありませんが、水中の熊手がいくつかあります。 このセクションで説明するのは、それらについてです。
組み立てには、 バゼルアセンブリシステムが使用されます。
Tensorflow Servingのインストールについては、公式Webサイトで説明されています https://tensorflow.imtqy.com/serving/setup 各ステップの詳細は説明しませんが、インストール中に発生する可能性のある問題について説明します。
Tensorflow( ./configure configure)を構成する前に、すべての手順に問題がないはずです。
Tensorflowを設定するとき、ほとんどすべてのパラメーターにデフォルト値を残すことができます。 ただし、CUDAを使用してインストールすることを選択した場合、コンフィギュレーターはcuDNNバージョンを要求します。 cuDNNの完全版(私の場合は5.1.5)を導入する必要があります。
ビルド( bazel build tensorflow_serving/... )を取得しbazel build tensorflow_serving/... 。
まず、プロセッサで使用できる最適化を決定し、アセンブリ中にそれらを指定する必要があります。 bazelはそれらを自動的に認識できません。
したがって、ビルドコマンドは次のように複雑になります。
bazel build -c opt --copt=-mavx --copt=-mavx2 --copt=-mfma --copt=-mfpmath=both --copt=-msse4.2 tensorflow_serving/...
これらの最適化がすべてプロセッサで利用できることを確認してください。 私のプロセッサはAVX2とFMAをサポートしていないため、次のコマンドでビルドしました。
bazel build -c opt --copt=-mavx --copt=-mfpmath=both --copt=-msse4.2 tensorflow_serving/...
デフォルトでは、Tensorflowアセンブリは大量のメモリを消費するため、あまり多くない場合は、リソースの消費を制限する必要があります。 これは、次のフラグ--local_resources availableRAM,availableCPU,availableIO (RAMのMB、コアのCPU、利用可能なI / O(1.0は平均ワークステーション)、たとえば--local_resources 2048,.5,1.0 )で実行できます。
GPUをサポートするTensorflow Servingを構築する場合は、フラグ--config=cudaを追加する必要があります。 このようなものが得られます。
bazel build -c opt --copt=-mavx --copt=-mfpmath=both --copt=-msse4.2 --config=cuda tensorflow_serving/...
アセンブリ中に次のエラーが発生する場合があります。
エラーテキストERROR: no such target '@org_tensorflow//third_party/gpus/crosstool:crosstool': target 'crosstool' not declared in package 'third_party/gpus/crosstool' defined by /home/movchan/.cache/bazel/_bazel_movchan/835a50f8a234772a7d7dac38871b88e9/external/org_tensorflow/third_party/gpus/crosstool/BUILD.
このエラーを修正するには、 @org_tensorflow//third_party/gpus/crosstoolを@local_config_cuda//crosstool:toolchain tools/bazel.rcファイルの@local_config_cuda//crosstool:toolchainにtools/bazel.rcます
次のエラーが引き続き表示される場合があります。
エラーテキストERROR: /home/movchan/.cache/bazel/_bazel_movchan/835a50f8a234772a7d7dac38871b88e9/external/org_tensorflow/tensorflow/contrib/nccl/BUILD:23:1: C++ compilation of rule '@org_tensorflow//tensorflow/contrib/nccl:python/ops/_nccl_ops.so' failed: crosstool_wrapper_driver_is_not_gcc failed: error executing command external/local_config_cuda/crosstool/clang/bin/crosstool_wrapper_driver_is_not_gcc -U_FORTIFY_SOURCE '-D_FORTIFY_SOURCE=1' -fstack-protector -fPIE -Wall -Wunused-but-set-parameter ... (remaining 80 argument(s) skipped): com.google.devtools.build.lib.shell.BadExitStatusException: Process exited with status 1. In file included from external/org_tensorflow/tensorflow/conERROR: /home/movchan/.cache/bazel/_bazel_movchan/835a50f8a234772a7d7dac38871b88e9/external/org_tensorflow/tensorflow/contrib/nccl/BUILD:23:1: C++ compilation of rule '@org_tensorflow//tensorflow/contrib/nccl:python/ops/_nccl_ops.so' failed: crosstool_wrapper_driver_is_not_gcc failed: error executing command external/local_config_cuda/crosstool/clang/bin/crosstool_wrapper_driver_is_not_gcc -U_FORTIFY_SOURCE '-D_FORTIFY_SOURCE=1' -fstack-protector -fPIE -Wall -Wunused-but-set-parameter ... (remaining 80 argument(s) skipped): com.google.devtools.build.lib.shell.BadExitStatusException: Process exited with status 1. In file included from external/org_tensorflow/tensorflow/contrib/nccl/kernels/nccl_manager.cc:15:0: external/org_tensorflow/tensorflow/contrib/nccl/kernels/nccl_manager.h:23:44: fatal error: external/nccl_archive/src/nccl.h: No such file or directory compilation terminated.
これを修正するには、次のファイルの#include "external/nccl_archive/src/nccl.h"の行のプレフィックス/external/nccl_archiveを削除する必要があります。
tensorflow/tensorflow/contrib/nccl/kernels/nccl_ops.cc tensorflow/tensorflow/contrib/nccl/kernels/nccl_manager.h
やった! ついに集めました!
輸出モデル
Tensorflowからのモデルのエクスポートの詳細については、 「TensorFlowモデルのトレーニングとエクスポート」の下のhttps://tensorflow.imtqy.com/serving/serving_basic
エクスポートには、 SavedModelBuilderクラスがSavedModelBuilderます。 Kerasを使用してTensorflowモデルをトレーニングします。 このモジュールを使用してKerasからServingにモデルをエクスポートするプロセスを説明します。
ImageNetでトレーニングされたResNet-50エクスポートコード。
import os import tensorflow as tf from keras.applications.resnet50 import ResNet50 from keras.preprocessing import image from keras.applications.resnet50 import preprocess_input, decode_predictions from tensorflow.contrib.session_bundle import exporter import keras.backend as K
'images'および'scores'代わりに、入力および出力を設定するときに任意の名前を指定できます。 これらの名前は後で使用されます。
モデルに複数の入力や出力がある場合、これをtf.saved_model.signature_def_utils.build_signature_def指定する必要があります。 これを行うには、 model.inputsおよびmodel.outputs使用します。 入力と出力のインストールコードは次のようになります。
また、 signature_def_mapは使用可能なすべてのメソッド(シグネチャ)が示されており、1を超える場合があることに注意してください。上記の例では、1つのメソッドだけが追加されます。 メソッドの名前は後で使用されます。
モデルサーバーの起動
モデルサーバーは、次のコマンドで起動します。
./bazel-bin/tensorflow_serving/model_servers/tensorflow_model_server --enable_batching --port=9001 --model_name=resnet50 --model_base_path=/home/movchan/ml/serving_post/model
このコマンドのフラグの意味を検討してください。
enable_batching自動バッチ処理の有効化のフラグにより、 enable_batching Servingはリクエストをバッチに結合して処理を効率化できます。portモデルがリッスンするポート。model_nameモデルの名前(後で使用されます)。model_base_pathモデルへのパス(前のステップで保存した場所)。
PythonからのTensorflow Servingの使用
最初に、pipを介してgrpcioパッケージを配置しましょう。
sudo pip3 install grpcio
一般に、公式サイトのチュートリアルでは、bazelを介してPythonスクリプトを収集することを推奨しています。 しかし、私はこのアイデアを好きではありません。 別の方法を見つけました。
Python APIを使用するには、 bazel-bin/tensorflow_serving/example/inception_client.runfiles/tf_serving/tensorflow_servingをコピー(ソフトリンクを作成)できます。 python APIが機能するために必要なものがすべて含まれています。 通常、このAPIを使用するスクリプトがあるディレクトリにコピーします。
Python APIを使用した例を考えてみましょう。
import numpy as np from grpc.beta import implementations from tensorflow_serving.apis import predict_pb2 from tensorflow_serving.apis import prediction_service_pb2
完全なPython APIのサンプルコード import time import sys import tensorflow as tf import numpy as np from grpc.beta import implementations from tensorflow_serving.apis import predict_pb2 from tensorflow_serving.apis import prediction_service_pb2 from keras.preprocessing import image from keras.applications.resnet50 import preprocess_input, decode_predictions def preprocess_image(img_path): img = image.load_img(img_path, target_size=(224, 224)) x = image.img_to_array(img) x = np.expand_dims(x, axis=0) x = preprocess_input(x) return x def get_prediction(host, port, img_path): image = preprocess_image(img_path) start_time = time.time() channel = implementations.insecure_channel(host, port) stub = prediction_service_pb2.beta_create_PredictionService_stub(channel) request = predict_pb2.PredictRequest() request.model_spec.name = 'resnet50' request.model_spec.signature_name = 'predict' request.inputs['images'].CopyFrom( tf.contrib.util.make_tensor_proto(image, shape=image.shape)) result = stub.Predict(request, 10.0) prediction = np.array(result.outputs['scores'].float_val) return prediction, (time.time()-start_time)*1000. if __name__ == "__main__": if len(sys.argv) != 4: print ('usage: serving_test.py <host> <port> <img_path>') print ('example: serving_test.py 127.0.0.1 9001 ~/elephant.jpg') exit() host = sys.argv[1] port = int(sys.argv[2]) img_path = sys.argv[3] for i in range(10): prediction, elapsed_time = get_prediction(host, port, img_path) if i == 0: print('Predicted:', decode_predictions(np.atleast_2d(prediction), top=3)[0]) print('Elapsed time:', elapsed_time, 'ms')
Tensorflow Servingの速度をKerasバージョンと比較します。
Kerasのコード import sys import time from keras.applications.resnet50 import ResNet50 from keras.preprocessing import image from keras.applications.resnet50 import preprocess_input, decode_predictions import numpy as np def preprocess_image(img_path): img = image.load_img(img_path, target_size=(224, 224)) x = image.img_to_array(img) x = np.expand_dims(x, axis=0) x = preprocess_input(x) return x def get_prediction(model, img_path): image = preprocess_image(img_path) start_time = time.time() prediction = model.predict(image) return prediction, (time.time()-start_time)*1000. if __name__ == "__main__": if len(sys.argv) != 2: print ('usage: keras_test.py <img_path>') print ('example: keras_test.py ~/elephant.jpg') exit() img_path = sys.argv[1] model = ResNet50(weights='imagenet') for i in range(10): prediction, elapsed_time = get_prediction(model, img_path) if i == 0: print('Predicted:', decode_predictions(np.atleast_2d(prediction), top=3)[0]) print('Elapsed time:', elapsed_time, 'ms')
すべての測定はCPUで行われました。
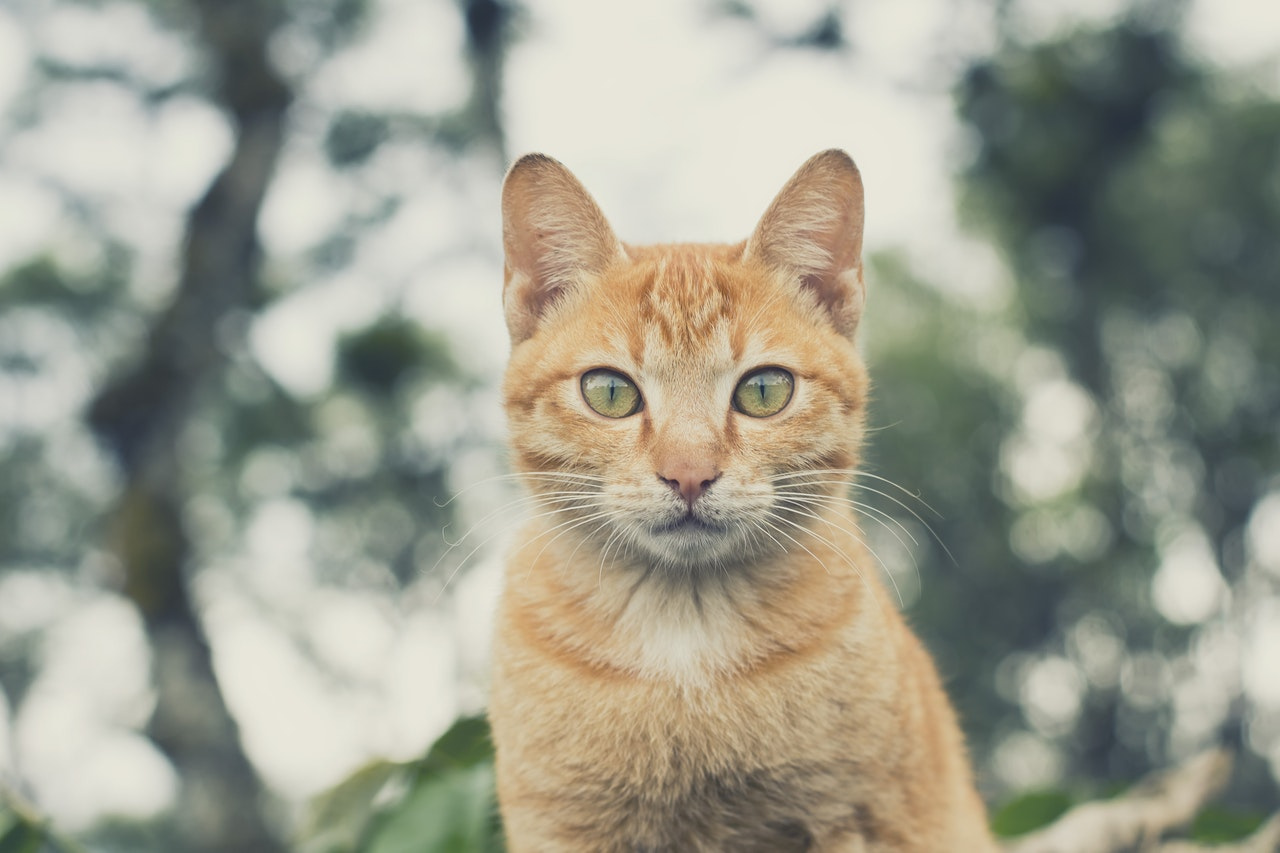
テストのために、 Pexels.comからこの猫の写真を撮ります。 https://everypixel.com
ケラス
Predicted: [('n02127052', 'lynx', 0.59509182), ('n02128385', 'leopard', 0.050437182), ('n02123159', 'tiger_cat', 0.049577814)] Elapsed time: 419.47126388549805 ms Elapsed time: 125.33354759216309 ms Elapsed time: 122.70569801330566 ms Elapsed time: 122.8172779083252 ms Elapsed time: 122.3604679107666 ms Elapsed time: 116.24360084533691 ms Elapsed time: 116.51420593261719 ms Elapsed time: 113.5416030883789 ms Elapsed time: 112.34736442565918 ms Elapsed time: 110.09907722473145 ms
サービング
Predicted: [('n02127052', 'lynx', 0.59509176015853882), ('n02128385', 'leopard', 0.050437178462743759), ('n02123159', 'tiger_cat', 0.049577809870243073)] Elapsed time: 117.71702766418457 ms Elapsed time: 75.67715644836426 ms Elapsed time: 72.94225692749023 ms Elapsed time: 71.62714004516602 ms Elapsed time: 71.4271068572998 ms Elapsed time: 74.54872131347656 ms Elapsed time: 70.8014965057373 ms Elapsed time: 70.94025611877441 ms Elapsed time: 70.58024406433105 ms Elapsed time: 68.82333755493164 ms
ご覧のとおり、サービングはKerasバージョンよりもさらに高速です。 これは、多数のリクエストがある場合にさらに顕著になります。
Flaskを介したTensorflow ServingへのREST APIの実装
最初にFlaskをインストールします。
sudo pip3 install flask
完全なRESTサービスコード from flask import Flask from flask import request from flask import jsonify import tensorflow as tf from grpc.beta import implementations from tensorflow_serving.apis import predict_pb2 from tensorflow_serving.apis import prediction_service_pb2 from keras.preprocessing import image from keras.applications.resnet50 import preprocess_input, decode_predictions import numpy as np application = Flask(__name__) host = '127.0.0.1' port = 9001 def preprocess_image(img): img = image.load_img(img, target_size=(224, 224)) x = image.img_to_array(img) x = np.expand_dims(x, axis=0) x = preprocess_input(x) return x def get_prediction(img): image = preprocess_image(img) channel = implementations.insecure_channel(host, port) stub = prediction_service_pb2.beta_create_PredictionService_stub(channel) request = predict_pb2.PredictRequest() request.model_spec.name = 'resnet50' request.model_spec.signature_name = 'predict' request.inputs['images'].CopyFrom( tf.contrib.util.make_tensor_proto(image, shape=image.shape)) result = stub.Predict(request, 10.0) prediction = np.array(result.outputs['scores'].float_val) return decode_predictions(np.atleast_2d(prediction), top=3)[0] @application.route('/predict', methods=['POST']) def predict(): if request.files.get('data'): img = request.files['data'] resp = get_prediction(img) response = jsonify(resp) return response else: return jsonify({'status': 'error'}) if __name__ == "__main__": application.run()
サービスを起動します。
python3 serving_service.py
サービスをテストします。 curlを介してリクエストを送信します。
curl '127.0.0.1:5000/predict' -X POST -F "data=@./cat.jpeg"
次のフォームの回答が得られます。
[ [ "n02127052", "lynx", 0.5950918197631836 ], [ "n02128385", "leopard", 0.05043718218803406 ], [ "n02123159", "tiger_cat", 0.04957781359553337 ] ]
いいね! うまくいく!
おわりに
この記事では、Tensorflow Servingを使用して実稼働環境でモデルを展開する方法について説明しました。 また、モデルサーバーにアクセスするFlaskに簡単なRESTサービスを実装する方法も検討しました。
参照資料
テンソルフローの公式ウェブサイト
すべての記事スクリプトのコード