ある日、デスクトッププログラムからUSB経由で制御される1つのデバイスが、Androidアプリケーション経由でも制御される必要がありました。 特徴は、HID、CDC、およびその他の標準デバイスクラスが使用されなかったことです。 データ転送は、バルク転送とエンドポイントを介して実行されました。 usbでの作業の中心はlibusbライブラリでした。
デバイスから任意のデータを送受信できるテストアプリケーションを作成します。
キーポイントに触れると、完全なコードへのリンクが最後になります。
まず、UsbHostを操作するための公式ドキュメントに従って行動します。
マニフェストに行を追加します
<uses-feature android:name="android.hardware.usb.host"/>
デバイスを自動的に検出してアプリケーションを起動する場合、メインアクティビティのマニフェストに次のように記述します。
<intent-filter> <action android:name="android.hardware.usb.action.USB_DEVICE_ATTACHED"/> </intent-filter> <meta-data android:name="android.hardware.usb.action.USB_DEVICE_ATTACHED" android:resource="@xml/device_filter"/>
リソースdevice_filter.xmlを使用して、デバイスのVIDとPIDをファイルに指定します
<resources> <usb-device product-id="0037" vendor-id="8742"/> </resources>
onCreateメソッドでusbマネージャーを取得します。
mUsbManager = (UsbManager) getSystemService(Context.USB_SERVICE)
次に、USBに接続されているデバイスのリストを取得し、その中で必要なUSB_CLASS_PER_INTERFACEクラスのデバイスを探しています。
UsbDevice findDevice(UsbManager usbManager) { for (UsbDevice usbDevice : usbManager.getDeviceList().values()) { if (usbDevice.getDeviceClass() == UsbConstants.USB_CLASS_PER_INTERFACE) { return usbDevice; } else { UsbInterface usbInterface = findInterface(usbDevice); if (usbInterface != null) return usbDevice; } } return null; } UsbInterface findInterface(UsbDevice usbDevice) { for (int nIf = 0; nIf < usbDevice.getInterfaceCount(); nIf++) { UsbInterface usbInterface = usbDevice.getInterface(nIf); if (usbInterface.getInterfaceClass() == UsbConstants.USB_CLASS_PER_INTERFACE) { return usbInterface; } } return null; }
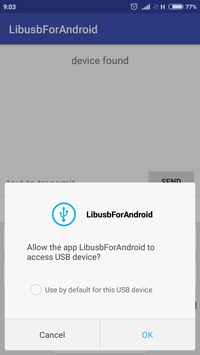
次に、必要なインターフェイスを見つけ、アクセス許可を確認することを忘れずに、すべてのコントロールポイントを並べ替え、その中で読み取りポイントと書き込みポイントを選択し、最後に接続します。
private void initUsbDevice() { PendingIntent mPermissionIntent = PendingIntent.getBroadcast(this, 0, new Intent(ACTION_USB_PERMISSION), 0); IntentFilter filter = new IntentFilter(ACTION_USB_PERMISSION); registerReceiver(mUsbReceiver, filter); mUsbManager.requestPermission(mUsbDevice, mPermissionIntent); mUsbInterface = findInterface(mUsbDevice); for (int nEp = 0; nEp < mUsbInterface.getEndpointCount(); nEp++) { UsbEndpoint tmpEndpoint = mUsbInterface.getEndpoint(nEp); if (tmpEndpoint.getType() != UsbConstants.USB_ENDPOINT_XFER_BULK) continue; if ((mOutEndpoint == null) && (tmpEndpoint.getDirection() == UsbConstants.USB_DIR_OUT)) { mOutEndpoint = tmpEndpoint; } else if ((mInEndpoint == null) && (tmpEndpoint.getDirection() == UsbConstants.USB_DIR_IN)) { mInEndpoint = tmpEndpoint; } } if (mOutEndpoint == null) { Toast.makeText(this, "no endpoints", Toast.LENGTH_LONG).show(); } mConnection = mUsbManager.openDevice(mUsbDevice); if (mConnection == null) { Toast.makeText(this, "can't open device", Toast.LENGTH_SHORT).show(); return; } mConnection.claimInterface(mUsbInterface, true); startIoManager(); }
I / O、データバッファリング、非同期、およびその他の便利な操作を行うために、補助マネージャークラスが使用されますが、本質的に、データ交換は次のコードに削減されます。
読書:
mConnection.bulkTransfer(mInEndpoint, data, size, READ_TIMEOUT);
記録:
int bytesWritten = mConnection.bulkTransfer(mOutEndpoint, Arrays.copyOfRange(data, offset, offset + size), size, WRITE_TIMEOUT);
このようにして、BulkTransferパケットが送受信されます。
その結果、単純なアプリケーションは任意のデータを送受信できます。
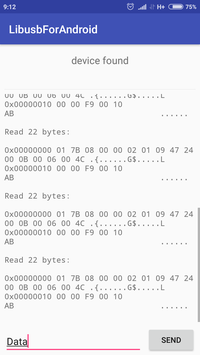
うまくいく!
GitHubでのこの
テストアプリケーションのプロジェクト
便利なリンク:
- AndroidでFT232およびその他のCDCデバイスを操作するためのライブラリ。
- UsbHostを操作するための公式のAndroidドキュメント。