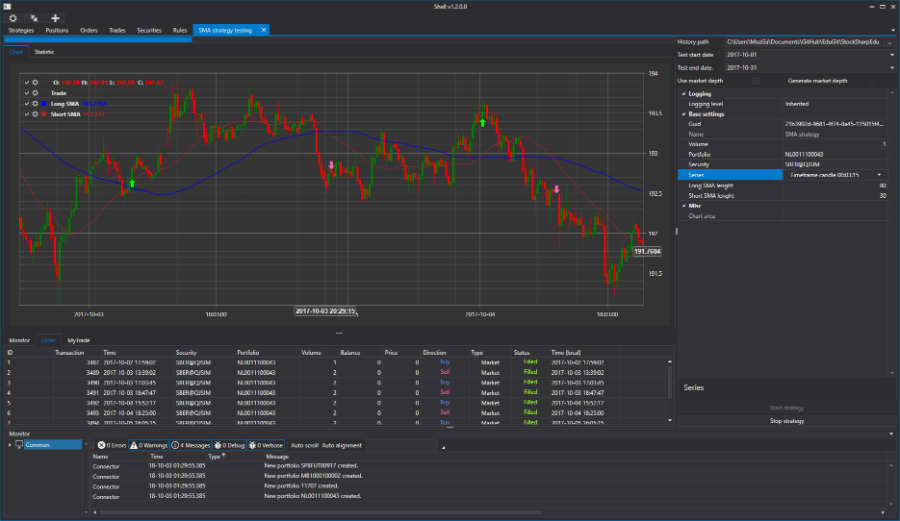
私たちのブログでは、株式取引に関連する技術と便利なツールについてたくさん書いています。 それらの1つは無料の
StockSharpプラットフォームで、C#での取引端末と取引ロボットの専門的な開発に使用できます。 この記事では、S#.APIに含まれるグラフィックフレームワークを使用して、アルゴリズム戦略を実行できるトレーディングターミナルを作成する方法を示します。
必要なもの
- Visual Studio 2017(コミュニティ、無料版)、その中でプログラムします。
- 取引所での取引への接続。このテキストの例では、ITI CapitalのSMARTcomインターフェースが使用されています。
プロジェクト作成
Visual Studioで新しいWPFアプリケーションを作成します。

次に、S#.APIライブラリを追加する必要があります。 これを行う方法について
は、ドキュメントを参照してください 。 最適なオプションは、Nugetを使用してインストールすることです。
すべてのS#.APIグラフィック要素はDevExpressに基づいており、DevExpressライブラリにはS#.APIが付属しているため、それらを使用しないのは愚かなことです。 MainWindow.xamlウィンドウのエディターに行きましょう:

WindowをDXWindowに置き換えます。異なるカラースキームを使用するには、これが必要になります。

Visual Studio自体から、必要なライブラリを挿入できます。
ウィンドウを3つの部分に分割します。上部には接続と接続を設定するためのボタンのあるストリップがあり、下部にはログのあるウィンドウがあり、中央には他のすべてのパネルがあります。 ウィンドウを分割する最も簡単な方法は、DevExpressのLayoutControlを使用することです。
結果の3つの部分に、必要な要素を追加します。
<dx:DXWindow x:Class="ShellNew.MainWindow" xmlns="http://schemas.microsoft.com/winfx/2006/xaml/presentation" xmlns:x="http://schemas.microsoft.com/winfx/2006/xaml" xmlns:d="http://schemas.microsoft.com/expression/blend/2008" xmlns:mc="http://schemas.openxmlformats.org/markup-compatibility/2006" xmlns:dx="http://schemas.devexpress.com/winfx/2008/xaml/core" xmlns:dxlc="http://schemas.devexpress.com/winfx/2008/xaml/layoutcontrol" mc:Ignorable="d" Title="MainWindow" Height="450" Width="800"> <dxlc:LayoutControl Padding="0" Name="LayoutControlRoot" Orientation="Vertical"> <dxlc:LayoutGroup HorizontalAlignment="Stretch" Height="25"> </dxlc:LayoutGroup> <dxlc:LayoutGroup HorizontalAlignment="Stretch" > </dxlc:LayoutGroup> <dxlc:LayoutGroup HorizontalAlignment="Stretch" > </dxlc:LayoutGroup> </dxlc:LayoutControl> </dx:DXWindow>
コネクタへの接続の構成
2つのボタンを追加します。1つは接続設定ボタンで、もう1つは接続ボタンです。 これを行うには、DevExpressのSimpleButtonボタンを使用します。 ボタンはアプリケーションの上部に配置されます。 各ボタンには、
S#.Designer 、
S#.Data 、および
S#.Terminalからおなじみの写真を配置します。
<dx:DXWindow x:Class="ShellNew.MainWindow" xmlns="http://schemas.microsoft.com/winfx/2006/xaml/presentation" xmlns:x="http://schemas.microsoft.com/winfx/2006/xaml" xmlns:d="http://schemas.microsoft.com/expression/blend/2008" xmlns:mc="http://schemas.openxmlformats.org/markup-compatibility/2006" xmlns:dx="http://schemas.devexpress.com/winfx/2008/xaml/core" xmlns:dxlc="http://schemas.devexpress.com/winfx/2008/xaml/layoutcontrol" xmlns:xaml="http://schemas.stocksharp.com/xaml" mc:Ignorable="d" Title="MainWindow" Height="450" Width="800"> <dxlc:LayoutControl Padding="0" Name="LayoutControlRoot" Orientation="Vertical"> <dxlc:LayoutGroup HorizontalAlignment="Stretch" Height="25"> <!-- --> <dxlc:LayoutItem Width="40"> <dx:SimpleButton x:Name="SettingsButton" Click="SettingsButton_Click" > <Image Source="{xaml:ThemedIcons Key=Settings}" Width="16" /> </dx:SimpleButton> </dxlc:LayoutItem> <dxlc:LayoutItem Width="40"> <dx:SimpleButton x:Name="ConnectButton" Click="ConnectButton_Click" > <Image Source="{xaml:ThemedIcons Key=Connect}" Width="16" /> </dx:SimpleButton> </dxlc:LayoutItem> </dxlc:LayoutGroup> <dxlc:LayoutGroup HorizontalAlignment="Stretch" View="Tabs"> <!-- --> </dxlc:LayoutGroup> <dxlc:LayoutGroup HorizontalAlignment="Stretch" > <!-- --> </dxlc:LayoutGroup> </dxlc:LayoutControl> </dx:DXWindow>
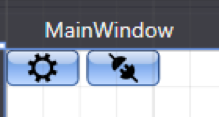
画面フォームの右上隅に、次の図が表示されます。
各ボタンをダブルクリックして、ボタンをクリックするためのイベントハンドラーを作成します。 MainWindowコードでは、コネクタ、およびコネクタ設定が保存される場所とファイル名を宣言する必要があります。
public readonly Connector Connector; private const string _dir = "Data"; private static readonly string _settingsFile = $@"{_dir}\connection.xml";
コネクタ設定ボタンをクリックするためのイベントハンドラで、コネクタ構成ウィンドウを開き、ファイルに保存します。
private void SettingsButton_Click(object sender, RoutedEventArgs e) { if (Connector.Configure(this)) { new XmlSerializer<SettingsStorage>().Serialize(Connector.Save(), _settingsFile); } }
コンストラクターでは、コネクタ設定のあるディレクトリとファイルがあるかどうかを確認し、ある場合はコネクタにロードします。
ほとんどのS#.APIオブジェクトには、このオブジェクトをXMLファイルから保存およびロードするために使用できるSaveおよびLoadメソッドがあります。
接続ボタンをクリックするためのメソッドハンドラで、コネクタを接続します。
private void ConnectButton_Click(object sender, RoutedEventArgs e) { Connector.Connect(); }
これで、プログラムを実行して確認できます。
暗いテーマを設定する
多くのトレーダーは、取引アプリケーションよりも暗いテーマを好みます。 そのため、すぐにプログラムのテーマを暗くします。 App.xamlファイルを見つける必要がある場合:
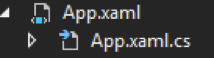
そして、Applicationをチャートに置き換えます。ExtendedBaseApplicationを使用すると、Visual Studio自体から必要なライブラリを挿入できます。
<charting:ExtendedBaseApplication x:Class="ShellNew.App" xmlns="http://schemas.microsoft.com/winfx/2006/xaml/presentation" xmlns:x="http://schemas.microsoft.com/winfx/2006/xaml" xmlns:charting="http://schemas.stocksharp.com/xaml" StartupUri="MainWindow.xaml"> </charting:ExtendedBaseApplication>
また、App.xaml.csファイルで、「:Application」を削除する必要があります。
namespace ShellNew {
ApplicationThemeHelper.ApplicationThemeName = Theme.VS2017DarkName;のコンストラクターで、
ApplicationThemeHelper.ApplicationThemeName = Theme.VS2017DarkName;現時点での完全なコード:
public partial class MainWindow { public readonly Connector Connector; private const string _dir = "Data"; private static readonly string _settingsFile = $@"{_dir}\connection.xml"; public MainWindow() {
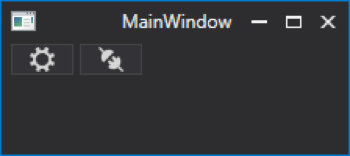
実行して、暗いトピックを確認します。
ツールバーの作成
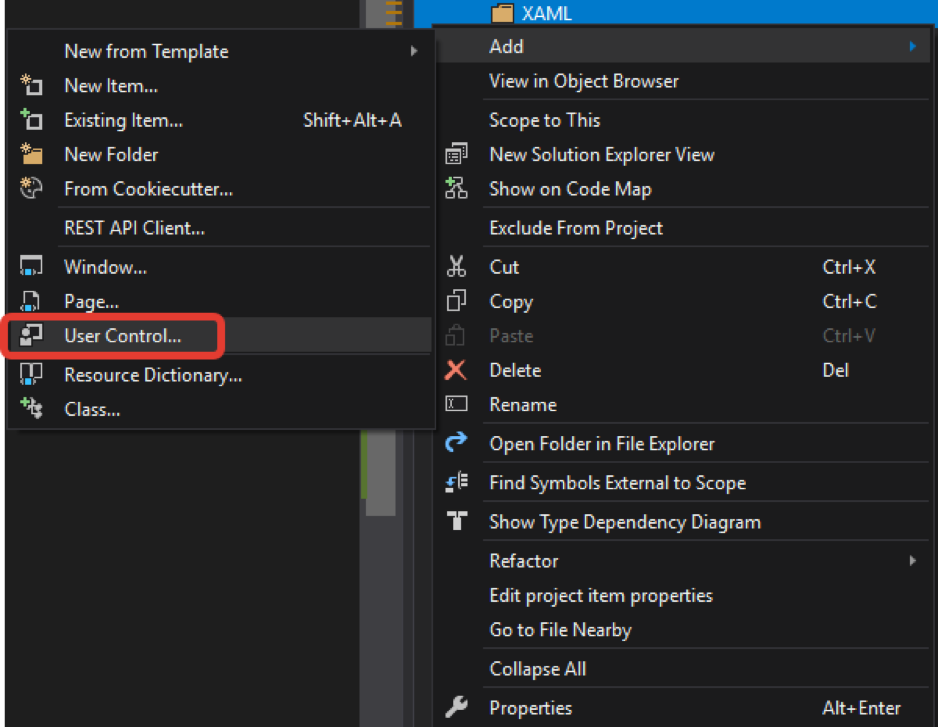
作成したすべてのコントロールを保存するフォルダーを追加し、XAMLという名前を付けます。 最初のUserControllを追加し、SecurityGridControlという名前を付けます。
SecurityPicker要素を1つ追加します。 利用可能なツールが表示されます。 メインウィンドウと同様に、DevExpressのLayoutControlを使用します。
<UserControl x:Class="ShellNew.XAML.SecurityGridControl" xmlns="http://schemas.microsoft.com/winfx/2006/xaml/presentation" xmlns:x="http://schemas.microsoft.com/winfx/2006/xaml" xmlns:mc="http://schemas.openxmlformats.org/markup-compatibility/2006" xmlns:d="http://schemas.microsoft.com/expression/blend/2008" xmlns:xaml="http://schemas.stocksharp.com/xaml" mc:Ignorable="d" d:DesignHeight="450" d:DesignWidth="800"> <xaml:SecurityPicker x:Name="SecPicker" /> </UserControl>
メインウィンドウのデザイナーに移動して、中央部分をブックマークビューに変更しましょう。 ブックマークの1つに、SecurityPickerで作成したコントローラーを配置します。
<dxlc:LayoutGroup HorizontalAlignment="Stretch" View="Tabs"> <!-- --> <dxlc:LayoutGroup Header="Securities"> <myxaml:SecurityGridControl x:Name="SecurityPanel" /> </dxlc:LayoutGroup> </dxlc:LayoutGroup>
ツールバーができたので、データソース(この場合はコネクタ)を提供する必要があります。
MainWindow
SecurityPanel.SecPicker.SecurityProvider = Connector;
コンストラクターで簡単に
MainWindow
SecurityPanel.SecPicker.SecurityProvider = Connector;
ことができます
MainWindow
SecurityPanel.SecPicker.SecurityProvider = Connector;
。
ただし、MainWindowを適用しないコードで詰まらせないでください。 したがって、静的変数インスタンスを作成し、MainWindowのコンストラクターで値MainWindowを割り当てます。
… public static MainWindow Instance; … Instance = this; …
これで、プログラムのどこからでも、MainWindow.Instance.XXXというコードを使用してMainWindowのプロパティにアクセスできます。
SecurityGridControlコンストラクターで、この方法でConnectorをデータソースとして指定します。
public SecurityGridControl() { InitializeComponent(); SecPicker.SecurityProvider = MainWindow.Instance.Connector; }
実行して確認します:

ロギングの追加
プログラム、コネクタ、またはロボットを制御する必要があります。 このため、S#.APIには特別なLogManagerクラスがあります。 このクラスはソースからメッセージを受け取り、リスナーに渡します。 私たちの場合、ソースはコネクタ、戦略などであり、リスナーはファイルとログパネルです。
MainWindowコードで、LogManagerオブジェクトとそれが格納される場所を宣言します。
public readonly LogManager LogManager; private static readonly string _logsDir = $@"{_dir}\Logs\";
MainWindowコンストラクターでLogManagerを作成し、Connectorのソースとリスナーファイルを設定します。
ツールバーと同様に、XAMLフォルダーにログパネルを作成し、別のUserControlを追加します。 MonitorControlという名前を付けます。 Monitor要素を追加します。
<UserControl x:Class="ShellNew.XAML.MonitorControl" xmlns="http://schemas.microsoft.com/winfx/2006/xaml/presentation" xmlns:x="http://schemas.microsoft.com/winfx/2006/xaml" xmlns:mc="http://schemas.openxmlformats.org/markup-compatibility/2006" xmlns:d="http://schemas.microsoft.com/expression/blend/2008" xmlns:xaml="http://schemas.stocksharp.com/xaml" mc:Ignorable="d" d:DesignHeight="450" d:DesignWidth="800"> <xaml:Monitor x:Name="Monitor" /> </UserControl>
MonitorControlコンストラクターで、MonitorをLogManagerのリスナーとして設定します。
public MonitorControl() { InitializeComponent(); MainWindow.Instance.LogManager.Listeners.Add(new GuiLogListener(Monitor)); }
作成したMonitorControlをMainWindowの下部に追加します。
<dxlc:LayoutGroup HorizontalAlignment="Stretch" dxlc:LayoutControl.AllowVerticalSizing="True"> <!-- --> <myxaml:MonitorControl x:Name="MonitorControl" /> </dxlc:LayoutGroup>
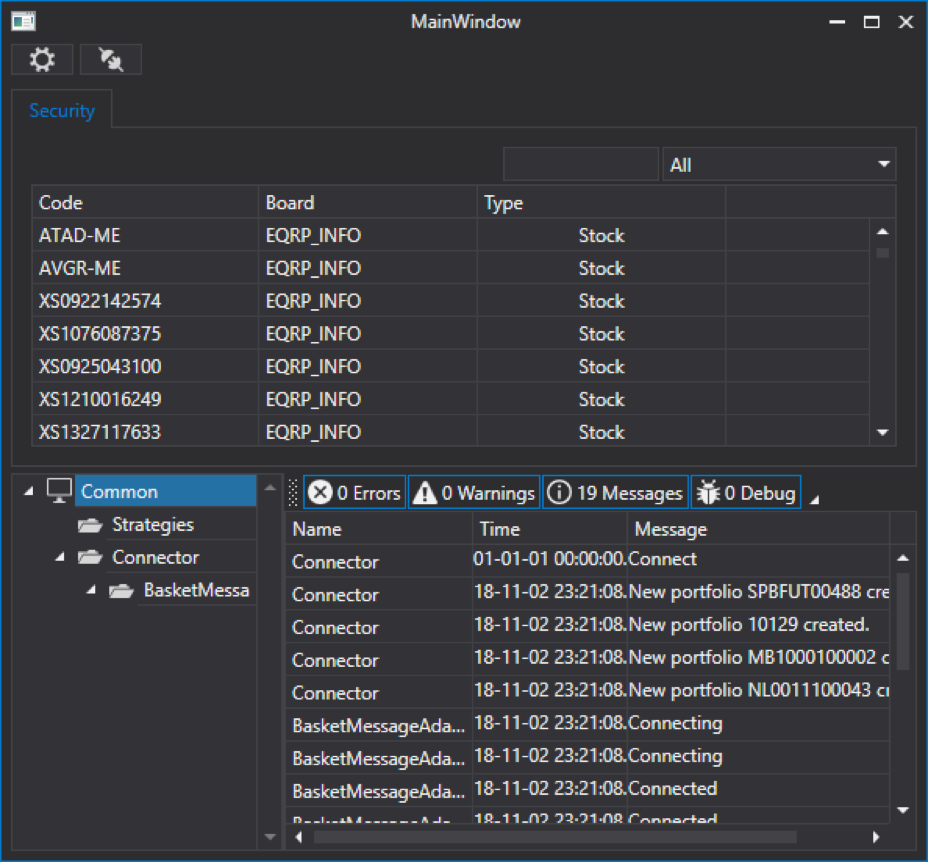
実行して確認します:
ガラスパネルを作成する
前のパネルと同様に、ガラスパネルを作成し、別のUserControlをXAMLフォルダーに追加します。 MarketDepthControlという名前を付けます。
MainWindowでは、すでにLayoutControlを使用しましたが、このコントロールではLayoutControlも使用します。 パネルを水平方向に2つの部分に分割します。
<UserControl x:Class="ShellNew.XAML.MarketDepthControl" xmlns="http://schemas.microsoft.com/winfx/2006/xaml/presentation" xmlns:x="http://schemas.microsoft.com/winfx/2006/xaml" xmlns:mc="http://schemas.openxmlformats.org/markup-compatibility/2006" xmlns:d="http://schemas.microsoft.com/expression/blend/2008" xmlns:dxlc="http://schemas.devexpress.com/winfx/2008/xaml/layoutcontrol" mc:Ignorable="d"> <dxlc:LayoutControl Padding="0" Name="LayoutControlRoot" Orientation="Horizontal"> <dxlc:LayoutGroup> <!--Left--> </dxlc:LayoutGroup> <dxlc:LayoutGroup Orientation="Vertical" dxlc:LayoutControl.AllowHorizontalSizing="True"> <!--Rigth--> </dxlc:LayoutGroup> </dxlc:LayoutControl> </UserControl>
SecurityPickerを左側に追加します-ツールバーを作成したときに彼に会いました。
<dxlc:LayoutGroup> <xaml:SecurityPicker x:Name="SecPicker" SecuritySelected="SecPicker_SecuritySelected" /> </dxlc:LayoutGroup> . : <dxlc:LayoutGroup Orientation="Vertical" dxlc:LayoutControl.AllowHorizontalSizing="True"> <dxlc:LayoutItem VerticalAlignment="Stretch"> <xaml:MarketDepthControl x:Name="MarketDepth" MaxHeight="2000" SelectionChanged="MarketDepth_SelectionChanged" /> </dxlc:LayoutItem> </dxlc:LayoutGroup>
MarketDepthControlは、MaxHeight値を設定する必要があります。設定しないと、アプリケーションは起動しません。
ガラスの下に、ポートフォリオタスク、価格、注文量の要素を配置します。
<dxlc:LayoutItem Label="Portfolio" Height="20"> <xaml:PortfolioComboBox x:Name="PortfolioComboBox" /> </dxlc:LayoutItem> <dxlc:LayoutItem Label="Price" Height="20"> <dxe:SpinEdit MinValue="0" Name="SpinEditPrice" /> </dxlc:LayoutItem> <dxlc:LayoutItem Label="Volume" Height="20"> <dxe:SpinEdit MinValue="0" Name="SpinEditVolume" /> </dxlc:LayoutItem>
LayoutItemのLabelプロパティに注目する価値があります。要素の前にテキストを設定できます。 また、数値を設定するのに便利なDevExpress SpinEdit要素。 これらの要素は次のようになります。

以下に、売買ボタンを配置します。
<dxlc:LayoutGroup Orientation="Horizontal" Height="20" VerticalAlignment="Stretch"> <dxlc:LayoutItem VerticalAlignment="Stretch"> <dx:SimpleButton Content="Buy" x:Name="BuyButton" Click="BuyButton_Click" /> </dxlc:LayoutItem> <dxlc:LayoutItem VerticalAlignment="Stretch"> <dx:SimpleButton Content="Sell" x:Name="SelltButton" Click="SelltButton_Click" /> </dxlc:LayoutItem> </dxlc:LayoutGroup>
完全なコード:
<UserControl x:Class="ShellNew.XAML.MarketDepthControl" xmlns="http://schemas.microsoft.com/winfx/2006/xaml/presentation" xmlns:x="http://schemas.microsoft.com/winfx/2006/xaml" xmlns:mc="http://schemas.openxmlformats.org/markup-compatibility/2006" xmlns:d="http://schemas.microsoft.com/expression/blend/2008" xmlns:dxlc="http://schemas.devexpress.com/winfx/2008/xaml/layoutcontrol" xmlns:dx="http://schemas.devexpress.com/winfx/2008/xaml/core" xmlns:xaml="http://schemas.stocksharp.com/xaml" xmlns:dxe="http://schemas.devexpress.com/winfx/2008/xaml/editors" mc:Ignorable="d"> <dxlc:LayoutControl Padding="0" Name="LayoutControlRoot" Orientation="Horizontal"> <dxlc:LayoutGroup> <xaml:SecurityPicker x:Name="SecPicker" SecuritySelected="SecPicker_SecuritySelected" /> </dxlc:LayoutGroup> <dxlc:LayoutGroup Orientation="Vertical" dxlc:LayoutControl.AllowHorizontalSizing="True"> <dxlc:LayoutItem VerticalAlignment="Stretch"> <xaml:MarketDepthControl x:Name="MarketDepth" MaxHeight="2000" SelectionChanged="MarketDepth_SelectionChanged" /> </dxlc:LayoutItem> <dxlc:LayoutItem Label="Portfolio" Height="20"> <xaml:PortfolioComboBox x:Name="PortfolioComboBox" /> </dxlc:LayoutItem> <dxlc:LayoutItem Label="Price" Height="20"> <dxe:SpinEdit MinValue="0" Name="SpinEditPrice" /> </dxlc:LayoutItem> <dxlc:LayoutItem Label="Volume" Height="20"> <dxe:SpinEdit MinValue="0" Name="SpinEditVolume" /> </dxlc:LayoutItem> <dxlc:LayoutGroup Orientation="Horizontal" Height="20" VerticalAlignment="Stretch"> <dxlc:LayoutItem VerticalAlignment="Stretch"> <dx:SimpleButton Content="Buy" x:Name="BuyButton" Click="BuyButton_Click" /> </dxlc:LayoutItem> <dxlc:LayoutItem VerticalAlignment="Stretch"> <dx:SimpleButton Content="Sell" x:Name="SelltButton" Click="SelltButton_Click" /> </dxlc:LayoutItem> </dxlc:LayoutGroup> </dxlc:LayoutGroup> </dxlc:LayoutControl> </UserControl>
MarketDepthControlコンストラクターで、SecurityPickerのツールのソースとPortfolioComboBoxのポートフォリオのソースを設定します。この場合は、Connectorになります。
public MarketDepthControl() { InitializeComponent(); SecPicker.SecurityProvider = MainWindow.Instance.Connector; PortfolioComboBox.Portfolios = new PortfolioDataSource(MainWindow.Instance.Connector); }
SecurityPickerでツール選択イベントハンドラーを作成します。 その中で、受け取ったツールがゼロに等しくないかどうかをチェックします。 ゼロに等しくない場合、受信したツールをローカル変数に保存します。ガラスを更新するときに役立ちます。 その後、RegisterMarketDepthメソッドを使用して、受け取ったツールをクリーニングし、コネクターに登録してガラスを受け取ります。 GetMarketDepthメソッドを使用して、インストゥルメントの現在のグラスを取得し、それでMarketDepthControlを更新します。
private Security _selectedSecurity; private void SecPicker_SecuritySelected(Security security) { if (security == null) return; _selectedSecurity = security; MainWindow.Instance.Connector.RegisterMarketDepth(_selectedSecurity); var marketDepth = MainWindow.Instance.Connector.GetMarketDepth(_selectedSecurity); MarketDepth.UpdateDepth(marketDepth); }
MarketDepthControlコンストラクターでガラスが常に更新されるように、コネクタのMarketDepthChangedガラス変更イベントにサブスクライブします。 このイベントのハンドラーでは、受け取ったガラスがどのツールに属しているかを確認し、SecurityPickerで選択したツールに属している場合は、MarketDepthControlを更新します。
public MarketDepthControl() { InitializeComponent(); SecPicker.SecurityProvider = MainWindow.Instance.Connector; PortfolioComboBox.Portfolios = new PortfolioDataSource(MainWindow.Instance.Connector); MainWindow.Instance.Connector.MarketDepthChanged += Connector_MarketDepthChanged; } private void Connector_MarketDepthChanged(MarketDepth marketDepth) { if (_selectedSecurity == null || marketDepth.Security != _selectedSecurity) return; MarketDepth.UpdateDepth(marketDepth); }
MainWindowの中央部分で、作成されたMarketDepthControlパネルを追加します。
<dxlc:LayoutGroup HorizontalAlignment="Stretch" View="Tabs"> <!-- --> <dxlc:LayoutGroup Header="Securities"> <myxaml:SecurityGridControl x:Name="SecurityPanel" /> </dxlc:LayoutGroup> <dxlc:LayoutGroup Header="Portfolios"> <myxaml:PortfolioGridControl x:Name="PortfolioGridControl" /> </dxlc:LayoutGroup> <dxlc:LayoutGroup Header="Orders"> <myxaml:OrderGridControl x:Name="OrderGridControl" /> </dxlc:LayoutGroup> <dxlc:LayoutGroup Header="MyTrades"> <myxaml:MyTradeGridControl x:Name="MyTradeGridControl" /> </dxlc:LayoutGroup> <dxlc:LayoutGroup Header="MarketDepth"> <myxaml:MarketDepthControl x:Name="MarketDepthControl" /> </dxlc:LayoutGroup> </dxlc:LayoutGroup>
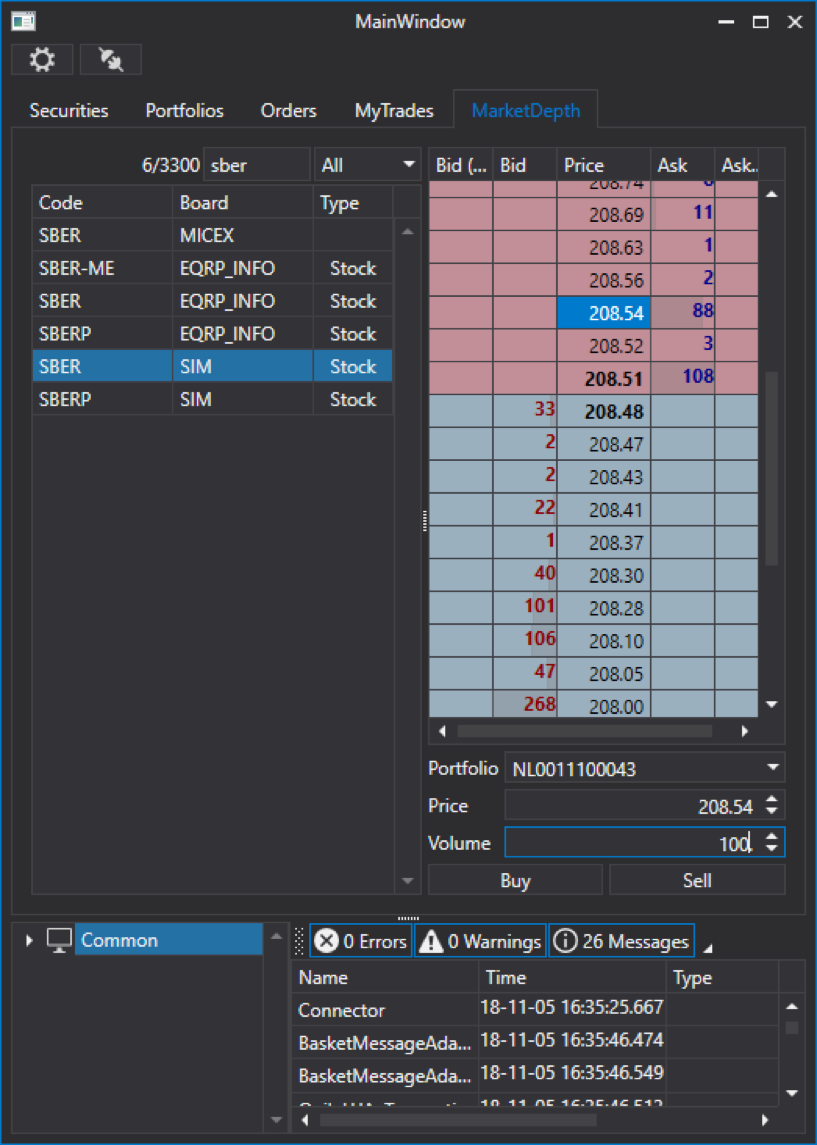
この段階で、プログラムを実行し、メガネの更新の動作を確認できます。
売買ボタンをクリックするためのイベントハンドラーを作成します。 各ハンドラーでOrderを作成し、SecurityPickerで選択されたツール、PortfolioComboBoxで選択されたポートフォリオ、対応するSpinEditのボリュームと価格を示します。 RegisterOrderメソッドを使用して、Connectorにアプリケーションを登録します。
private void BuyButton_Click(object sender, RoutedEventArgs e) { Order order = new Order() { Security = _selectedSecurity, Portfolio = PortfolioComboBox.SelectedPortfolio, Volume = SpinEditVolume.Value, Price = SpinEditPrice.Value, Direction = StockSharp.Messages.Sides.Buy, }; MainWindow.Instance.Connector.RegisterOrder(order); } private void SelltButton_Click(object sender, RoutedEventArgs e) { Order order = new Order() { Security = _selectedSecurity, Portfolio = PortfolioComboBox.SelectedPortfolio, Volume = SpinEditVolume.Value, Price = SpinEditPrice.Value, Direction = StockSharp.Messages.Sides.Sell, }; MainWindow.Instance.Connector.RegisterOrder(order); }
両方のプロセッサは、アプリケーションの方向のみが異なります。
ガラスで引用符を選択するときに、選択した引用符の価格によってSpinEditPrice値を変更してみましょう。 これを行うには、MarketDepthControlのSelectionChangedイベントハンドラーを作成します。 選択された見積がゼロに等しくない場合、選択された見積の価格でSpinEditPriceの値を更新します。
private void MarketDepth_SelectionChanged(object sender, GridSelectionChangedEventArgs e) { if (MarketDepth.SelectedQuote == null) return; SpinEditPrice.Value = MarketDepth.SelectedQuote.Price; }
実行して確認します:
市場データの保存
ポートフォリオ、ツール、プラットフォームを保存するには、CsvEntityRegistryクラスが必要です。 その中のエンティティの保存場所をやり直し、Initメソッドを呼び出してそれらを読み込む必要があります。
_csvEntityRegistry = new CsvEntityRegistry(_csvEntityRegistryDir); _csvEntityRegistry.Init();
ろうそくやお得な情報などを保存するには StorageRegistryが必要です。
_storageRegistry = new StorageRegistry { DefaultDrive = new LocalMarketDataDrive(_storageRegistryDir), };
また、SnapshotRegistryスナップショットストレージレジストリも必要です。
_snapshotRegistry = new SnapshotRegistry(_snapshotRegistryDir);
これらはすべて、作成時にコネクターに渡します。
Connector = new Connector(_csvEntityRegistry, _storageRegistry, _snapshotRegistry) { IsRestoreSubscriptionOnReconnect = true, StorageAdapter = { DaysLoad = TimeSpan.FromDays(3) }, }; Connector.LookupAll();
ここでは、接続が切断されたときにコネクタが再接続することも示し、ダウンロードする履歴の日数も示します。 文字列Connector.LookupAll(); 利用可能なデータをリクエストします:
アプリケーションをロードし、データフォルダーに移動すると、新しいフォルダーが表示されます。

再接続すると、ツールバーとポートフォリオはすでにいっぱいになっています。
最初の部分の終わりにスムーズに近づきました。 この段階では、プログラムを使用して、利用可能なすべての市場データを表示できます。 次のパートでは、最もおいしいもの、つまり、手動モードと自動モードの両方での取引について説明します。
継続するには...著者 :イワン・ザルートキー