ここに、そして今、サーバーへのアクセスが必要な状況がしばしばあります。 ただし、SSHクライアント、サーバーアドレス、またはユーザー/パスワードリンクが手元にない場合があるため、SSH接続が常に最も便利な方法とは限りません。 もちろん、管理を簡素化する
Webminがありますが、インスタントアクセスも提供しません。
そこで、シンプルでありながら好奇心solution盛なソリューションを実装することにしました。 つまり、サーバー自体で開始されるTelegramボットを作成し、送信されたコマンドを実行して結果を返します。 このトピック
に関する いくつかの 記事を研究した結果、そのような実装についてはまだ誰も説明していないことに気付きました。
このプロジェクトをUbuntu 16.04に実装しましたが、他のディストリビューションで問題なく起動できるように、すべてを一般的な方法で実行しようとしました。
ボット登録
@BotFatherで新しいボットを登録します。 私たちは彼
/newbotを送信し、さらにテキストで送信します。 新しいボットのトークンとIDが必要になります(たとえば、
@ userinfobotから取得できます)。
Pythonの準備
ボットを開始するには、
telebotボットライブラリ(
pip install pytelegrambotapi )を使用します。
subprocessライブラリを使用して、サーバーでコマンドを実行します。
ボットの打ち上げ
サーバーで、bot.pyファイルを作成します。
nano bot.pyそれにコードを貼り付けます:
from subprocess import check_output import telebot import time bot = telebot.TeleBot("XXXXXXXXX:AAAAAAAAAAAAAAAAAAAAAAAAAAAAAAAAA")
その中のボットトークンを@BotFatherが発行したものに置き換え、user_idをアカウントのid値に置き換えます。 ユーザーIDの確認は、ボットがあなただけにサーバーへのアクセスを提供するために必要です。
check_output()関数は、渡されたコマンドを実行し、結果を返します。
ボットを起動するためだけに残ります。 サーバーでプロセスを開始するには、
screenを使用することを好み
screen (
sudo apt-get install screen ):
screen -dmS ServerBot python3 bot.py
(「ServerBot」はプロセス識別子です)
プロセスはバックグラウンドで自動的に開始されます。 ボットとの対話に入り、すべてが正常に機能することを確認しましょう。

おめでとうございます! ボットは、送信されたコマンドを実行します。 サーバーにアクセスするには、ボットとのダイアログを開くだけです。
コマンドの繰り返し
多くの場合、サーバーのステータスを監視するには、同じコマンドを実行する必要があります。 したがって、コマンドを再送信せずに繰り返し実行することは、非常に不適切です。
メッセージの下にあるインラインボタンを使用して実装します。
from subprocess import check_output import telebot from telebot import types
ボットを再起動します。
killall python3 screen -dmS ServerBot python3 bot.py
すべてが正しく機能することを再度確認します。
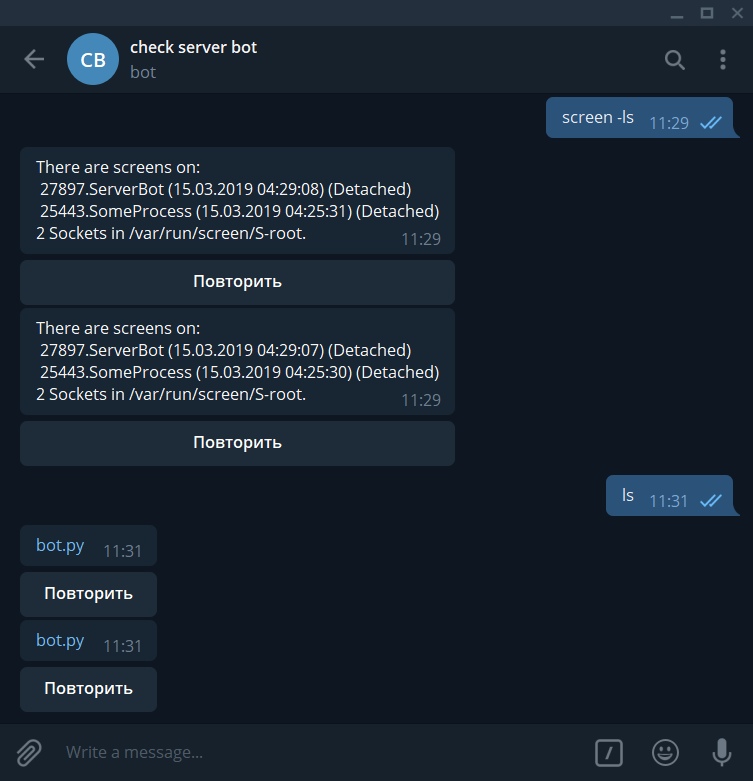
メッセージの下にあるボタンを押すと、ボットはメッセージの送信元のコマンドを繰り返す必要があります。
結論の代わりに
もちろん、この方法は従来の接続方法の代わりになりすますわけではありませんが、サーバーのステータスをすばやく学習し、複雑な出力を必要としないコマンドを送信することができます。